


Preparations Before Printing
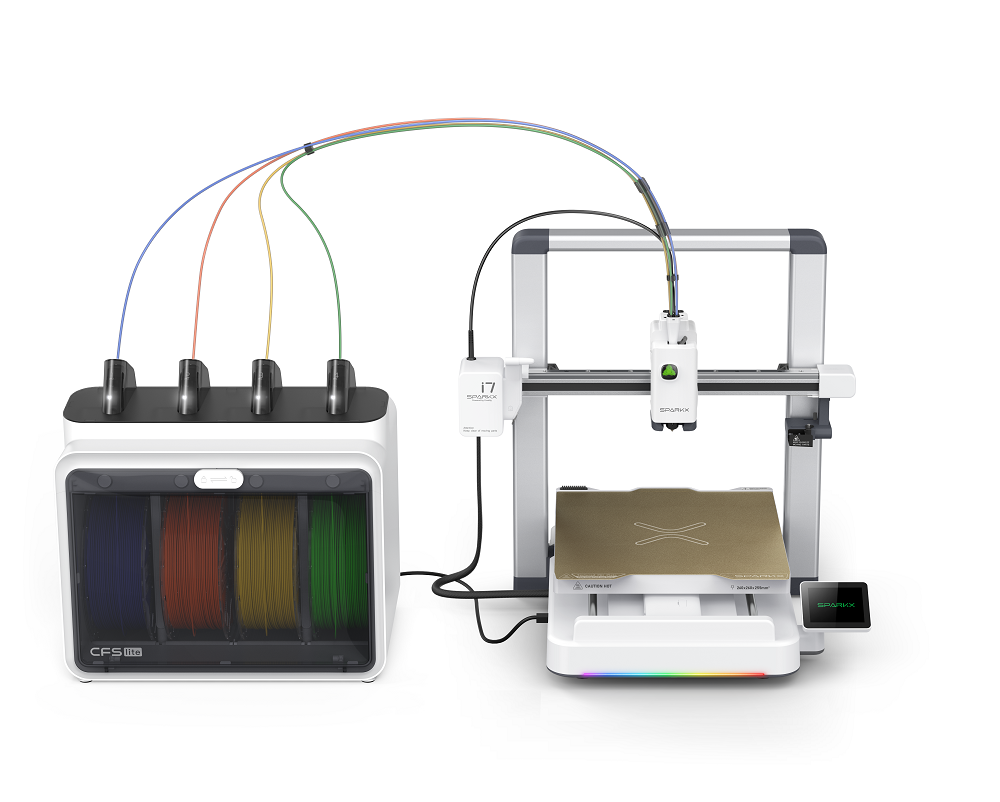
Install the CFS lite
Place the CFS lite on the left side of the SPARKX i7, and correctly connect the PTFE tube and the 6-pin cable of the CFS lite. For detailed installation instructions, please refer to How to connect i7 and CFS Lite?
Filament Preparation
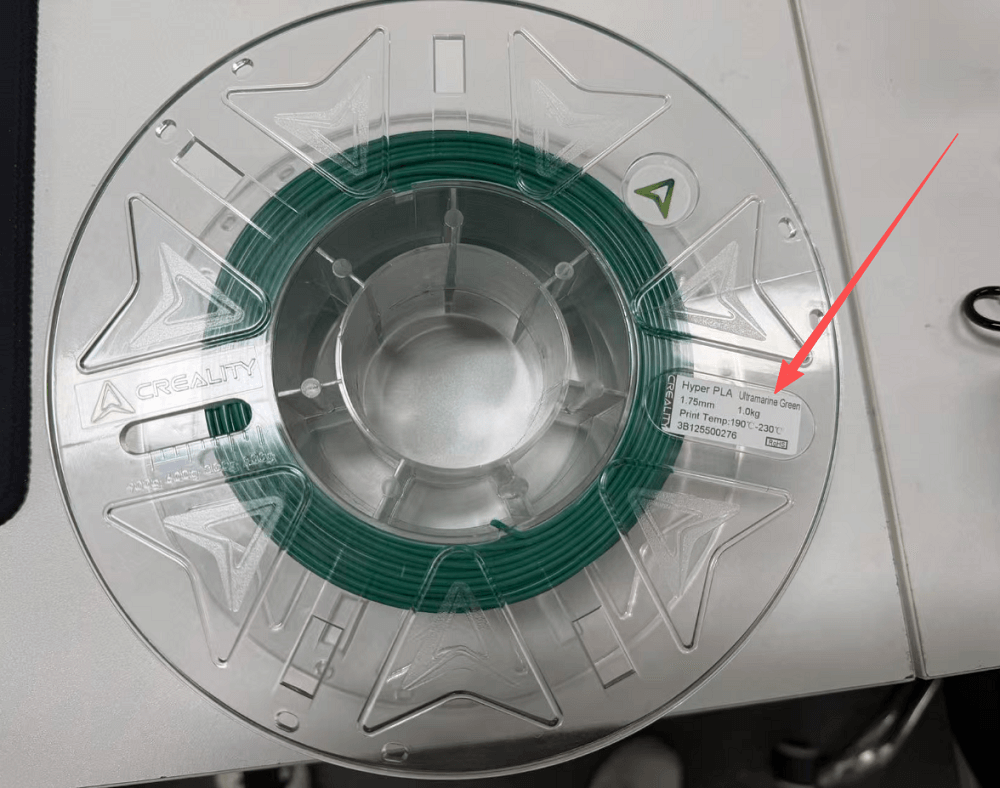
Prepare the filament in advance. You can obtain filament information from the spool label.
Load Filament
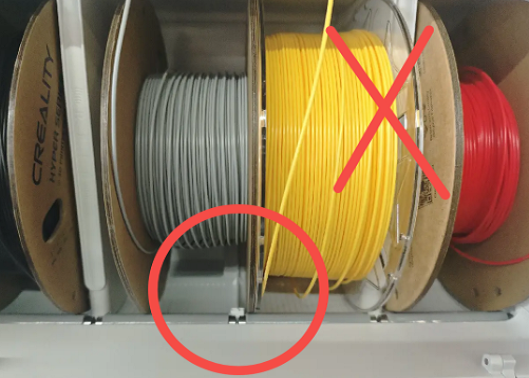
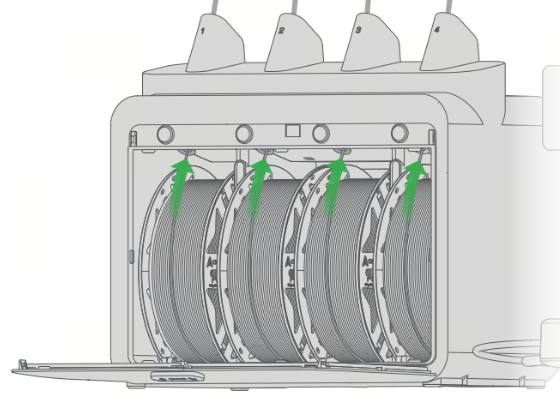
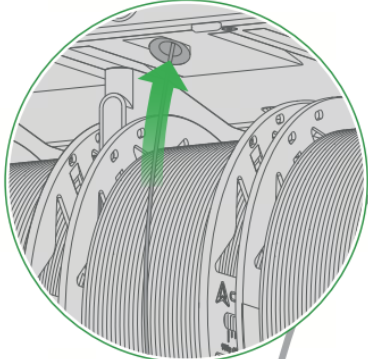
Place the required filament into the CFS lite spool slot and insert it into the Filament Inlet to automatically start pre-feeding.
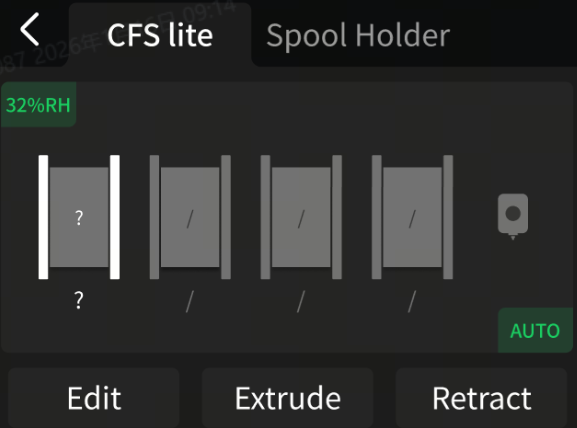
Edit Filament
Tap Filament on the main screen to enter the filament editing interface.If using non-RFID filament, you need to manually set the filament parameters:
a. Select the filament displayed as “?”, then tap Edit.
b. Tap to set the filament Brand-Color-Type-Name.
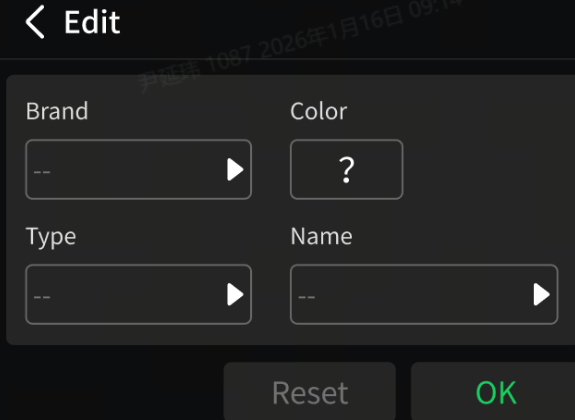
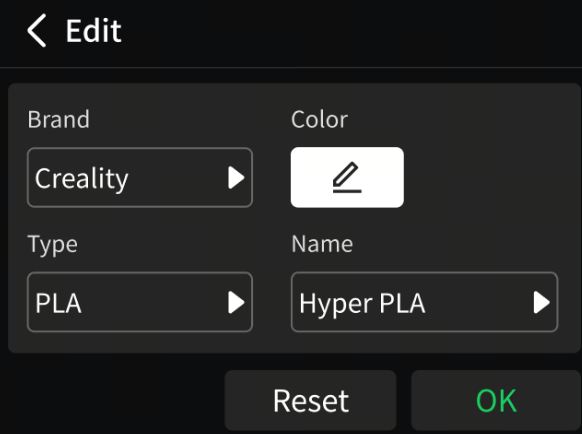
c. After setting the filament information, tap OK.
d. The interface will display the selected color, indicating that the filament parameters have been set.
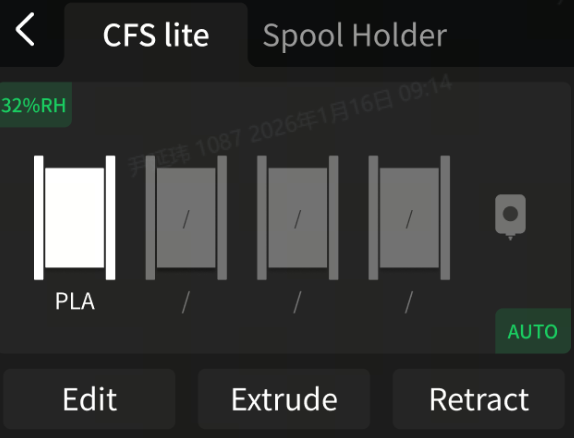
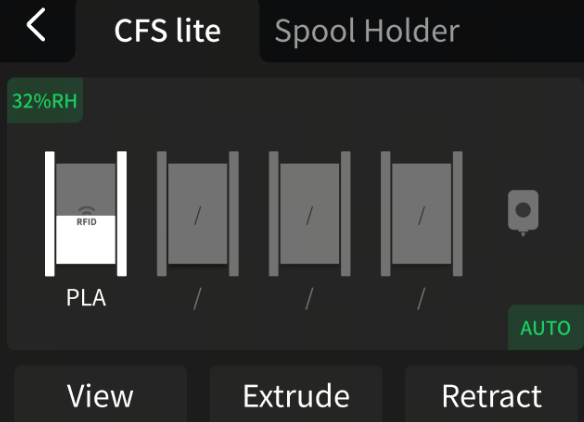
If using RFID filament, CFS lite can automatically recognize the filament information:
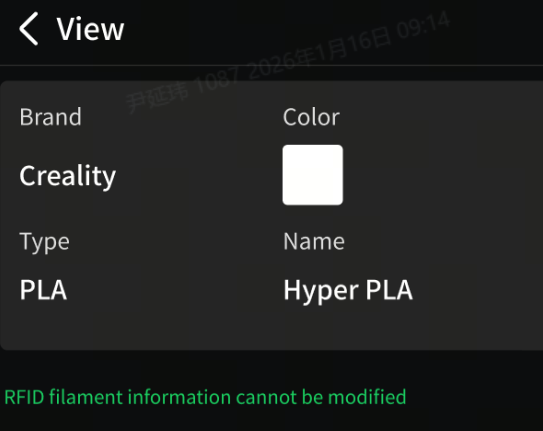
a. Tap the “View” button to check the filament information.
b. RFID filament information cannot be modified.
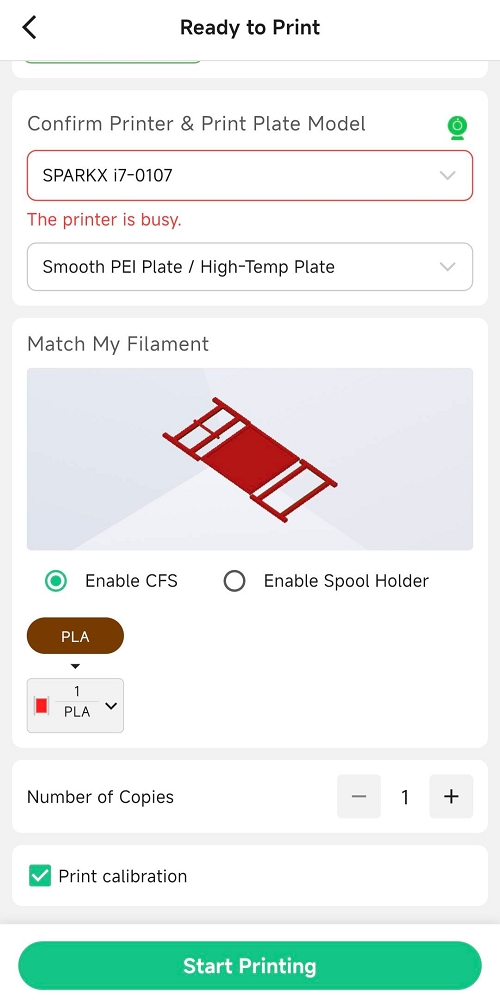
Start Printing
Start printing using the printer model file:
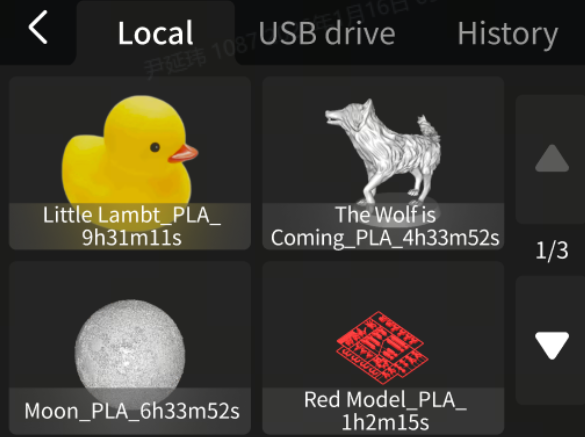
Tap Print File and select the model you want to print
It is recommended to enable “Enable CFS” and “Calibration”, then tap Next.
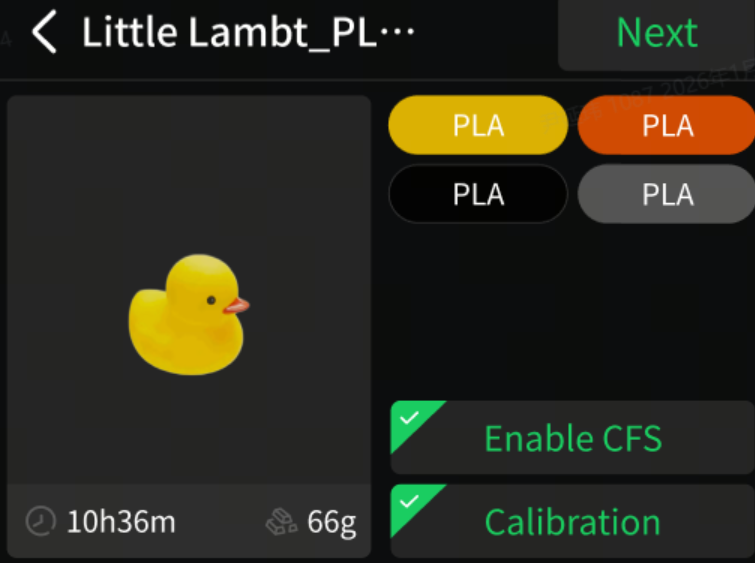
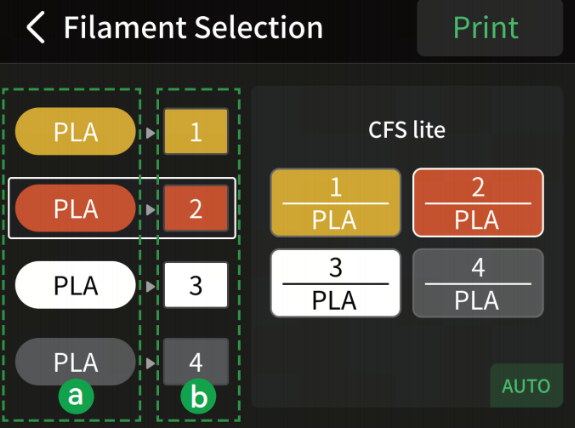
Select the corresponding filament mapping (“a” indicates the filament set in the print file; “b” indicates the filament actually used). Tap Print, wait for the print to complete, and remove the model after the Print Plate has cooled.
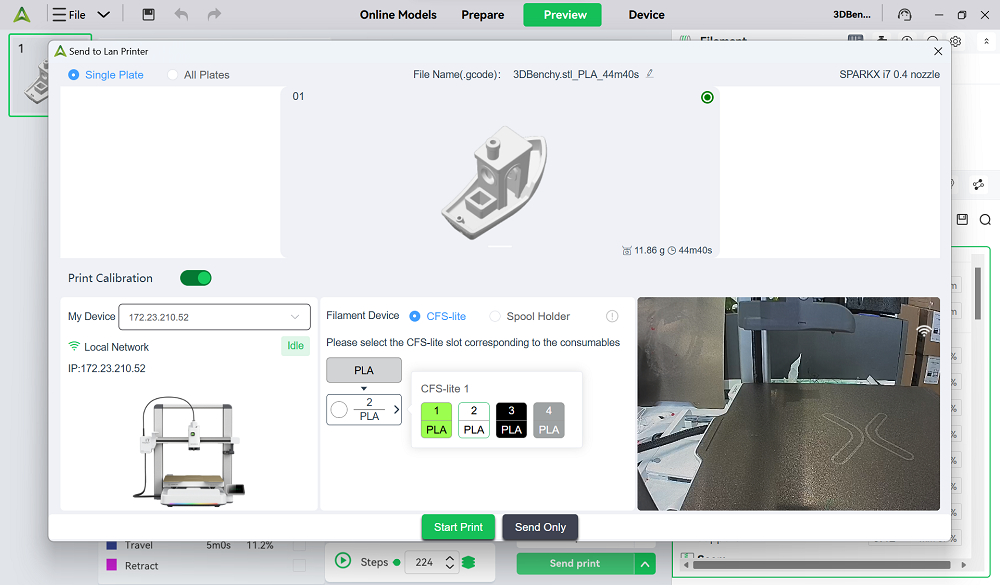
Printing with Creality Print
For detailed instructions, please refer to: How to Start Printing with Creality Print?
Download Creality Print.
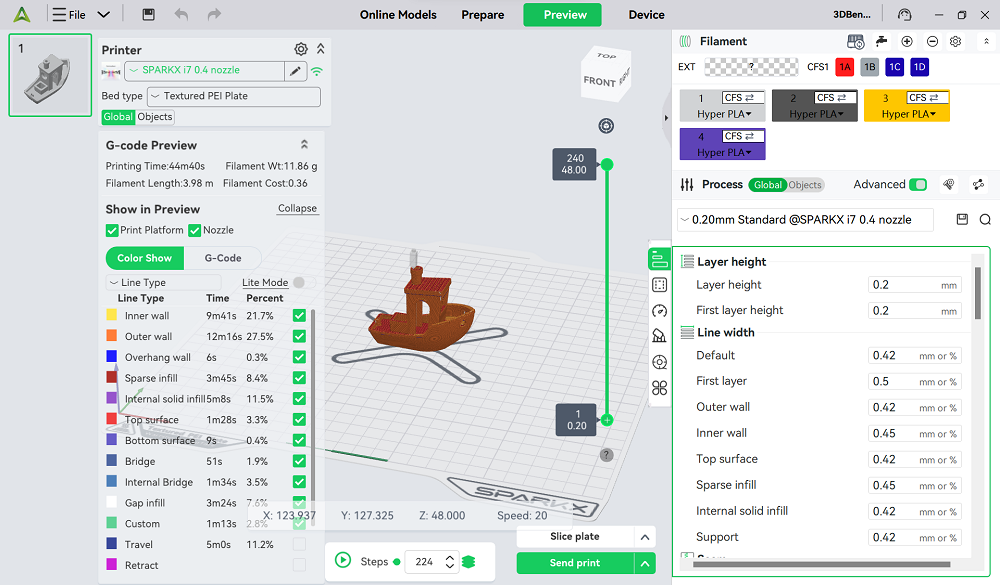
Select or import the model you want to print. In the top-left corner, choose the printer model you will use. Tap Slice Plate in the bottom-right corner, and after slicing is complete, tap Send Print.
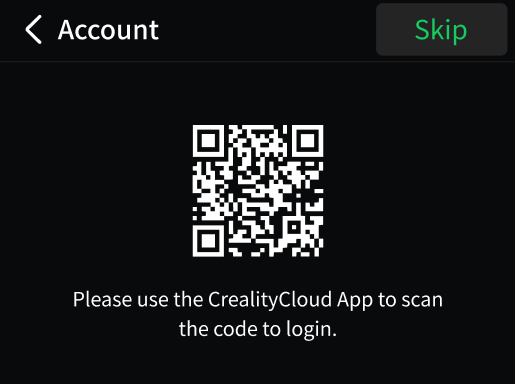
Printing with Creality Cloud App
For detailed instructions, please refer to: How to Start Printing with Creality Cloud App?
Scan the QR code to download the Creality Cloud App, and then scan the login QR code on the printer to complete the binding.


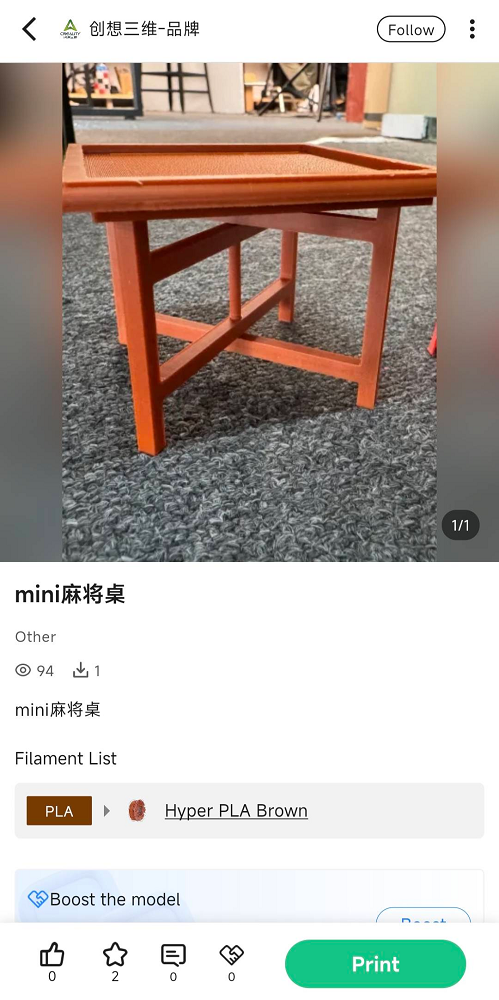
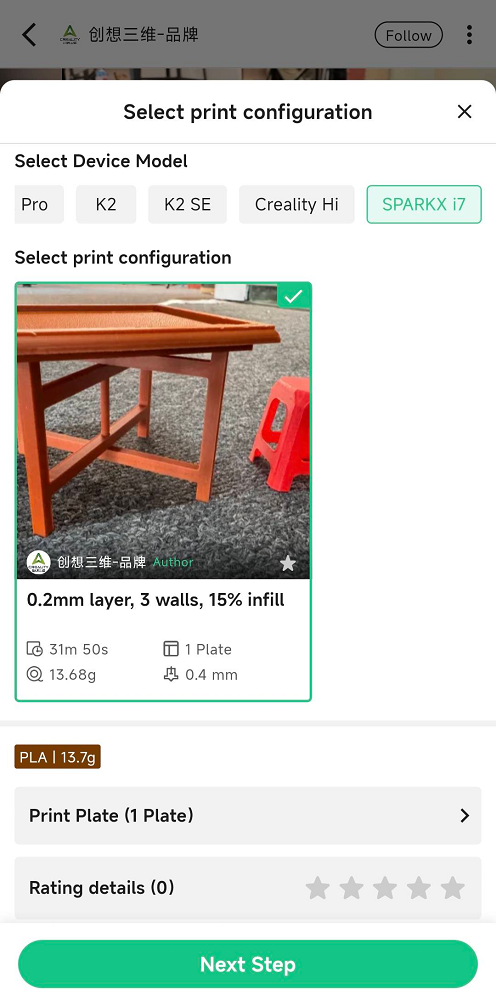
Select the model you want to print, tap Print, choose your printer model configuration, and then tap Start Print.
How to Refill Filament
If the filament runs out during printing, the current print job will be automatically paused.
Automatic Refill
When multiple spools in the CFS lite have the exact same filament attributes (Brand, Type, Color, Name), enabling the Automatic Refill function allows the system to automatically switch to a backup spool when the current filament runs out, continuing the print without manual intervention.
Manual Refill
If the CFS lite does not have spools with identical filament attributes, the system will notify that the filament is out. The user needs to manually load the same type of filament. Follow the steps in “Preparations Before Printing” and tap Continue Print.
How to Change Filament
Retract the Current Filament
Go to the Filament Management interface, select the spool you want to replace, and tap Unload. The system will automatically cut the filament at the Nozzle and retract it into the CFS lite.
Open the CFS lite cover and remove the old filament spool.
Load New Filament
Follow the steps in “Pre-print Preparation” to load the new filament, then continue printing.