


3D printing - a kind of additive manufacturing, allows you to snap a pic and some hours later, hold a physical 3D object in your hands. No intricate software. No professional design degree. No guesswork. You only need the Creality SPARKX i7 as it’s shifting the way people think about 3D printing at home, in the office, anywhere in between. However, how does it actually work? Ahead, learn the real steps of the complete process, from the digital foundation to post-print tips.
What is a 3D Printer and How Does It Work?
A 3D printer develops actual objects, layer by layer, from melted plastic filament. It begins from the bottom, keep moving up, one thin slice at a time, till the whole object is complete.
The process is known as FDM (Fused Deposition Modeling). It’s also specified as FFF (Fused Filament Fabrication), the most common among the mainstream 3D printing technologies.
The Core Components Behind Every Print
Every 3d printer, involving the SPARKX i7, depends on a few key components functioning together:
|
Component
|
What It Does
|
|
Motion System
|
Moves the build plate and print head in X, Y, and Z directions
|
|
Extruder
|
Feeds filament from the spool into the hotend at a controlled rate
|
|
Hotend
|
Heats and melts the filament before it exits the nozzle
|
|
Heated Bed
|
Warms the print surface so layers stick properly from the very first line
|
All these work as a team. The minute one is off, even a bit, print quality suffers.
How Does the SPARKX i7 3D Printer Work? (Step-by-Step)
The SPARKX i7 follows the same basic process as any other printer, but with smarter tools, AI-powered features, and a smooth process that lets total newbies get their first print done in just five minutes.
Here's how a 3d printer works step by step.
Step 1 - Start with a Model: The Digital Foundation
Each print begins with a digital file. The printer requires a 3D model to work from that tells it exactly what shape to create. You have two ways to make it happen with the SPARKX i7.
Option A: The Traditional Route
Download a customized 3D model from Creality Cloud, or make your own through CAD software if you have the skills. The i7 operates with the most common file formats:
-
STL: the standard format for the majority of 3D models
-
OBJ: famous for textured, detailed designs
There’s no need to create your own. Creality Cloud alone offers you an enormous library to pick from, tools, toys, art pieces, functional elements, and more.
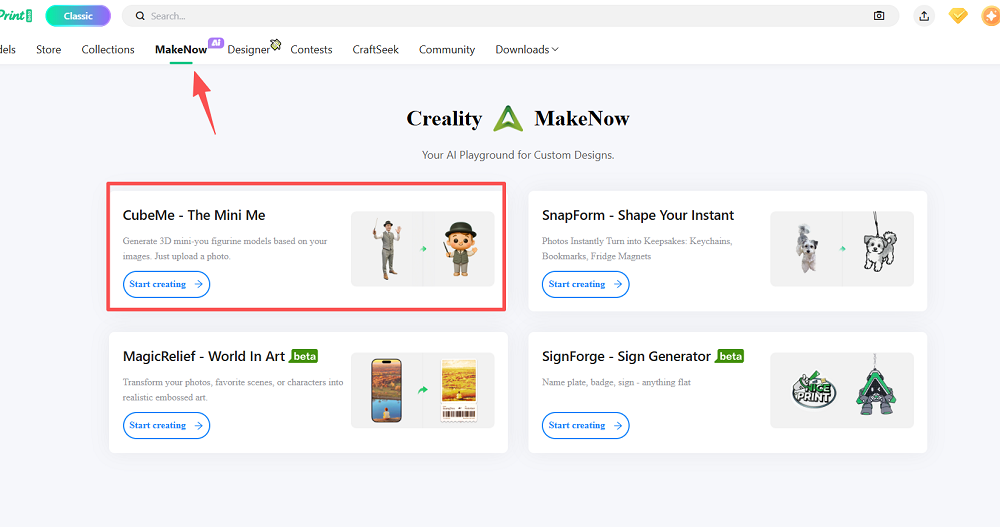
Option B: The AI Shortcut - CubeMe
This is where the SPARKX i7 stands out. Through CubeMe, you take a portrait picture of your friend, family member, or yourself, and the AI transforms it into a print-ready 3D model with one tap. No software skills, no modeling experience. Only a photo and a button.
Step 2 - Slicing: Translating the Model into Printer Language
A 3D model is just an onscreen graphic. The printer cannot read it directly. It requires instructions that the slicing software generates.
What is Slicing?
Slicing is the method of cutting a 3D model into hundreds or thousands of paper-thin horizontal layers. Every layer becomes one pass of the print head. Assemble all of them to get your finished article.
The SPARKX i7 aligns with Creality Print, a free, user-friendly slicer by Creality designed particularly for their printers.
What Does the Slicer Actually Decide?
Creality Print gets your model and, before printing starts, decides on layer height, print speed, infill density, and support structures. When the slicer has made key decisions, it shifts everything into G-code, the language a printer reads. G-code is actually a list of movement instructions.
A Note on Night Mode
For those who want to print overnight or in a shared space, Creality Print allows you to activate Night mode settings, keeping the SPARKX i7 operating at only 45dB. You adjust it in the slicer before the print begins, and the printer manages the rest.
Step 3 - Getting the i7 Ready to Print (Takes Under 5 Minutes)
Everything is built to get you printing quickly; no technical background is needed. The entire setup takes under five minutes.
Below is what prep looks like:
-
Feed filament into the magic box: The magic box is a three-in-one system, a color switcher, a filament hub, and a damp-proof storage.
-
Install the textured PEI build plate: For this, no glue sticks, no adhesives required. The textured PEI surface handles your print during the job and releases it cleanly when the plate cools. Works right out of the box with PETG, PLA, and TPU.
-
Auto Bed Leveling: The i7 outlines the build surface automatically before each print. The initial layer settles correctly every time, without you touching a single screw.
-
Nozzle Auto wiping: A two-step cleaning cycle runs before every print, coarse wipe first, fine wipe second. Your initial layer is never polluted by waste material from the previous job.
-
The hotend is quick-release, and the filament cutter utilizes a split design. The two replace without any equipment, designed for those who want to print, not maintain.
Step 4 - How the SPARKX i7 Actually Builds Your Object, Layer by Layer
Once the model is sliced, your filament is fed, and the printer is arranged, they get down to business. The i7 runs an accurate, coordinated sequence of heat, movements, and controlled material flow. This process is repeated layer by layer until the object is complete.
Below is what’s occurring within the machine during each print.

The Motion System: X, Y, and Z Working Together
The i7 operates a Cartesian coordinate system in which the build platform and print head move right, left, up-down, and forward-back to set the nozzle exactly where it is required to be.
Build volume: 260 × 260 × 255 mm, around the size of a basketball.
|
Axis
|
Movement
|
Guided By
|
|
X-Axis
|
Left ↔ Right
|
High-accuracy linear rail
|
|
Y-Axis
|
Forward ↔ Backward
|
Double extreme precision linear rods
|
|
Z-Axis
|
Up ↕ Down
|
Double lead screws + timing belt
|
A belt tension detection algorithm observes tension immediately, catching problems before they impact your print.
The Toolhead: Where Filament Becomes a Physical Object
The extruder draws filament from the spool, the hotend liquifies it, and the nozzles drops it in an accurate path. Next, the 5015 centrifugal cooling fan hardens every layer instantly for clean crisp outcomes.
The integrated quick-release hotend warms quicker than classic designs and replaces without equipments. Additionally, while multicolor printing, the filament cutter starts automatically between color switches, triggered by the X-axis pin, resent by magnetic repulsion. All of this happens without any manual intervention.
The Heated Bed: Why It Matters
Hot filament when hits a cold surface twists, shifts, or detaches mid-print. The heated bed helps avoid it completely and maintains the surface hot so each layer bonds properly. The i7’s bed reaches up to 100°C, adjusting automatically by filament kind.
The textured PEI surface grips during printing and releases cleanly when cold, no scraping, no adhesives.
Step 5 - Post-Print: Removing and Finishing Your Print
-
Wait till the build plate is fully cool. Then print releases on its own ( no dragging, no damage.)
-
Take out supports if used
-
Light sanding or post processing optional based on filament and finish goal.
What Makes the SPARKX i7 More Than Just a Printer
The SPARKX i7 brings a bundle of smart features that most printers in its class just don’t have. Here’s what’s built in:
-
AI Spaghetti Detection: The cameral module of i7 operates AI in the background during each print. When the print fails, filament twists into a mess of loose strands, called “spahetti”, the AI captures it early and pause the job.
-
Remote Monitoring via Creality Cloud: Begin a print, walk away and check in from your phone. The Creality Cloud offers a real time camera feed of your print from anywhere.
-
RGB Progress Bar: The RGB light strip at the in front of the printer serves more than look good. It shows the print progress live.
-
50% Less-Waste Multicolor Printing: Standard multicolor printers purge huge amounts of filament each time they shift colors, it’s wasteful and slow. The Magic Box handles transitions smarter, cutting filament waste by about 50% relative to conventional setups.
Conclusion
Manual calibration? Complex setup? Hours of troubleshooting? The SPARKX i7 shifts that dynamics completely. The 3D printing process step by step is a blend of a digital foundation, slicing in Creality Print, and actually building your object layer by layer. Every step is designed to be simple, reliable, and genuinely enjoyable. The tool manages the hard parts, you manages the creative ones.