


Your 3D print starts strong, but halfway through, the walls show ripples, corners look soft, or layers don’t line up as cleanly as expected. These issues are often blamed on slicer settings or filament, but the real cause is frequently overlooked: 3D printer belt tension.
Belts determine how precisely your printer will move along the X and Y axes. If they are not tight or are overly tightened, your prints will not be clear regardless of your printer settings. In this guide, you’ll learn what 3D printer belt tension is, how to check it, and how to adjust and maintain it properly.
What Is 3D Printer Belt Tension?
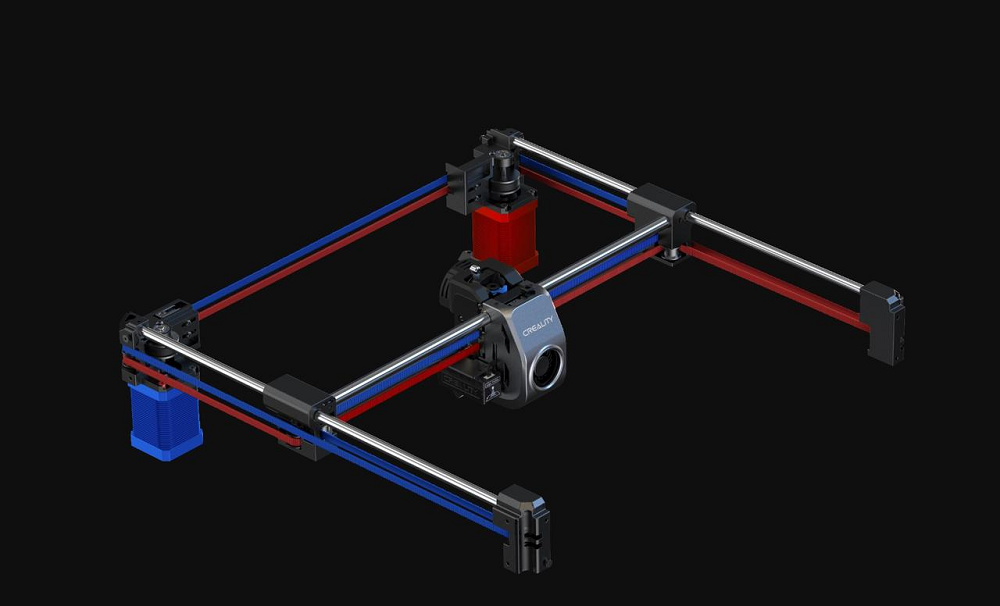
In most FDM 3D printers available on the market today, the X and Y axes employ flat toothed belts to control their movements. These belts are connected to the print head or build plate through stepper motors. 3D printer belt tension thus refers to the tightness or tension exerted on the belts by the pulleys.
Proper belt tension plays a major role in print quality. If a belt is too loose, it can slip or wobble, leading to issues like layer shifting, poor dimensional accuracy, or ghosting on print surfaces. Similarly, a belt that lacks the appropriate tensioning can result in the motor and pulley wear and tear.
5 Signs You Belts Need Adjustment
Knowing the symptoms of bad belt tension helps you diagnose issues early. Look for these five common signs that your printer’s belts need attention:
-
Ghosting or "Ringing"
Vertical surfaces show faint "echo" ripples following sharp corners, also known as ghosting or ringing in 3D printing. This happens because loose belts allow the print head to vibrate after sudden direction changes.
-
Layer Shifting
An entire section of the print is offset horizontally from the layers below. This occurs when a loose belt skips a tooth on the motor pulley or "coasts" past its intended stopping point.
-
Dimensional Distortion
Circles appearing as ovals or squares printing as rectangles are classic signs of uneven tension. If one axis is looser than the other, the printer cannot maintain accurate geometry.
-
Excessive Belt Deflection
Press the center of the belt; if it deflects more than a few millimeters or feels "floppy," it lacks the tension required for precision. A properly tensioned belt should feel firm and emit a low "twang" when plucked.
-
Visible Physical Wear
Inspect the belt for fraying, cracks, or missing teeth. Even if the tension feels correct, physical degradation leads to slipping and eventual failure. Damaged belts should be replaced immediately.
How to Check 3D Printer Belt Tension
Before tightening, you need to measure or test the tension. Here are some simple methods for evaluating belt tightness (no tools required):
-
The Deflection Test (ruler test)
Press the center of the belt span. It should resist firmly and deflect only about 1 mm for every 60–70 mm of length. If it dips easily like a loose rubber band, it needs tightening.
-
The Pluck Test (Acoustic)
Pluck the longest open section of the belt like a guitar string.
-
Low, clear bass note: Ideal tension.
-
Dull thud: Too loose.
-
High-pitched "ping": Too tight (risks motor damage).
-
Manual Glide Test
With the printer off, move the toolhead or bed by hand. The motion should feel smooth and consistent.
-
Loose: You’ll feel a "lag" or "slop" when changing directions (backlash).
-
Too Tight: You’ll feel heavy resistance or a "notchy" sensation from the motor bearings.
-
Mechanical/Software Tools
-
Physical Gauges: Use a 3D-printable tension meter (like the Prusa PETG gauge) to check physical deflection.
-
Frequency Apps: Use a "Guitar Tuner" or "Spectrolyzer" app. Most belts are tuned correctly when they vibrate between 60 Hz and 90 Hz.
-
Firmware Self-Tests: If using a Prusa or high-end Klipper machine, run the built-in "Belt Test" to get a numerical status report.
How to Adjust and Tighten Your Belts
The adjustment of the belt tension may be different for each printer model, but essentially it is just the same: loosen, relocate, and tighten. Here are the steps for beginners:
-
Preparation
Turn off your printer and unplug it. This will ensure that no motor turns on accidentally or gives you a shock while you are working on it.
-
Identify Your Tensioner Type
Locate the end of the X (carriage) and Y (bed) axes.
-
Knob Style: Modern printers (like Anycubic Kobra or Creality Ender 3 V3) use a thumb-turn knob.
-
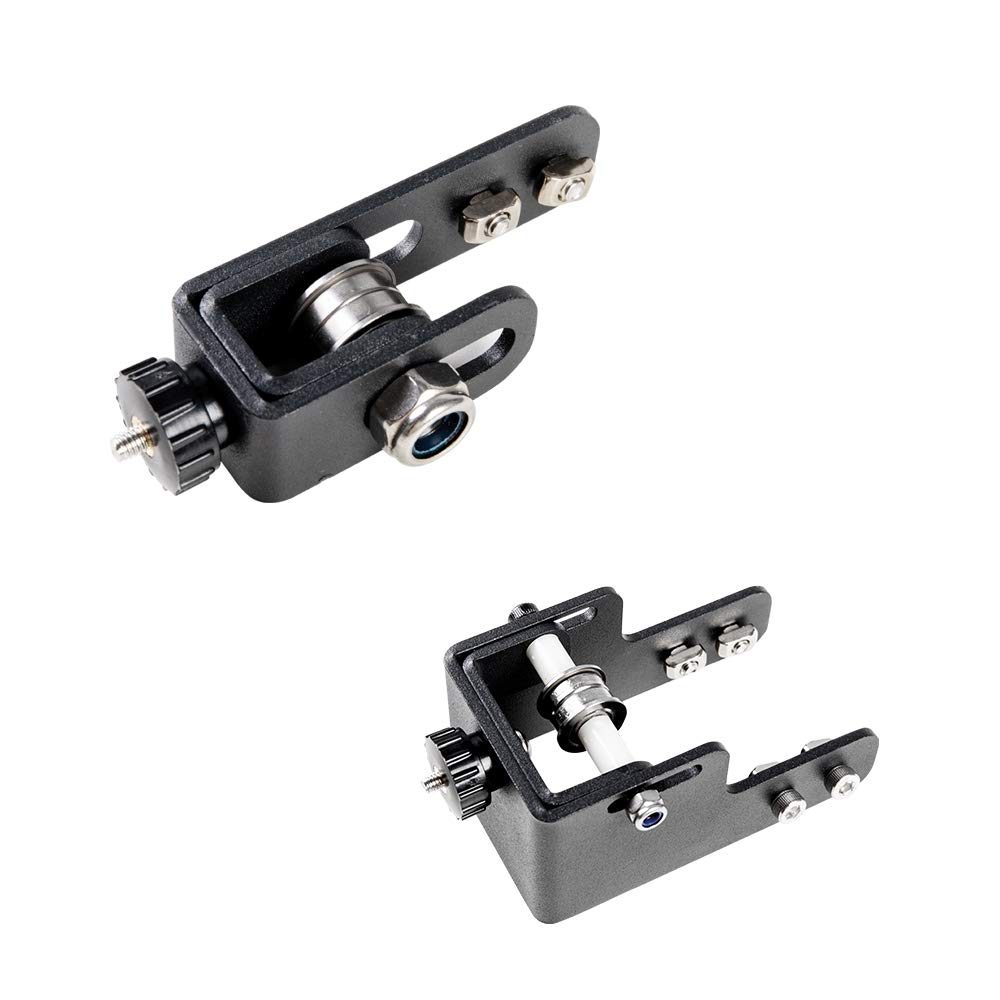
Screw Style: Older or DIY models use Allen screws holding a sliding bracket in place.
-
The Adjustment Process
-
For Knob Tensioners: Simply turn the knob clockwise to tighten. Use the "Pluck Test" frequency mentioned earlier to find the sweet spot.
-
For Screw Tensioners:
-
Loosen: Slightly back off the mounting screws so the bracket can slide.
-
Tension: Use an Allen key as a lever to pry the bracket away from the printer frame, or pull it taut by hand.
-
Secure: While holding the belt taut, retighten the screws. Ensure the belt remains parallel to the profile and isn't twisting.
-
-
The Smoothness Check
With the printer still off, move the carriage and bed manually.
-
The movement should be fluid and silent.
-
If you feel "notches" or heavy resistance, you have over-tightened the belts, which will cause premature motor wear.
-
Verification Print
Power on and run a small Calibration Cube. Inspect the vertical corners for "ghosting" and check the top surface for dimensional accuracy (ensure X and Y are identical).
How to Make Belt Tension on Ender-3 S1
If you are scouting for how to make belt tension on Creality Ender-3 S1, here's the right place. Actually, the Ender-3 S1 has a significant advantage over the base model: it features built-in tensioner knobs, meaning you don't need to manually pull the belts or use Allen keys for the actual tensioning.
Step 1: Locate the Tensioner Knobs
-
X-Axis: The large plastic knob on the far right of the horizontal gantry.
-
Y-Axis: The large plastic knob at the front-center of the printer base.
Step 2: Adjust While Powered Off
Turn the printer off so you can feel the mechanical resistance without the motors fighting you.
-
To Tighten: Turn the knobs clockwise.
-
To Loosen: Turn the knobs counter-clockwise.
Step 3: Perform the "Sweet Spot" Check
-
The Pluck: Pluck the belt. It should emit a low, clear "bass" note. If it sounds high-pitched like a guitar string, it is too tight. If it makes a dull "flap," it is too loose.
-
The Finger Test: Press the belt; it should have about 2–3 mm of play.
Step 4: Smoothness Verification
Slide the print head (X) and the bed (Y) back and forth by hand.
-
If the movement feels "notchy" or heavy, you have over-tightened the knobs.
-
Over-tightening on the S1 can quickly wear out the V-slot wheels and the motor bearings.
Step 5: Final Inspection
Look at the belts as they enter the pulleys. Ensure they are centered and not rubbing against the sides of the metal brackets, which can cause fraying.
How to Maintain Proper Belt Tension
Once you have good belt tension, keep it there with simple care:
-
Routine Frequency
Check your tension every 3–5 prints or as part of a monthly "tune-up." Catching slight slack early prevents failed long-duration prints.
-
Keep it Clean and Dry
-
Clean: Wipe belts with a dry, lint-free cloth to remove dust or filament debris.
-
Dry: Never use lubricants or oils on belts. Grease causes the teeth to slip and degrades the rubber.
-
Visual Inspection
During your checks, look for:
-
Fraying: Thinning at the edges.
-
Cracks: Hardening of the rubber.
-
Missing Teeth: Direct cause of layer shifts.
-
Pro-Tip: Belts are cheap consumables; replace them proactively if you see any wear.
-
The "Goldilocks" Tension
Avoid the urge to crank belts as tightly as possible. Over-tensioning causes:
-
Stretched belts.
-
Worn-out motor bearings.
-
Premature failure of V-slot wheels.
Rule: Firm enough to "pluck," but flexible enough to pinch.
-
Check the Hardware Foundation
Belt tension is only as good as the frame it’s attached to. Occasionally tighten:
-
Pulley Set-Screws (Grub Screws): Ensure they are tight on the flat part of the motor shaft.
-
Frame Bolts: A wobbly frame mimics the symptoms of a loose belt.
Conclusion
Belt tension is a basic aspect of printer maintenance that impacts the print quality and reliability. It’s a delicate balance since if it is done on the loose side, it will result in some sort of ghosting, and if it is on the tight side, it will stress the motors. This is the simplest way to improve your prints from "okay" to "pro."