







Visible layer lines, support marks, and rough textures. Are you dealing with these issues? Don’t worry. They aren’t defects; they’re just part of the process. Every FDM print separates from the build plate as a beginning point, not a finished product. What occurs after printing determines if a model looks rough or professional, amateur or display-worthy.
3D print finishing does not need an expensive tool or years of experience. It needs the right technique, applied in the right order. Today’s guide covers how to smooth out 3d prints, including sanding, chemical techniques, painting, and coloring. Just have a look!
Quick Overview: Best Finishing Methods by Filament
|
Filament
|
Sanding
|
Chemical Smoothing
|
Primer
|
Paint
|
|
PLA
|
Yes
|
Ethyl acetate only
|
Yes
|
Yes
|
|
PETG
|
Yes
|
Not recommended
|
Yes
|
Yes
|
|
ABS
|
Yes
|
Acetone
|
Yes
|
Yes
|
|
TPU
|
Light only
|
No
|
Flexible primer only
|
Flexible paint
|
|
Resin
|
Yes
|
No
|
Yes
|
Yes
|
Why Does Finishing Matter?
Layer lines are a byproduct of how FDM printing functions. Each layer settles on top of the last, and those changes appear on the surface. That’s not an issue with the printer or the filament. It is just physics.
The finishing procedure eliminates those lines or covers them and turns the model from raw print to something truly impressive.
How much finishing you require is based entirely on what the print is for:
-
Display models: whole surface finishing, primer, and paint convert a rough print into something shelf-worthy
-
Functional parts: mild sanding smooths sharp edges, extracts burrs, and enhances fit in assemblies. No painting needed.
-
Gifts and collectibles: smooth surface, color, and a clear coat distinguish a print that seems handmade from one that looks manufactured.
A rule of thumb: Techniques depend on the type of filament. What works perfectly on ABS can harm PLA. Smooth resin does not touch PETG. So, always match the finishing technique to the material.
Tools Worth Having
Before starting any finishing work, verify that you have the proper tools. Here’s what you require:
|
Tool
|
Used For
|
|
Flush cutters
|
Clean support removal without damaging the model surface
|
|
Sandpaper set (120–3000 grit)
|
Full grit progression from layer line removal to pre-polish
|
|
Filler primer spray
|
Fills micro-scratches and shallow layer lines after sanding
|
|
XTC-3D epoxy coating
|
Self-leveling surface fill — works especially well on PLA
|
|
Acrylic paint set
|
Detail work, multi-color finishing, and miniature painting
|
|
Clear coat spray
|
Protective final layer, available in matte, satin, and gloss
|
|
Heat gun
|
Removes stringing and tightens surface texture before sanding
|
Step 1: Support Removal and Surface Prep
The very first step in 3D print smoothing is surface prep. Sanding over unpurged supports or strings wastes time and creates inconsistent results. First, clean the print properly, and each step after becomes easier and faster.
Remove Supports Carefully
Use flush cutters, needle nose pliers, or a hobby knife to pull out support structures. Work slowly, particularly around fine details, textured surfaces and thin walls. Rushing support removal is the most common way creators damage a model before finishing even begins. A snapped-off tab or slipped knife cannot be sanded out.
After removing supports, analyze the surface for three things:
-
Stringing: thin plastic threads stretching between parts of the model. You need to remove these before sanding; pressing them flat with sandpaper fixes them into the surface.
-
Support tearing: rough, pitted patches where the support touches the model require sanding before primer.
-
Layer blobs or shifts: elevated spots or misplaced parts on the surface that require flattening before moving to finer grits.
Do not sand strings; remove them first. Pass a heat gun on its lowest setting quickly across the surface. The strings shrink and disappear in seconds. Test on a hidden spot first, especially with PLA, which softens at relatively low temperatures.
Step 2: Sanding 3D Prints
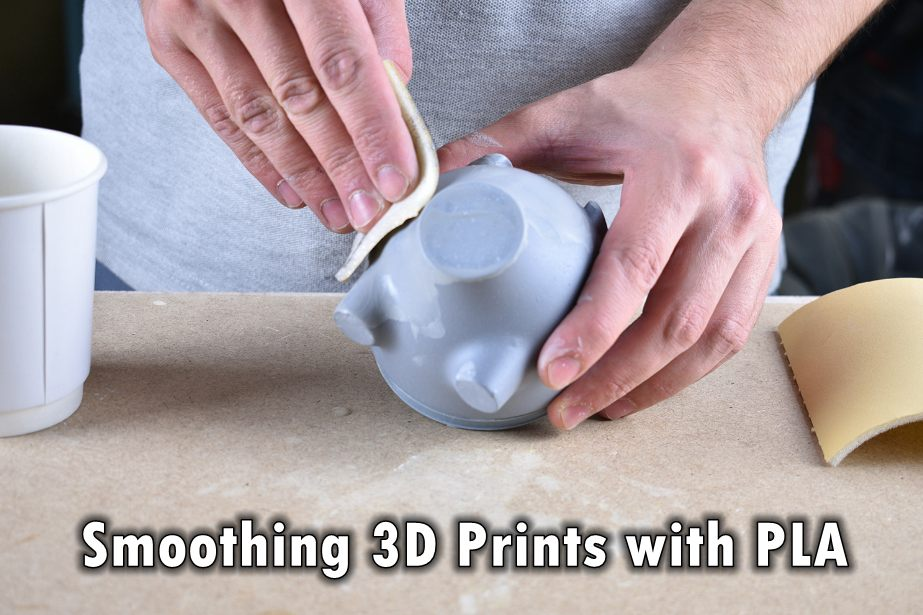
Among the most classic and convenient methods for smoothing 3D prints is sanding. It works on almost every filament: PLA, ABS, PETG, and resin. Besides, it’s the most dependable way to eliminate layer lines and the base every other finishing step builds on.
The goal is not to sand hard and fast. It is to process grit progression, starting coarse to remove material, finishing fine to refine the surface.
The Grit Progression
Begin rough, finish fine. Skipping grits misses the middle smoothing stages, leaving scratches that show through primer and paint.
|
Sandpaper Grit
|
Purpose
|
|
120–220 grit
|
Remove layer lines and major surface irregularities
|
|
400 grit
|
Smooth scratches left by coarser grits
|
|
800–1000 grit
|
Refine surface before priming
|
|
1500–2000 grit
|
Final pass for a near-smooth finish
|
|
3000+ grit
|
Pre-polish pass for high-gloss results
|
Wet Sanding
From 400 grit upward, switch to wet sanding. Soak the sandpaper in water and keep the surface wet while sanding. The water serves as a lubricant, lowering heat buildup and transferring sanding waste that would otherwise block the paper and scratch the surface.
Wet sanding is essential, especially for PLA. PLA softens at relatively low temperatures. Dry sanding at higher grits produces enough friction heat to drag and stain the surface instead of cutting it cleanly.
Step 3: Filler Primer
Filler primer can easily hide small flaws and layer lines when used correctly. It handles what sanding leaves behind: shallow surface texture, micro-scratches, and the fine layer shiftings that only become visible once paint goes on.
Skipping primer is the primary reason 3D prints look rough. Paint is thin; it does not fill; it reveals. Each imperfection under paint becomes more visible with each top coat.
How to apply filler primer correctly:
-
Shake the can extensively for at least 60 seconds.
-
Hold the can 25–30cm from the surface; too close generates runs, and too far generates a dry texture
-
Apply in thin, even passes; do not try to cover in one coat
-
Allow every coat to dry completely before the next, 15-20 minutes at least between coats
-
Apply 2-3 coats total
-
Sand lightly with 400-800 grit between coats to reduce high spots
-
Repeat the cycle, prime → dry → sand → prime, until the surface reads smooth under a raking light.
Step 4: Chemical Smoothing
An advanced technique to greatly enhance your 3D print's surface is chemical smoothing. Chemical smoothing dissolves the outer surface layer of the print, merging layer lines and creating a smooth, mostly glossy finish without sanding. It’s fast, but it only functions on a particular filament.
Acetone Smoothing for ABS
Acetone is the most efficient chemical smoothing agent for ABS. It partially melts the surface, layer lines fuse, and the print takes on a smooth, injection-molded look.
Two methods:
Vapor method for the most consistent result:
-
Pour a tiny amount of acetone into a sealed, heat-safe container
-
Suspend the print above the liquid on a platform; don’t overflow it
-
Inspect progress, remove when the desired smoothness is reached
-
Allow the print to air dry and cure fully before handling.
Brush method for targeted areas:
-
Apply acetone with a brush directly to particular parts
-
Functions better for smoothing support scars or coarse patches without impacting the whole model
Safety: Acetone is flammable. Use in a well-ventilated space. No open flames, no heat sources nearby. Keep the container sealed when not actively checking progress.
Does Acetone Work on PLA?
No, acetone does not affect PLA. PLA requires a different solvent. Ethyl acetate works on PLA. It's less aggressive than acetone and produces slower, more controlled results.
Step 5: Painting and Coloring
The final step is painting. Everything before it exists to make this step work; a smooth, primed surface takes paint equally and holds it securely.
One rule: never skip primer. Paint exposes flaws; it doesn’t fill them.
-
Spray paint: Ideal for big, easy surfaces. Apply in fine, equal passes; 3 thin coats always outperform 1 thick one. Use plastic-compatible spray paint only.
-
Hand painting: Ideal for detail work and multi-color models. Use acrylic paints thinned a bit with water, 10-20% water ratio. Establish color in thin layers. Use a dry brush on raised details to highlight texture naturally.
-
Finishing coats: Always wrap up with a clear coat, matte, satin, or gloss depending on the appearance you want. It protects paint from UV fading, chipping, and handling damage. Allow 24 hours to cure before handling.
Conclusion
3D print finishing and smoothing go beyond looks, it introduces polish and expertness to your inventions. If it's ABS, PLA, or resin, there is a technique that suits your needs and skill level. The process isn't complicated. Clean the print. Sand it properly. Prime it. Paint it. Protect it. Take it easy, remain protected, and convert the layered lines into masterpieces.
Visit Creality to explore filaments, slicer tools, and maker resources.