





















A figurine can look perfect in your slicer until you notice the outstretched hand hanging over empty space. That hand needs something underneath it while the printer builds the first few layers. Tree supports provide that temporary foundation, with branches that reach around the model.
They can make awkward shapes easier to print, but switching them on is only the beginning. Placement, branch strength and the gap beneath your model all affect the result. This guide explains how to use tree supports in filament 3D printing, from setup to removal.
How Do Tree Supports Work in 3D Printing?
An FFF printer lays down softened filament in layers. Each new layer usually rests on material below it. An overhang extends beyond that material; a bridge spans between two supported points. Some print well without help, but more demanding shapes need temporary supports.
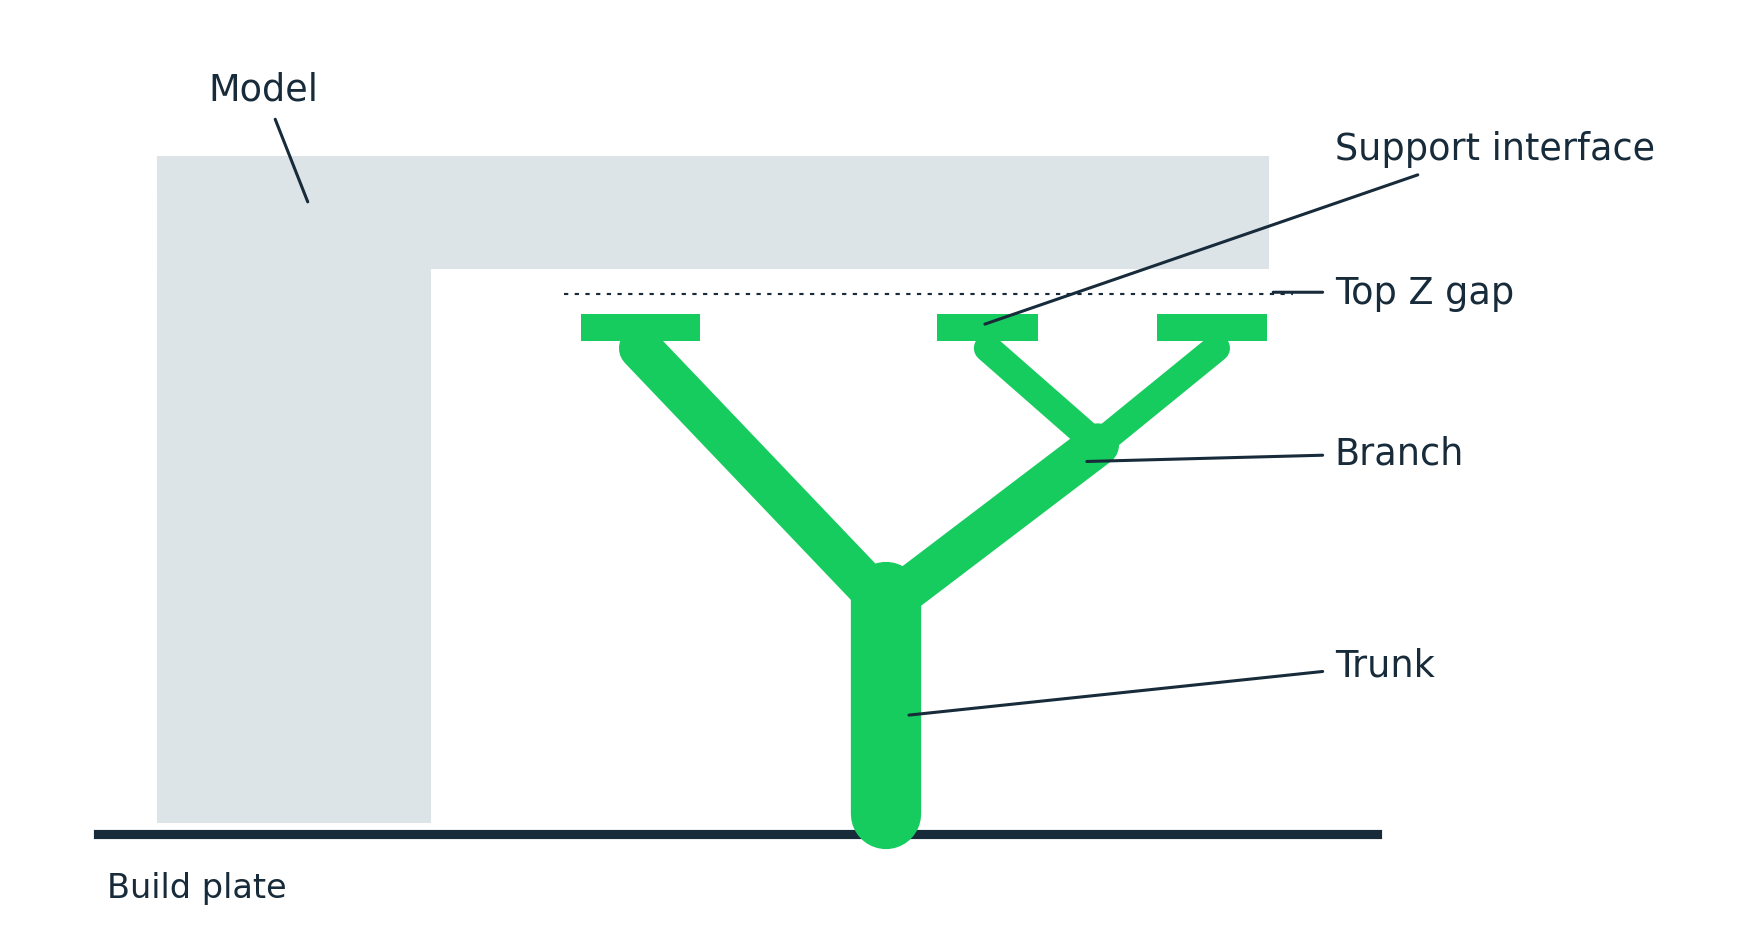
Tree supports split into branches that reach separate overhangs. Several branches can share a trunk rather than forming individual towers. Near the model, branch tips or support interface layers provide the surface the filament prints over.
When Should You Use Tree Supports?
Tree Supports vs Normal Supports
Tree supports may reduce material and contact with the model, but they do not automatically save time on every print. Compare the sliced estimates and inspect the coverage. A lighter support structure is useful only if it holds the part successfully.
Also consider removal. A branch trapped inside a narrow opening can be frustrating, even if it prints perfectly.
How to Set Up Tree Supports in Creality Print
Step 1: Orient Your Model
Rotate the model before adding supports. A different orientation may reduce overhangs or move support marks onto a less visible surface. Check delicate features, too. A thin sword may survive printing but snap when you remove the support beside it.
In some Reddit discussions, commenters suggested rotating a densely supported miniature or splitting it into pieces. Consider that option if changing settings still leaves the model wrapped in branches. A little assembly may be easier than difficult cleanup.
Step 2: Enable Tree Supports and Choose Placement
In Creality Print's Support settings, enable "Support", choose "Type" > "Tree (auto)", then select Organic as the style. Switch to the advanced settings view if needed.
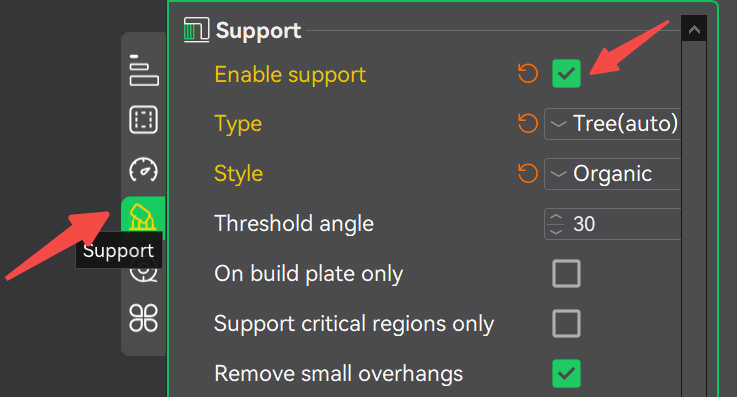
Try "On build plate only" when branches can reach the required areas from the bed. This prevents supports from starting on the model, but it can leave some overhangs unsupported. Keep it enabled only when the preview shows adequate coverage.
Step 3: Add or Block Supports Where Needed
Step 4: Slice and Check the Preview
Tree Support Settings
Branch Diameter
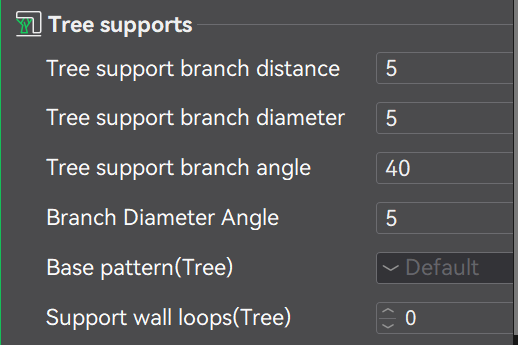
Branch Angle
Branch Diameter Angle
Support Z Distance and XY Distance
Top Z distance is the vertical gap below the supported surface. XY distance is the sideways clearance between supports and the model. Tight gaps can make supports difficult to remove. Larger gaps improve separation, but may leave edges or undersides less supported.
In some cases, the actual Z gap can be rounded according to layer height and the support mode. Inspect the preview after changing it.
Tip Size Branch Spacing and Support Interfaces
Tip size and branch spacing affect support coverage. More contact can help an overhang, while making cleanup harder. Interface layers form a denser surface above the branches. Check these before assuming every rough underside needs thicker trunks.
That distinction appears in a Prusa forum discussion, too: a user struggling with bulky organic supports was directed toward tip diameter and branch density. Inspect the contact area as well as the trunk.
For a small PLA test with a 0.4 mm nozzle and 0.2 mm layers, the following is an illustrative starting setup, not a tested universal preset. It assumes supports use the same PLA as the model.
|
Setting
|
Starting approach
|
|
Support type and style
|
Tree (auto), Organic
|
|
Placement
|
Build plate only, if coverage is complete
|
|
Top Z distance
|
Try 0.2 mm and inspect the generated gap
|
|
Top interface layers
|
Try 2
|
|
Branch dimensions and angles
|
Begin with the selected profile's values
|
|
XY distance and interface spacing
|
Begin with profile values; tune after the test
|
Use a small model with an overhang before committing to an overnight print. Record your slicer version and changes so you can repeat what worked.
How to Get Tree Supports Off Your 3D Prints
Let the print cool before removing it from the bed. Then inspect the branches and their contact points. Resist the temptation to grab the whole tree and twist.
1. Support the model. Hold a solid section near the area you are working on, rather than a thin limb or decorative detail.
2. Cut accessible branches into sections. Use flush cutters to open up space, keeping the cutting edges away from the model. Wear eye protection against flying fragments.
3. Remove loose sections gently. Work through them gradually. If a section resists, inspect its attachment before pulling harder.
4. Remove the remaining interface. Lift accessible edges carefully with suitable pliers or cutters, then trim small remnants without digging into the surface.
If the model bends with the support, stop. Cut the support into smaller pieces. For the next print, inspect contact gaps and interface settings. Increasing branch diameter will not fix a support interface fused to the model.
Common Tree Support Problems and How to Fix Them
|
Problem
|
What to inspect first
|
Possible adjustment and tradeoff
|
|
Branch bases lift
|
Bed cleanliness and first layer
|
Improve bed adhesion or enlarge the support footprint; this adds material.
|
|
Branches break higher up
|
Branch thickness and support speed
|
Increase thickness or slow supports; expect more material or time.
|
|
Supports cling to the model
|
Contact gaps and interface spacing
|
Increase separation cautiously; underside quality may suffer.
|
|
Overhangs sag
|
Coverage, interface and Z gap
|
Add local support or reduce an excessive gap; removal may become harder.
|
Change one setting, print the test again and keep a note of the result. A few small trials are easier to learn from than another large print with the same broken branch.