


What are supports, and why do I need them?
Which type should I use—tree, grid, or custom?
How do I add more supports if the automatic ones aren’t enough?
Why is it so hard to remove them cleanly?
If you’ve ever printed a model with floating parts, overhangs, or bridges, you’ve likely faced a frustrating issue—failed prints. That’s where 3D printing supports come in. Feel frustrated by this new concept? No worries, we’ll break down everything you need to know about 3D printing supports in a way that’s easy to follow.
Quick takeaways:
-
Use supports for overhangs, bridges, and floating parts.
-
Choose the right support pattern based on your printer and model.
-
Adjust settings or add supports manually when needed.
What Are Supports in 3D Printing?
Supports in 3D printing are extra scaffold-like structures printed alongside your model to hold up overhanging or complex features. They are used to prevent parts of the model from sagging or collapsing during the build.
Since 3D printers build one layer at a time, anything that juts out too far (like a shelf or bridge) has to be propped up. At this time, you need 3D printing supports to keep the print stable and accurate. Without them, any filament printed in mid-air would droop.
Note: To make it simple, if you try to print the top of the letter T, the horizontal bar would be at 90° and curl down without support. By adding supports under that bar, you maintain the part’s geometry.
Types of supports
3D printer supports come in several styles, each with its pros and cons. There are several support styles used in FDM and resin 3D printing:
-
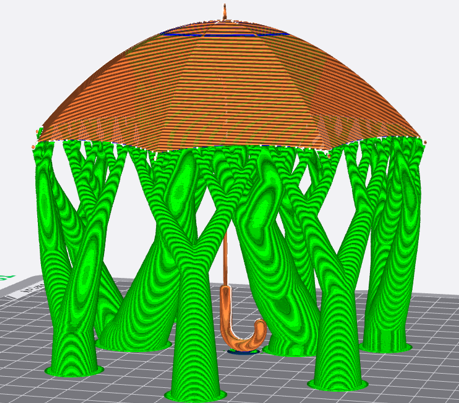
Tree supports: Often used in resin printing. They branch out like a tree and use minimal contact with the model, making them easier to remove and leaving fewer marks.
-
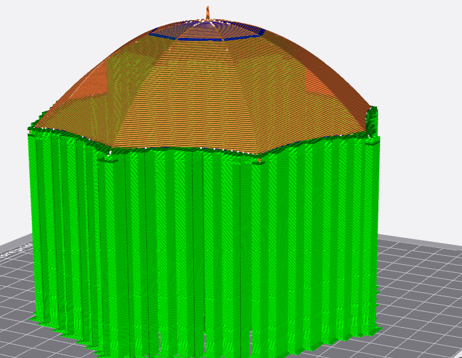
Linear/grid supports: Common in FDM printing. These are vertical, dense, and support large flat areas well but can be harder to remove.
-
Conical supports: Tapered supports good for minimizing contact points and often seen in resin prints.
-
Custom manual supports: Some slicers like Meshmixer allow you to manually place supports where needed for better control.
Each support type has pros and cons depending on your printer and model geometry.
Best Support Pattern for 3D Printing
When your slicer offers different support patterns (lines, zigzag, grid, concentric, etc.), the pattern can affect strength, material use, and ease of removal.

For FDM prints:
-
Zigzag or Lines: Easy to remove and good for basic models. Best choice for PLA and other easy-to-print plastics
-
Grid: Offer stronger support but can be tougher to clean up. Need very stable, rigid supports (for example, large ABS prints that warp or when an overhang is extremely long)
-
Concentric: Great for curved surfaces or spherical sections because they naturally follow the curve
For resin prints:
-
Tree-style or light-touch supports are ideal for preserving fine detail and reducing post-processing effort.
When to Use Supports in 3D Printing
You should use supports any time your model has features that extend too far into open air. A handy rule of thumb (the 45-degree rule) says that overhangs steeper than about 45° will likely fail without. However, sometimes you don’t always need supports, but you should use them in the following cases:

-
Overhangs Greater Than 45°: If your print has parts hanging out more than 45° from vertical, add supports.
-
Bridging Gaps: Long horizontal stretches (bridges) often need support underneath.
-
Floating or Disconnected Parts: Any part of the model that starts printing in mid-air will require support to anchor it.
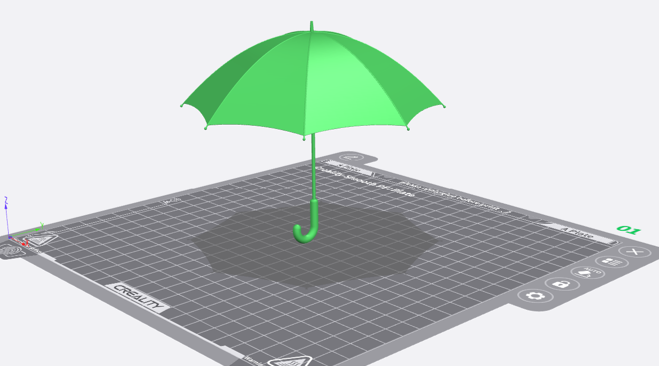
In practice, typical cases for supports include: roofs or canopies sticking out, holes oriented upside-down, steep angles like the top of a letter “T,” and any delicate detail that has nothing directly beneath it. Use your slicer’s preview to spot these overhangs.
How to Add Support to 3D Prints
You can customize supports in your slicer to get exactly the coverage you want. Here’s how in popular slicers, for instance, Creality Print:
Step 1: Download the slicer from the official website and then launch the software;
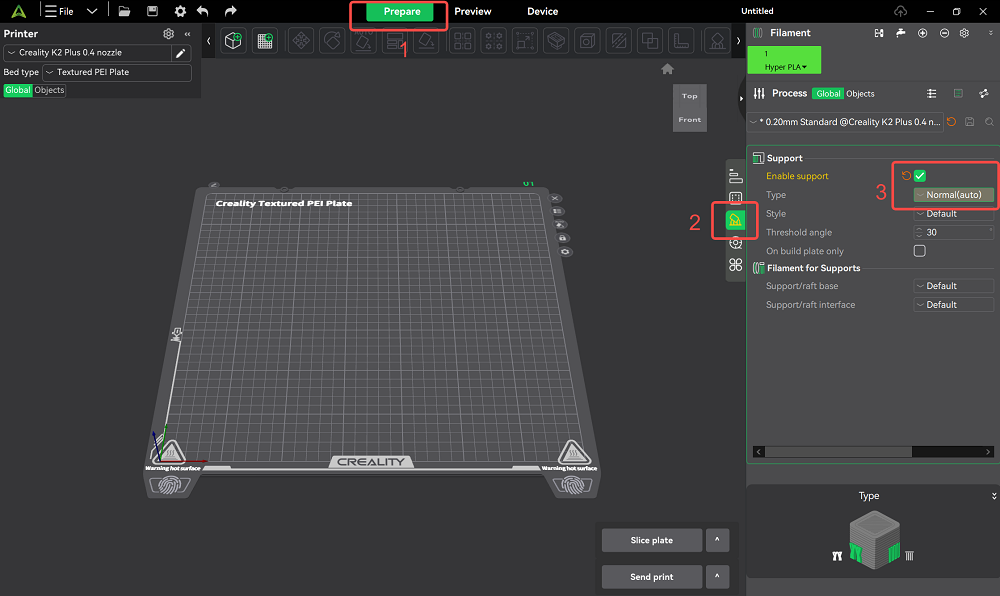
Step 2: In Creality Print's settings, go choose the "Prepare" menu;
Step 3: Move to the "Support" option. This slicer offers two choices: from the "Normal" to the "Tree" support.
3D support generators
Apart from professional slicer software, there are dedicated tools to generate or add supports. Autodesk MeshMixer (free) is a popular example: it can auto-generate tree-like supports or let you manually place supports on any STL file. For resin printing, slicers like Chitubox and Lychee have advanced auto-support algorithms: they automatically add and optimize support pillars for SLA/DLP parts.
Conclusion
3D print supports are essential for successful prints with complex shapes. By understanding support types, knowing when to use them, and learning how to customize them, you can greatly improve your print quality and reduce frustration.
FAQs About 3D Print Supports
Q: Why is it hard to remove the 3D printing supports?
A: It could be due to high support density, poor placement, or wrong support pattern. Try lowering density or switching to a more breakaway-friendly style like zigzag.
Q: What is the difference between support touching base plate and everywhere?
A: A touching build plate means that supports are only created from the build plate up. While everywhere refers to that supports are also generated on top of your print to hold up higher overhangs. This option provides better stability but can be harder to clean.