


Ever watched your 3D printer attempt a bridge, only for the filament to droop like a sad noodle? And yes, bridging is one of those skills that quietly separates average prints from great ones. It’s the technique that lets you span open spaces without using support material — saving both time and filament.
In this guide, we’ll walk through what bridging actually is, why it sometimes goes wrong, how to test your printer’s bridging ability, and what settings can help you get clean, crisp bridges every time.
What Is Bridging in 3D Printing?
In simple terms, bridging happens when your printer lays down filament between two points with nothing underneath for support — much like building a miniature bridge in mid-air. The filament has to be extruded, stretched, and cooled fast enough to stay flat instead of drooping.
A printer that’s good at bridging can handle overhangs and open spans with ease, which means cleaner parts, fewer supports, and less post-print cleanup. It’s one of those small optimizations that pays off big in efficiency and surface quality.
Bridging often gets confused with overhangs, but they’re not quite the same thing:
-
Overhangs lean outward and are printed over existing layers at an angle.
-
Bridges are printed straight across an open space with no layer beneath.
If you’ve ever printed something with holes, vents, or hollow sections, chances are you’ve relied on bridging without even realizing it.
Related Post: What Are Supports in 3D Printing?
Why 3D Printing Bridges Sag or Fail
Bridges often sag or fail due to gravity. When the filament comes out of the nozzle, it’s still molten and soft — which means it’s eager to droop before it cools. A few key factors usually cause bridges to sag or snap mid-print:
-
Too much heat: If your nozzle temperature is too high, the filament stays gooey for too long. The result? Stringy, uneven lines that dip in the middle.
-
Weak cooling: Without proper airflow, the plastic doesn’t harden quickly enough to hold its shape. Most filaments bridge best with 100% fan speed.
-
Excessive print speed: Go too fast, and the filament doesn’t have time to grab onto the anchor points on each side.
-
Over- or under-extrusion: Too much material makes thick, droopy strands; too little can cause gaps or breaks.
-
Material behavior: PLA tends to bridge beautifully thanks to its rigidity and quick cooling. PETG, on the other hand, is more elastic and often struggles with sagging and stringing.
Even slicer detection can cause issues — if your software doesn’t correctly recognize a section as a bridge, it won’t apply the right settings.
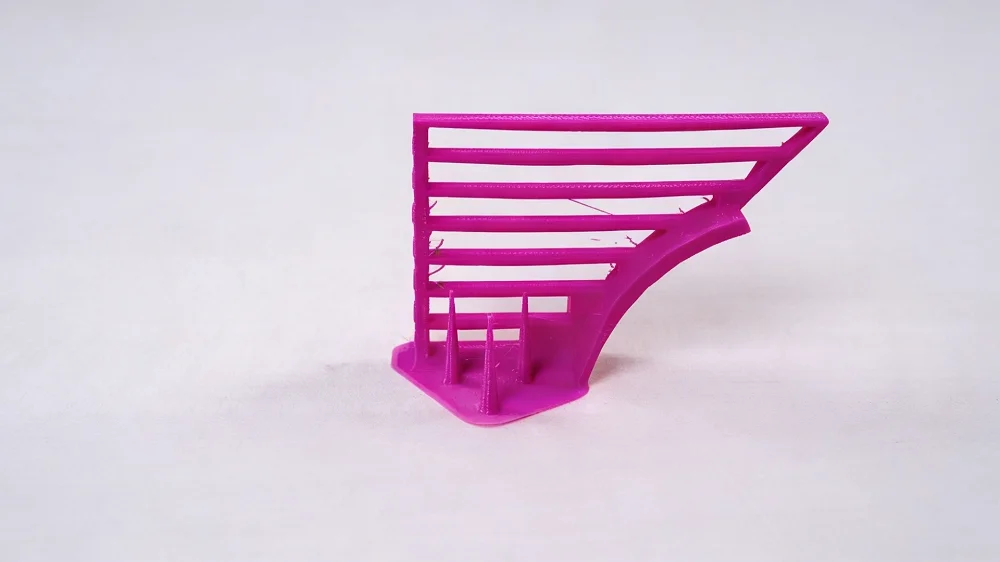
How to Test Bridging Performance
Before adjusting settings, it’s smart to run a bridge calibration test. These small models help you see how far your printer can span without supports and how different settings affect results.
How to Do It
-
Download a bridge test model from sites like Creality Cloud.
-
Print it with your regular slicer profile.
-
Check each span carefully after printing.
Here’s what you’re looking for:
-
A slight droop is fine — gravity always wins a little.
-
Moderate sagging or stringing means your cooling or speed might need adjustment.
-
A perfectly flat bridge is the gold standard — that’s when you know your printer is well-tuned.
How to Improve Bridging in 3D Printing
So once you know what’s causing the droop, it’s tuning time. Below are the most effective ways to improve bridging performance.
Lower the Printing Temperature
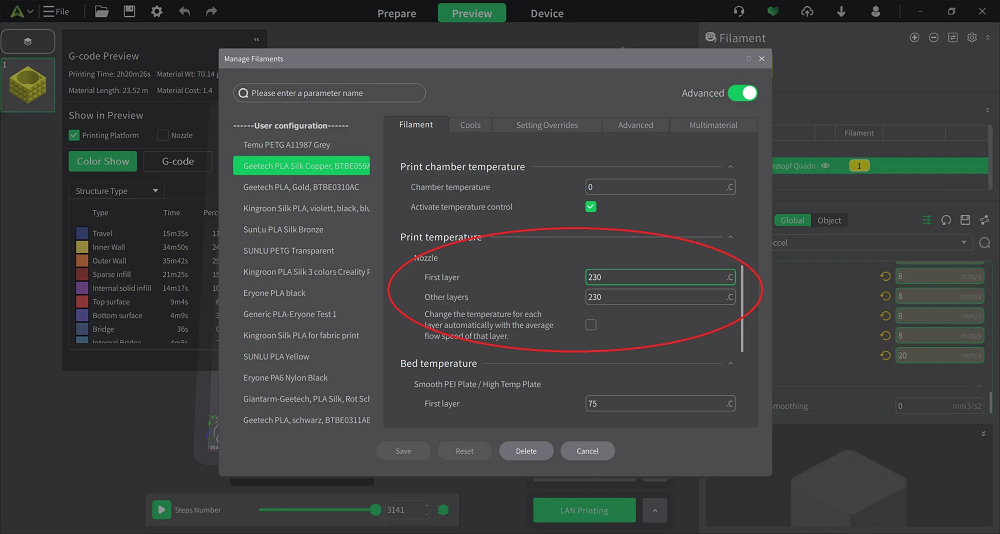
Cooler filament solidifies faster and resists sagging. Try dropping your print temperature by about 5–10 °C from your normal setting. Just don’t go too low — you don’t want under-extrusion or poor adhesion.
Related Post: PLA Printing Temperature Guide 2026
Increase Cooling Fan Speed
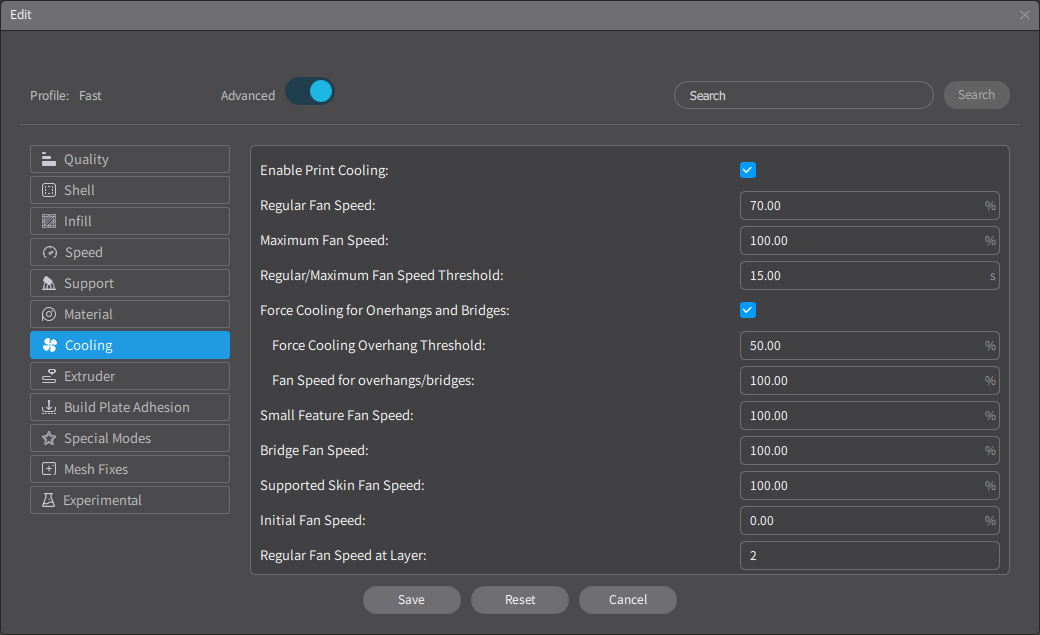
Bridging is all about airflow. Turn the part-cooling fan up to 100% when printing bridges, and if your fan setup isn’t ideal, consider upgrading the duct or shroud to better direct air under the nozzle.
Slow Down the Bridging Speed
Speed kills bridges. Slowing down to 20–40 mm/s gives the filament time to stretch and set before it droops. Most slicers even have a separate “bridge speed” setting for this.
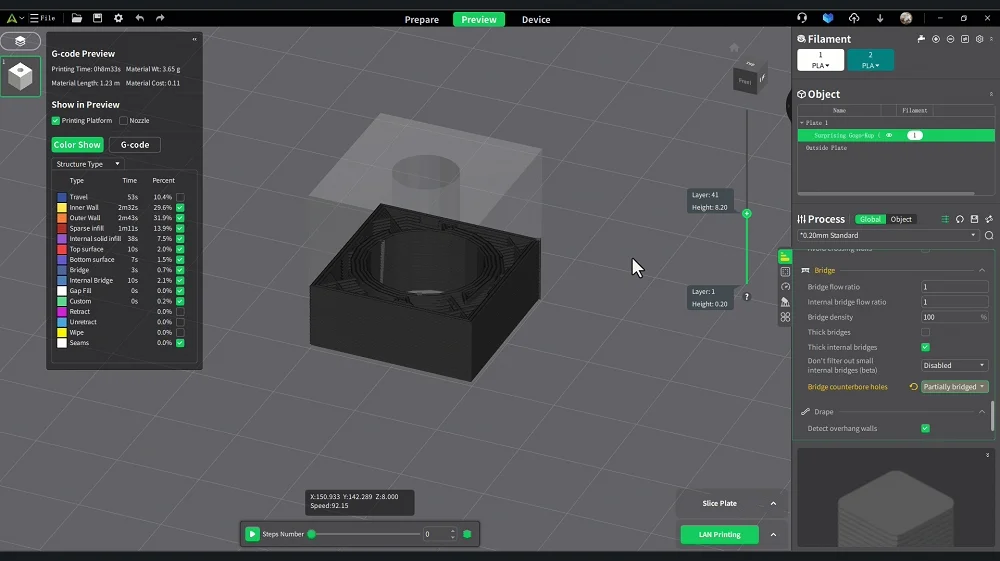
Adjust Flow Rate
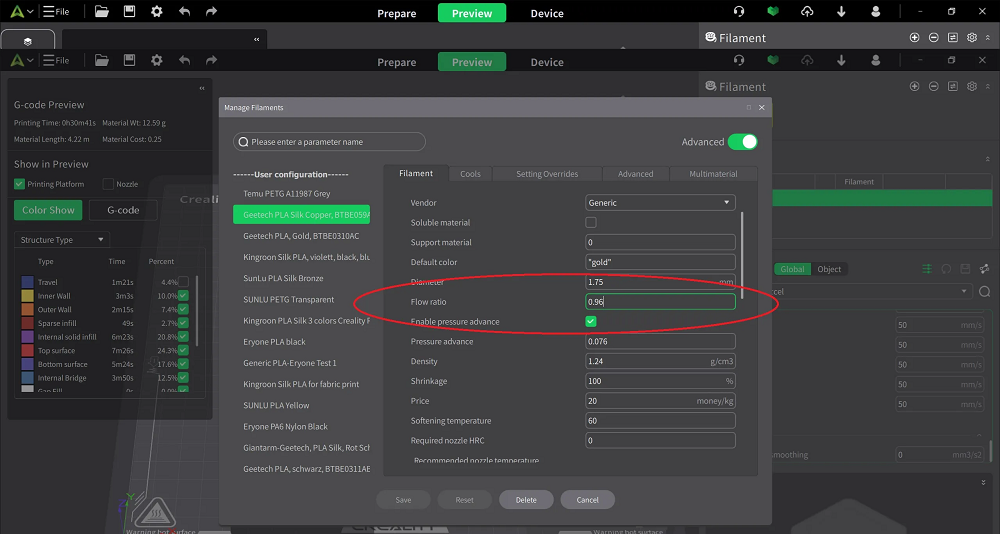
Lowering your flow rate or extrusion multiplier to around 90–95% can help prevent the nozzle from laying down too much material. Less filament = less drooping.
Tune Retraction and Coasting
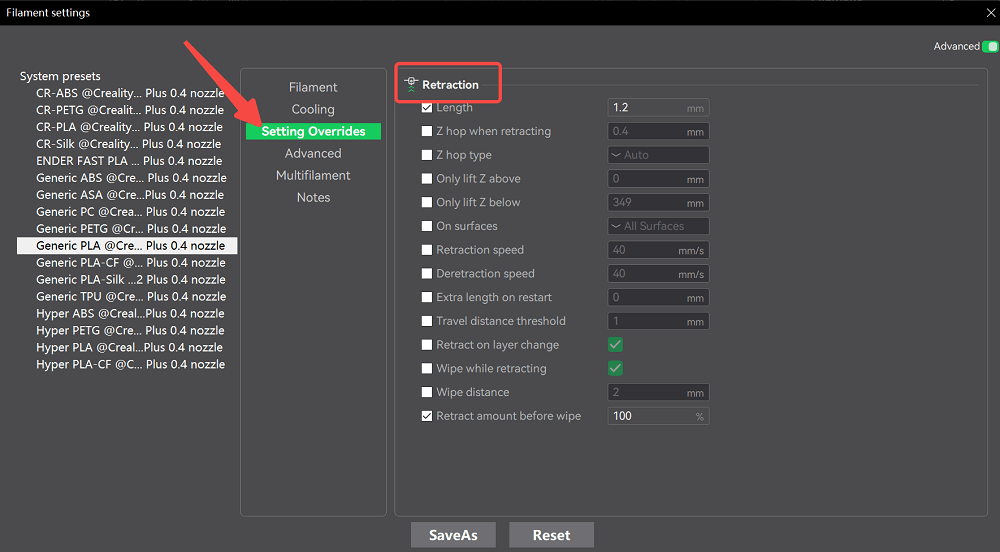
Fine-tuning retraction minimizes stringing between bridge lines. Some slicers also let you enable “coasting” to stop extrusion slightly before the end of a bridge line — reducing blobs and pull lines.
Keep the Nozzle Clean
A dirty nozzle tip can drag semi-molten plastic and ruin a bridge line. Wipe and clean the nozzle before calibration or long prints.
Best 3D Printing Bridging Settings in 2026
3D printing hardware is getting faster and smarter, especially with the rise of CoreXY and high-flow systems. But even as technology advances, the fundamentals of bridging stay the same.
| Setting | PLA | PETG | ABS | Notes |
| Bridge Speed | 25–40 mm/s | 20–30 mm/s | 20–35 mm/s | Slower for longer spans. |
| Bridge Flow Rate | 90–95% | 85–90% | 90–95% | Lower to stretch filament taut. |
| Bridge Fan Speed | 100% | 70–80% | 40–60% | Essential for solidification. |
| Bridge Temperature | 195–205 °C | 230–240 °C | 240–250 °C | Reduce by 5°C if sagging. |
| Max Bridge Distance (Recommended) | ≤ 25 mm | ≤ 15 mm | ≤ 20 mm | |
| Wall Speed | 20 mm/s | 20 mm/s | 20–35 mm/s | For bridge walls. |
Each filament behaves differently when bridging:
-
PLA – Best overall bridging performance. It cools fast, stays rigid, and easily handles long gaps.
-
PETG – Strong but stringy. It needs more cooling and slower speeds to avoid sagging.
-
ABS – Moderate bridging; works better in enclosed printers to prevent warping.
-
TPU / Flexible Filaments – Generally poor at bridging due to their softness.
If you print mainly with PETG, pay extra attention to cooling direction. Adding a duct or part-cooling fan upgrade can greatly improve results.
FAQs
Should I use supports under bridges? Not always. For small to mid-sized gaps, you can usually get away without them. But if the bridge is long or includes detailed geometry, a thin support interface might save you from a failed print.
Why is PETG bridging harder than PLA? PETG stays soft longer after extrusion, so it tends to stretch and sag before cooling. You can counter that with stronger cooling and slower print speeds.
How far can a 3D print bridge?
It depends on your printer, cooling setup, and filament. Most well-tuned desktop FDM printers can handle bridges of about 20–25 mm (around 1 inch) cleanly.
Conclusion
Bridging might look simple, but it’s one of the best indicators of how well your printer is tuned. Once you understand why sagging happens and how to control cooling, flow, and speed, you’ll be amazed at how much cleaner your parts look.
Think of it this way: every bridge you master is one less support structure you’ll have to remove later — and one more step toward professional-looking prints straight off the bed.