


The pure joy of designing a gaming miniature or custom car part using a 3D printer is amazing. Watching as the device layers out a beautiful representation makes you feel accomplished and ready for more intricate designs. The problem is when debris or filament residue gets in the way of your build.
To ensure you’re getting the best results from your machine, you will need a little 3D printer nozzle cleaning. Clogs can and will build up over time, which will likely compromise the print quality. Many owners who set their printers to building while they are away come home to a stopped device because of an unwanted clog.
While each device is unique, the basic printer unclog nozzle steps apply to PLA, ABS, PETG, and other flexible filaments. Time to learn how to unclog 3D printer nozzle and extend the usable life and efficiency of your home or business printer.
How to Recognize a Clogged Nozzle?
The first step to clean 3D printer nozzle is recognizing you have a problem. Before you can fix the issue, you’re going to have to get to know your machine a bit more closely. Again, different printers have unique needs. What works for how to clean K1C nozzle may be different than the Creality Hi Combo. Always read your instruction manual before getting started.
Common symptoms you should be on the lookout for with your 3D printer nozzle include:
-
Under-Extrusion: The printer is showing it is in the process of printing, but there is no or very little filament actually coming out of the end nozzle.
-
Clicking or Grinding Noises: If the extruder motor is pushing too hard to produce filament, it is likely to generate a rhythmic clicking noise or grinding.
-
Stringy or Uneven Layers: A significant indicator that it’s time to double-check the nozzle is when you have an inconsistent extrusion that makes your model’s shape look weird or distorted.
-
Gaps or Missing Sections: A clogged nozzle will cause mechanical weakness, resulting in poor print quality and surface imperfections where entire sections are skipped over during printing.
A quick flow test will help determine if you have a clog you cannot see. Most of the software available in the community includes a shortcut command for manual filament extrusion. If nothing comes out, you know it's time to learn how to clean the nozzle of a 3D printer.
Why Does a 3D Printer Nozzle Get Clogged?
The problem with some 3D printers is a lot can go wrong. These are incredible machines that can do wonders for your creativity, hobbies, or business. Like any other piece of equipment, they do require a little TLC to “sing” the way you want. Some of the more common reasons you’ll have to do a little 3D printer nozzle cleaning include:
-
Low-Quality or Moist Filament: Poorly stored filaments exposed to moisture or too dry from UV light lead to issues. High moisture will make the filament bubble or expand, causing blockages.
-
Incorrect Printing Temperature: Different 3D printers operate at different temperatures. However, most filaments have a recommended range for getting the best results. If the filament is not melting properly, it will leave behind debris and contaminants that harden (sometimes called getting carbonized).
-
Frequent Material Changes: Flipping from PLA to PETG quickly without purging or cleaning the nozzle will leave residue behind. You always want compatibility between the materials you’re using and the machine you rely on.
-
Retraction Settings: We’ve all been there. Frustrations over printing quality lead to pulling on the filament too hard or the machine retracting so fast that the hot ends end up in cooler printer zones, leading to jams and solidifying materials.
-
Residue from Additives: Never include additives in your printing materials without first checking your device's user manual. Glow-in-the-dark filaments or abrasive additives are likely to leave more residue than standard options.
Say, for example, you’re running the Creality K2 Plus 3D Printer. The best material for the job would be Creality RFID filament. These may include Hyper PLA RFID, Hyper PAHT-CF, and others. Using the filament that matches the machine cuts way down on unwanted clogs.
How to Unclog a 3D Printer Nozzle?
Now down to the actual work of how to unclog 3D printer nozzles so you get a great printed result. The bad news is that you’ve likely got some material, debris, or dirt in the nozzle causing a problem. The good news is most machines are built to be durable enough and easy to access so you can quickly resolve the issue.
There are many different methods for how to clean K1C nozzles or other formats. Here are the top methods we recommend.
1 – Manual Needle or Nozzle Cleaning Tool
The first method would be to carefully insert a fine, stainless steel needle into the nozzle's end. Ensure the nozzle is heated to the proper printing temperature, so you may want to use a glove for safety. Move the needle around, up, down, and back and forth gently. That should dislodge any minor obstructions or lighter clogs.
2 – Cold Pull Method
The “cold pull” way for 3D printer unclog nozzle methods is slightly more aggressive. You want to get the nozzle up to around 200°C for PLA material (higher if the material requires it). Once at the right temperature, insert a nylon filament or cleaning filament. It should start extruding, and you can lower the temperature to around 90-110°C as it cools. That will allow you to firmly pull the cooled filament out. It should be solid, but still pliable. That will “unstick” any debris.
An “atomic pull” version of this method sometimes works. You heat up the nozzle to the material target temperature, push through the filament until it extrudes, then let it cool to anywhere from 90-160°C. Tug on the filament and check to see if it is shaped like the nozzle – that’s how you know it worked.
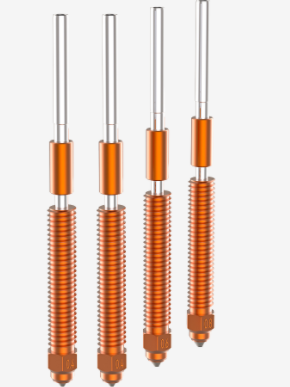
3 – Nozzle Removal and Soaking
How to unclog 3D printer nozzles often comes down to what is specifically trapped in the final part of your machine. If you heat the nozzle slightly (around 150°C), you can quickly soften any material stuck inside. Unscrew your nozzle (with a tool if required) and soak it in some mild acetone (for ABS) or a commercial cleaning agent from a trusted source (ethyl acetate for PLA).
A few hours usually does the trick. Then, you can use a soft brush or wire to scrub out anything left over.
The last solution is simply replacing your nozzle. If cleaning filament or a wire brush won’t work on a partial clog and chemical soaking or pull methods won’t dislodge a fully clogged device, then you may have to replace the nozzle. Most devices recommend replacing the nozzle every 3-6 months.
How to Prevent a Clogged Nozzle?
Prevention is just as important as learning how to clean 3D printer nozzles. Some proactive work upfront will save you a lot of time, money, and hassle when you’re hoping to create a new stand for your smartphone or prototype model.
-
Always store the filament you’re using in a cool, dry space away from UV light and moisture.
-
Only use the right materials your user manual recommends and ensure they are premium quality.
-
Maintain the proper temperature settings outlined by your 3D printer model to avoid carbonization or incomplete melting.
-
Be sure to purge your nozzle by extruding 5-10cm of material after each material change.
-
Keep up with regular 3D printer nozzle cleaning to keep your device in its best condition.
-
You can consider installing a filament filter that catches extra dust and debris before they end up in the nozzle and clogs your device.
Adding any of these habits to your regular 3D printing routine will dramatically improve the outcomes of your designs.
Wrapping Up
Learning how to clean the nozzle of a 3D printer is essential to prevent unwanted issues and have an efficient device working whenever you need it. Whether you’re just starting out and looking to get into the hobby or are printing 24/7 as a side hustle, the steps outlined above go a long way to extending the usable life of your 3D printer.
Most Creality products, like the Ender-3 V3, are designed with user-friendly interfaces and simplified maintenance suggestions. The modular nozzles and easy access ensure you can keep your machine in great health, but use a high-quality filament from Creality for even more peace of mind. You’ll be printing all your dream designs in no time with only a little bit of effort.
FAQs
How often should I clean my 3D printer nozzle?
The number of times you learn how to clean K1C nozzle varies from other models. The general rule of thumb is to clean the nozzle every 5-10 uses or if you’re making a material change.
Can I use a needle to unclog a 3D printer nozzle?
Yes, you can. Make sure the needle is fine in diameter and made from stainless steel. Be careful to only dislodge material and not scrape the inside of the nozzle.
What is the cold pull method, and how does it work?
The cold pull method will work. You have to heat the nozzle, insert the filament, and cool the material before pulling it back out. It is considered a non-invasive method for 3D printer nozzle cleaning.
Should I remove the nozzle to clean it?
Larger or more stubborn clogs may require removing the nozzle and soaking it or using a brush.
Can I prevent nozzle clogs?
If you clean your nozzle regularly, use premium quality material, maintain proper temperature settings, and pay attention to any debris buildup, you should prevent clogs.
Can I use a wire brush to clean my nozzle?
A brass wire brush will help clean your 3D printer nozzle, but don’t use steel. That will damage the surface.