

Welcome to Creality    Meet the K3 🔥

Creality
3D PrintersEcosystem3D Footwear SupportSoftwareBlogCreality CloudInvestor Relations
Store
FlagshipSPARKXHi SeriesEnder SeriesHALOT Series
K3
New
K3
K2
K2
K2 Plus
K2 Plus
K2 Pro
K2 Pro
K2 SE
K2 SE
More Products
Compare
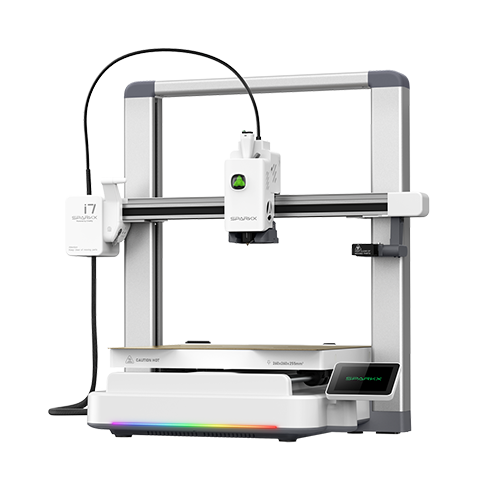
SPARKX i7
New
SPARKX i7
More Products
Compare
Creality Hi
Creality Hi
More Products
Compare
Ender-3 V3 SE
Ender-3 V3 SE
Ender-3 V3 KE
Ender-3 V3 KE
Ender-3 V4
New
Ender-3 V4
Ender-5 Max
Ender-5 Max
Ender-3 V3 Plus
Ender-3 V3 Plus
More Products
Compare
HALOT X1-Neo
New
HALOT X1-Neo
HALOT-X1
HALOT-X1
HALOT R6
HALOT R6
HALOT-MAGE S
HALOT-MAGE S
HALOT-MAGE
HALOT-MAGE
More Products
Filaments3D ScannersLaser EngraversFilament DryersAccessories
Hyper Series
Hyper Series
CR Series
CR Series
Soleyin Series
Soleyin Series
Ender Series
Ender Series
More Products
Filament Guide
Creality Pika
New
Creality Pika
Sermoon P1
New
Sermoon P1
Sermoon X1
Sermoon X1
Sermoon S1
Sermoon S1
Creality Raptor Pro
Creality Raptor Pro
More Products
Falcon A1C
New
Falcon A1C
Creality Falcon T1
New
Creality Falcon T1
Creality Falcon A1 Pro 20W
Creality Falcon A1
Creality Falcon A1
Creality Falcon2 Pro 60W
More Products
SpacePi X4L
New
SpacePi X4L
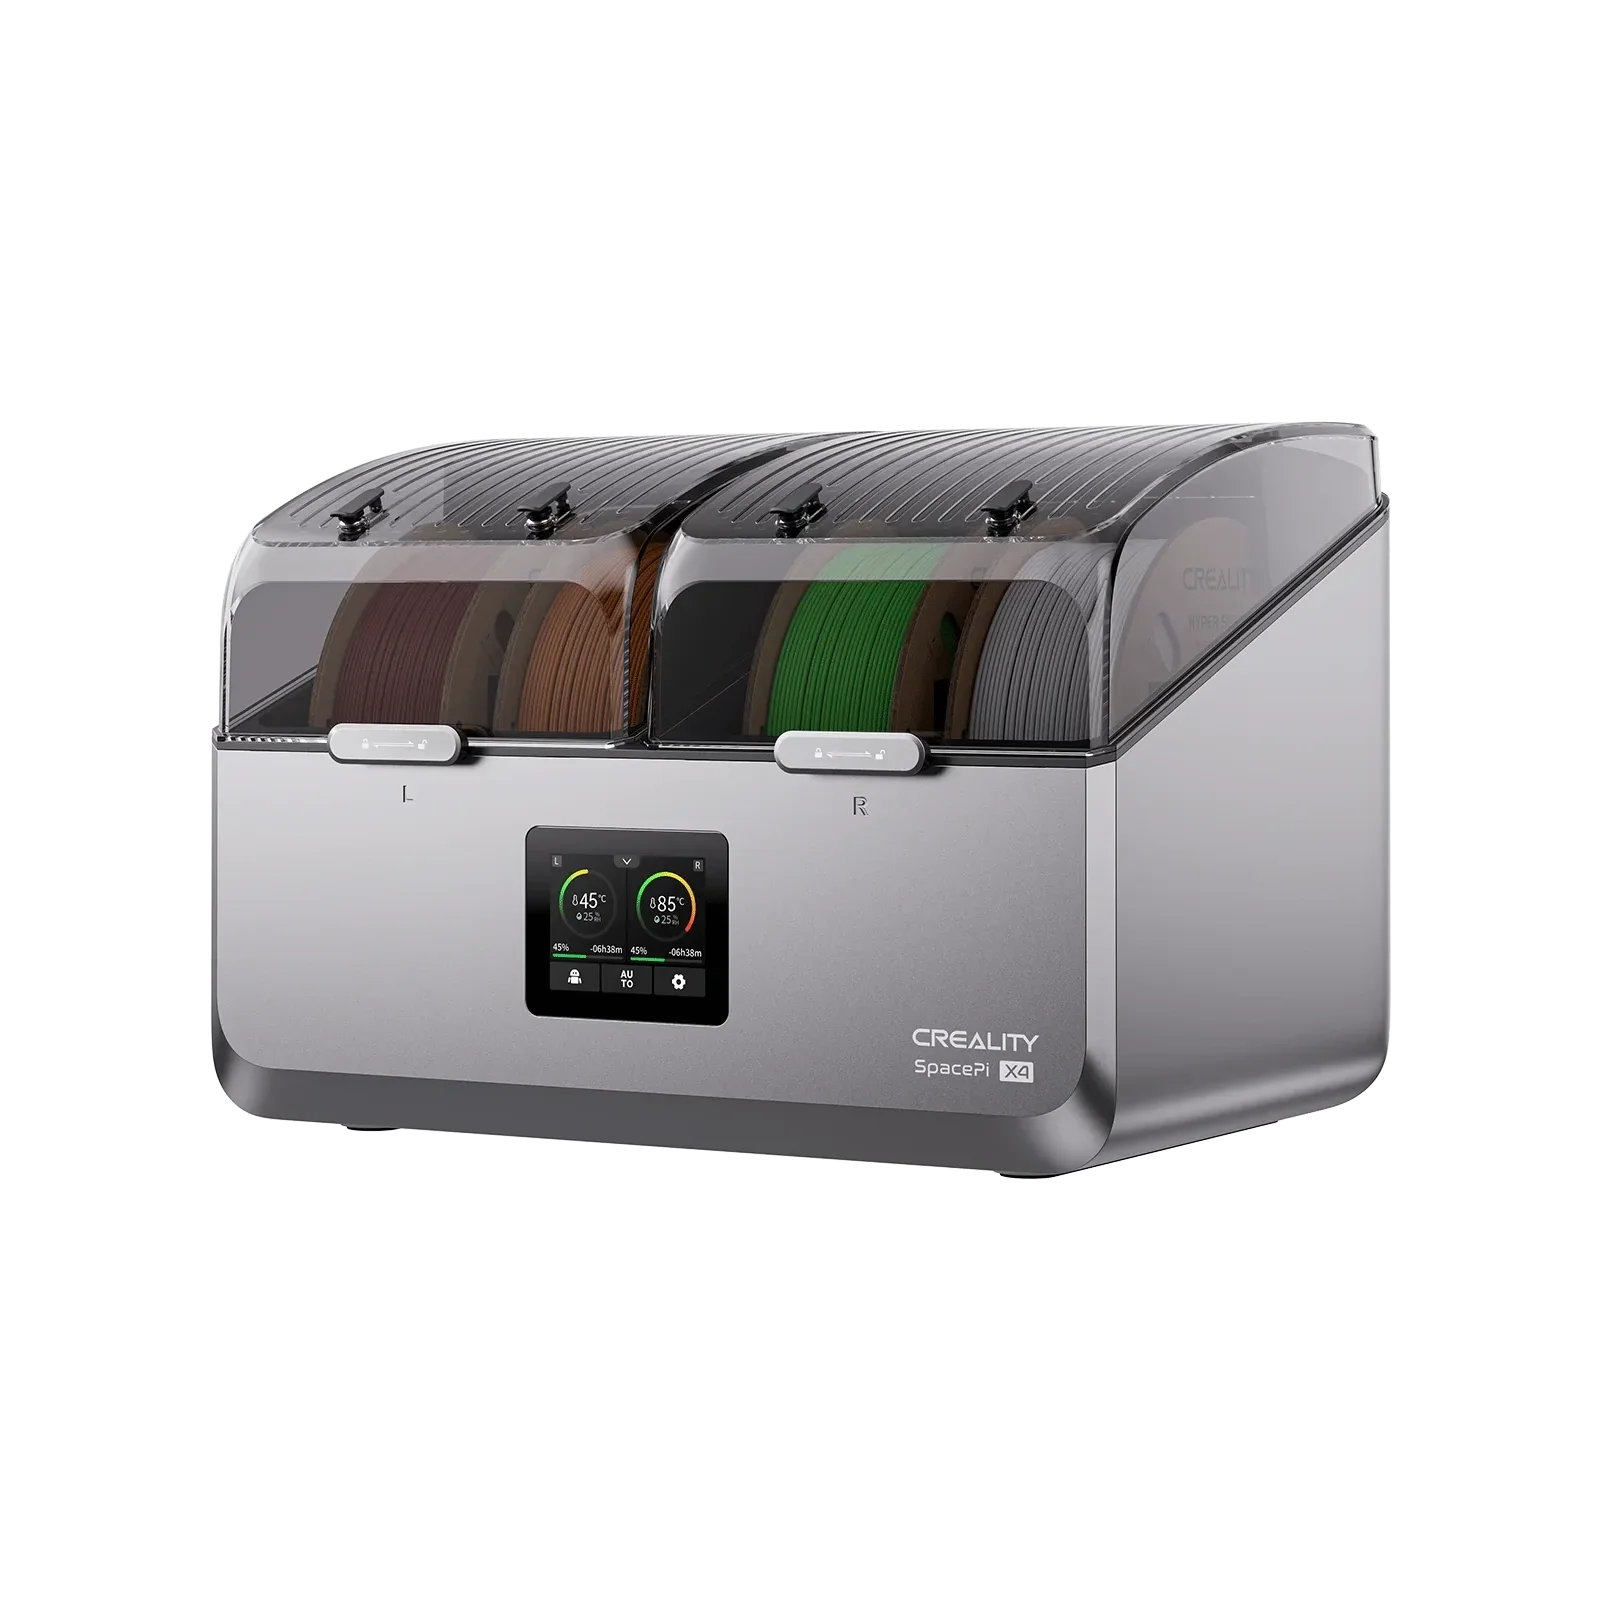
SpacePi X4
SpacePi X4
SpacePi
SpacePi
More Products
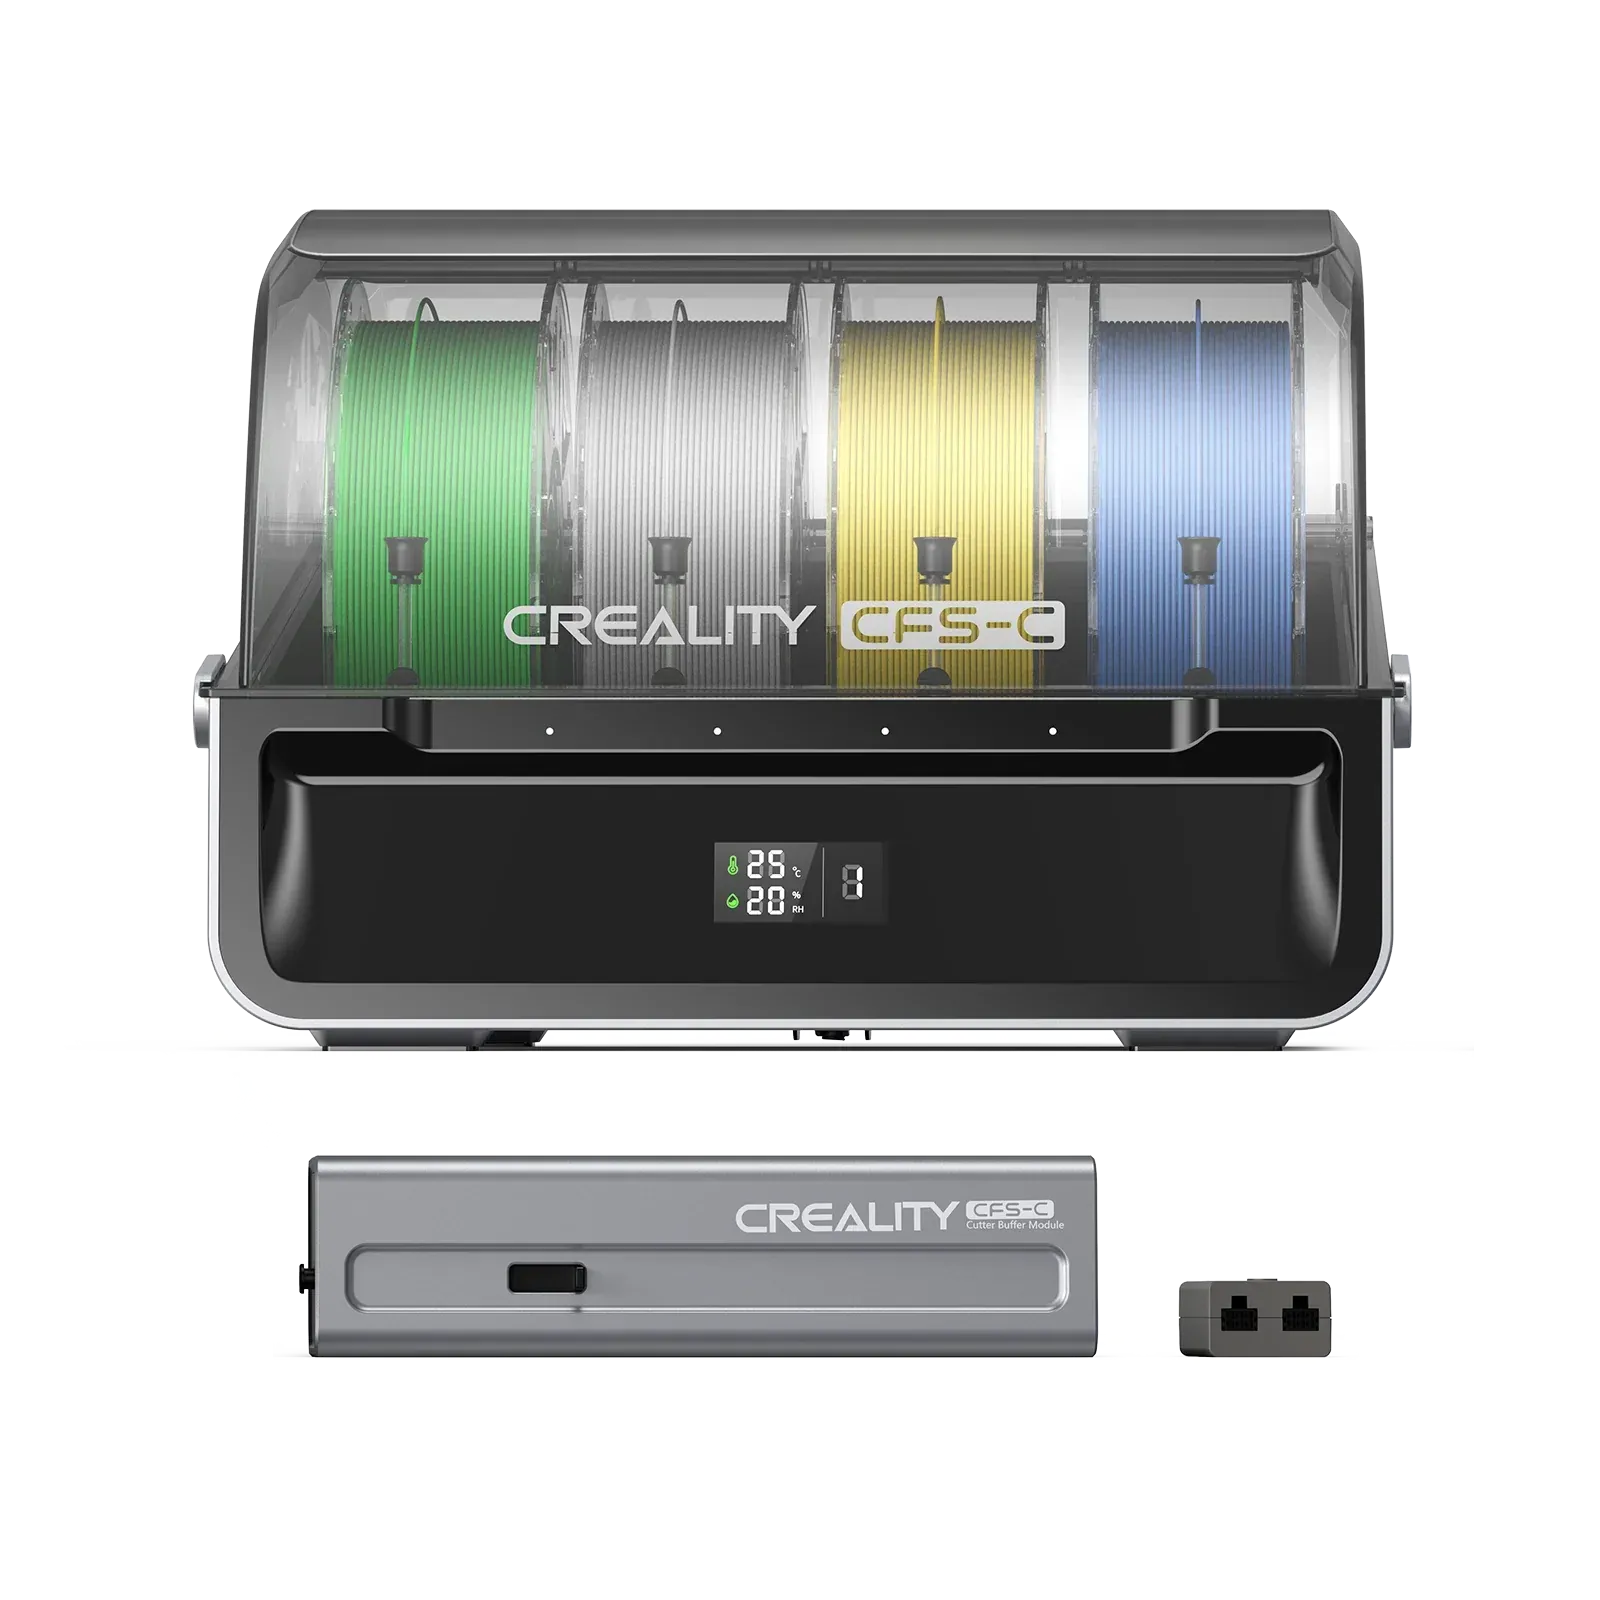
CFS-C
New
CFS-C
CFS - Creality Filament System
Creality Air Purifier
Multifunctional Protective Cover
Creality Sonic Pad
Creality Sonic Pad
More Products
Download Center
3D Models
Creality Cloud App
Firmware & Software
Service Center
Help Center
Creality Wiki
Product Support
Video Guides
Product Comparison
Filament Guide
Find Your Printer
Discover
User Stories
Beginner 3D Printers
3D Scanner Applications
3D Printing in Education
Blog Center / How to Adjust SPARKX i7 Belts Manually | X/Y/Z Axis Tension Guide
Contents
contents

Join Our Newsletter

Subscribe to our newsletter for 3D printing insights, step-by-step guides, and inspirations for your next 3D printing adventure.

By subscribing, you agree to our Terms and Privacy Policy.

Social Media

  • Youtube
  • Facebook
  • Instagram
  • TikTok
  • Twitter
  • Reddit
  • Discord
  • LinkedIn

Contents

  • X-axis Belt Tensioning
  • Y-axis Belt Tensioning
  • Z-axis Belt Tensioning
  • Vibration Compensation Calibration

How to Adjust SPARKX i7 Belts Manually | X/Y/Z Axis Tension Guide

Apr 24, 2026 10:55:32

The SPARKX i7 is equipped with three belts, which are transmission components responsible for driving the movement of the toolhead (X), heated bed (Y), and X-axis (Z) along the designated directions. Proper belt tension helps ensure stable motion and consistent print quality.

The i7 requires manual belt tension adjustment. Below are the detailed tensioning steps.

Required Tools:

H2.0 hex wrench (included with the printer)

H2.5 hex wrench (included with the printer)

X-axis Belt Tensioning

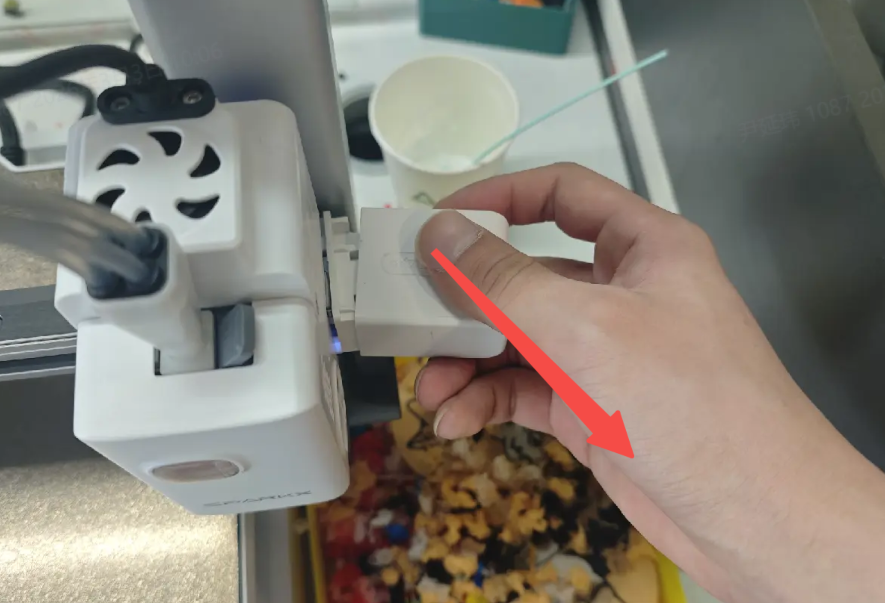
The X-axis belt tensioner is located at the right end of the X-axis. Remove the protective cover to access it.
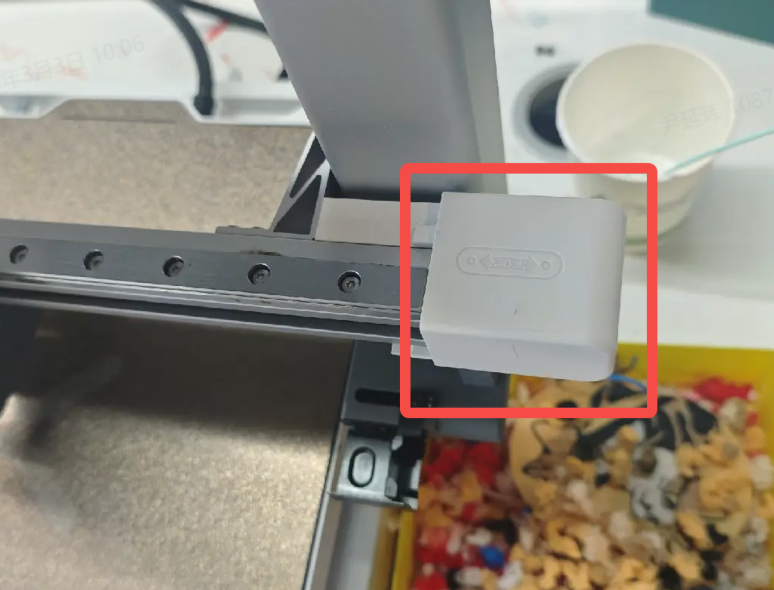
X-axis Belt Tensioning

Use an H2.0 hex wrench to loosen the two tensioning screws counterclockwise by one turn (do not remove them completely).
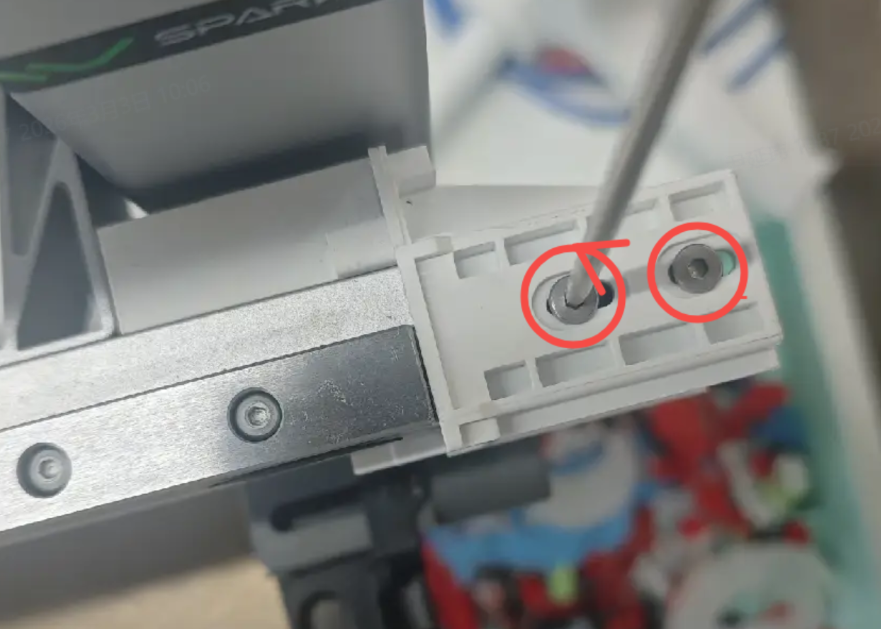
H2.0 hex wrench

Move the toolhead left and right three times, then tighten the two tensioning screws and reinstall the protective cover.
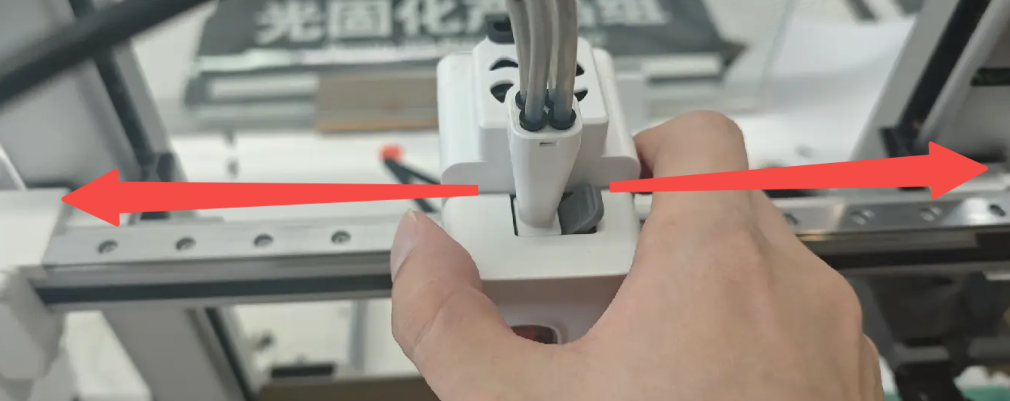
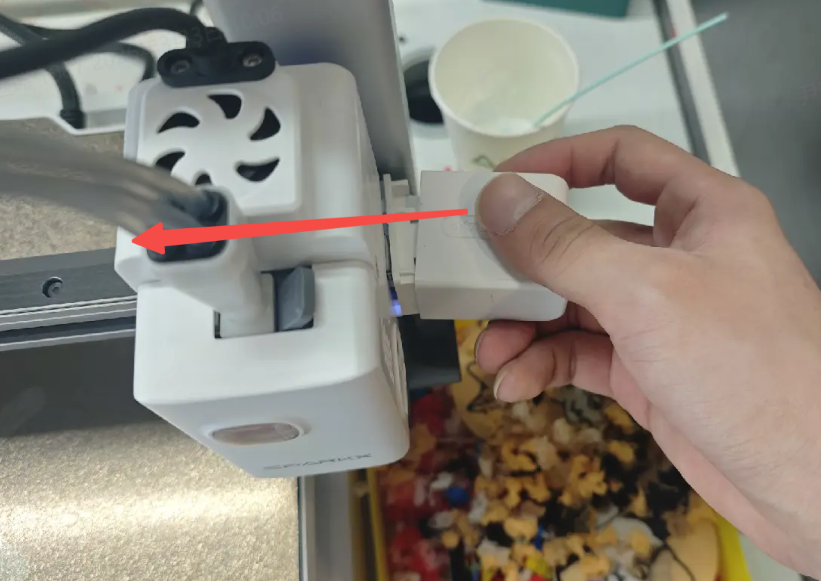
X-axis Belt Tensioning-4
X-axis Belt Tensioning

Y-axis Belt Tensioning

The Y-axis belt tensioner is located on the chassis beneath the heated bed. Move the heated bed to the rear to access it, then remove the protective cover to expose the two tensioning screws.
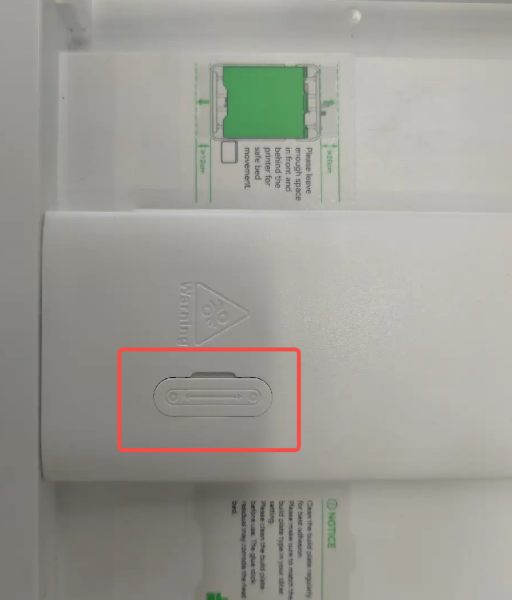
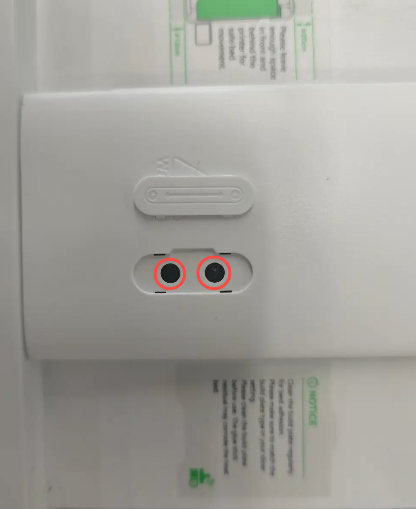
Y-axis belt tensioner

Use an H2.5 hex wrench to loosen the two tensioning screws by one turn (do not remove them completely).
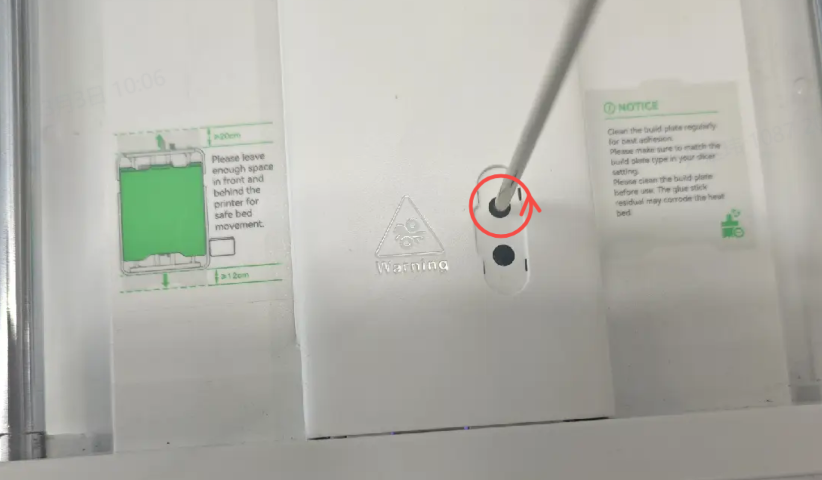
H2.5 hex wrench

Move the heated bed forward and backward three times, then tighten the tensioning screws and reinstall the protective cover.
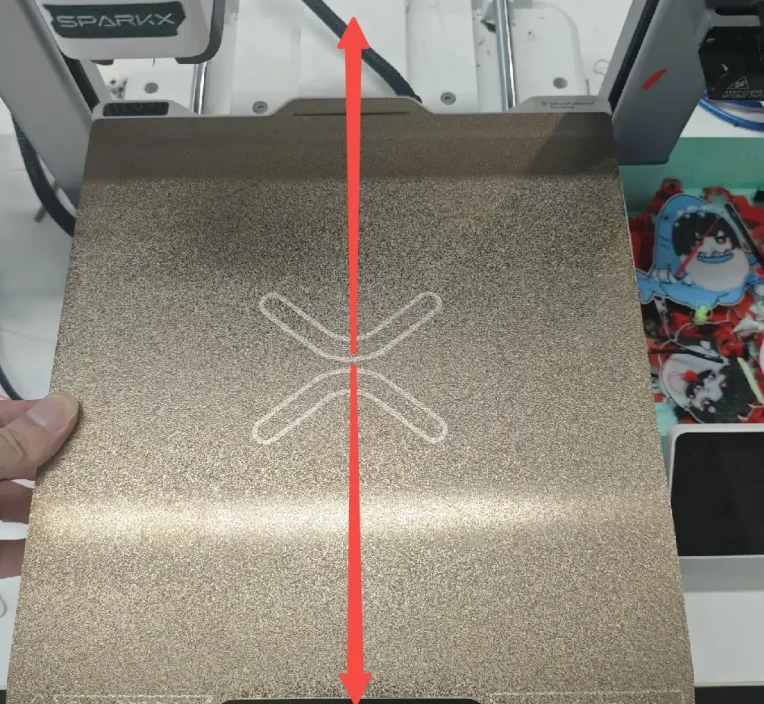
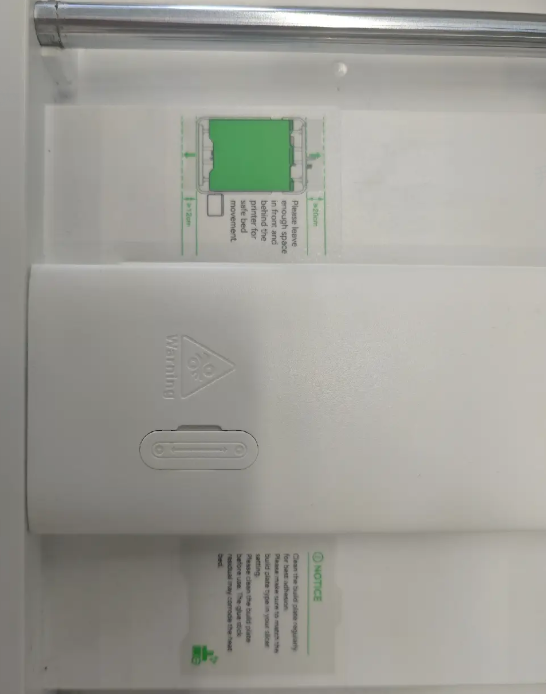
Move the heated bed forward
reinstall the protective cover

Z-axis Belt Tensioning

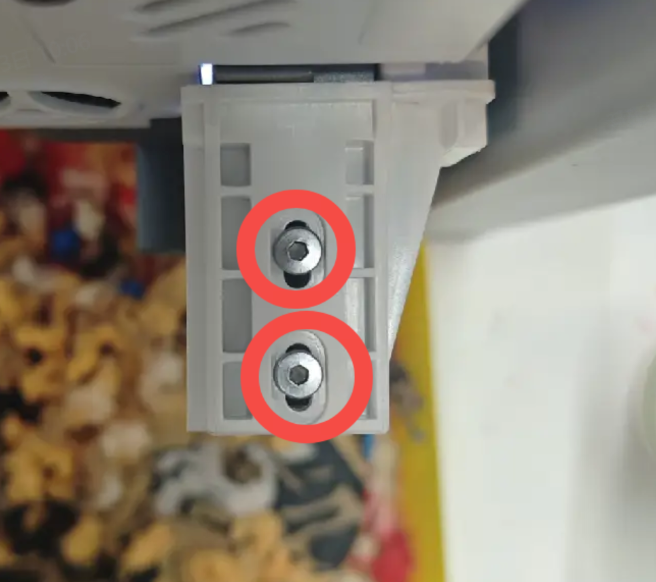
The Z-axis belt tensioner is located at the bottom of the printer. Tilt the printer to access it.
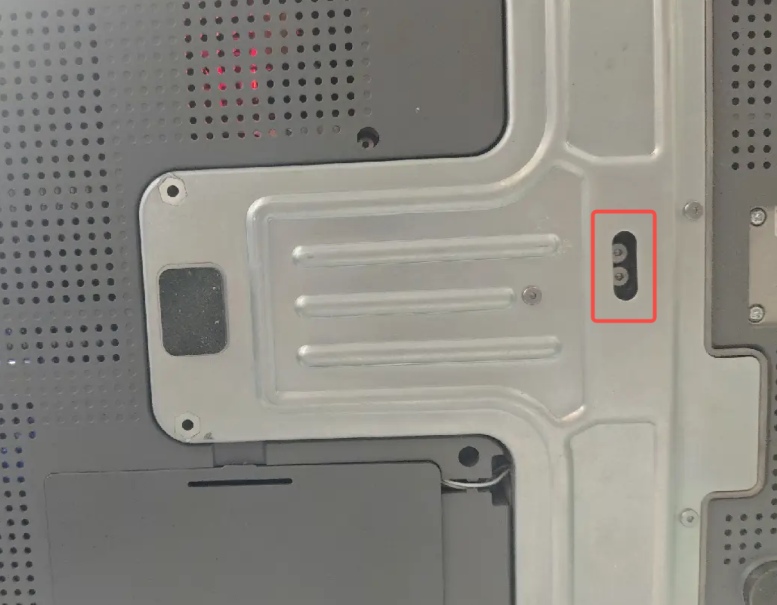
Z-axis Belt Tensioning

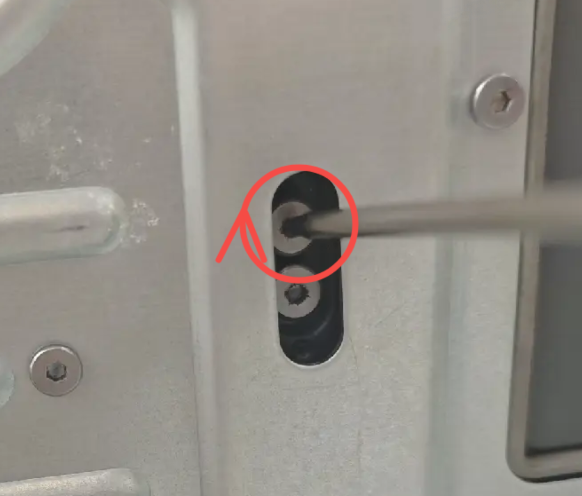
Use an H2.0 hex wrench to loosen the two tensioning screws counterclockwise by one turn (do not remove them completely).
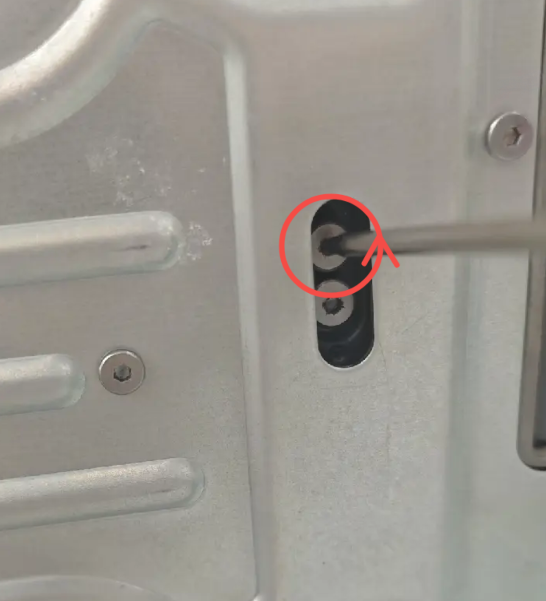
H2.0 hex wrench (2)

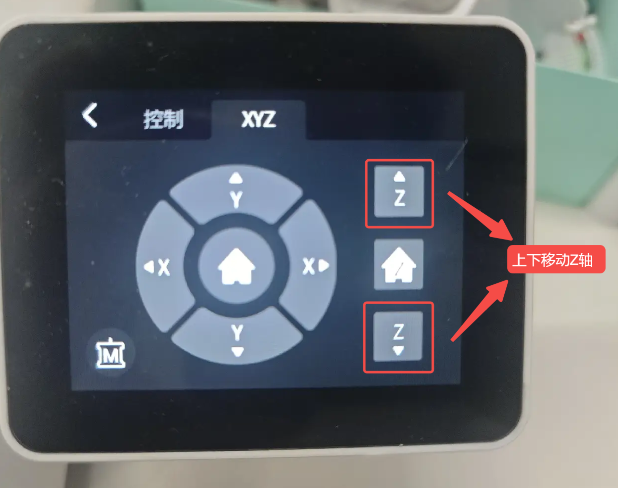
Return the printer to its upright position, perform a Z-axis homing in the “Control → XYZ” menu, and then move the Z-axis up and down three times (make sure the nozzle does not collide with the heated bed).
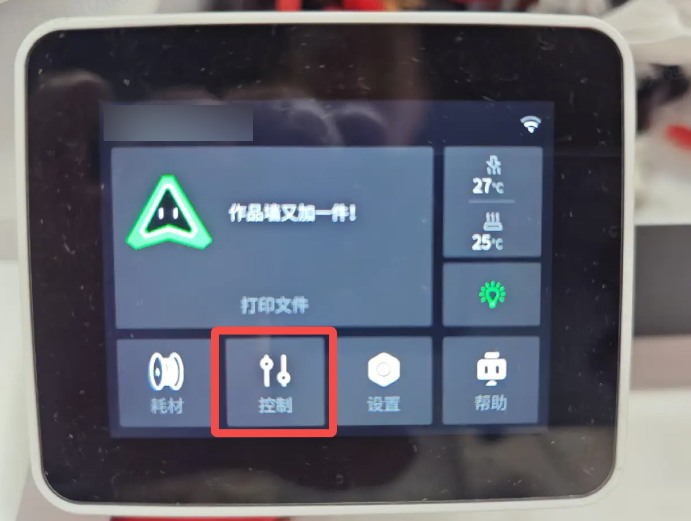
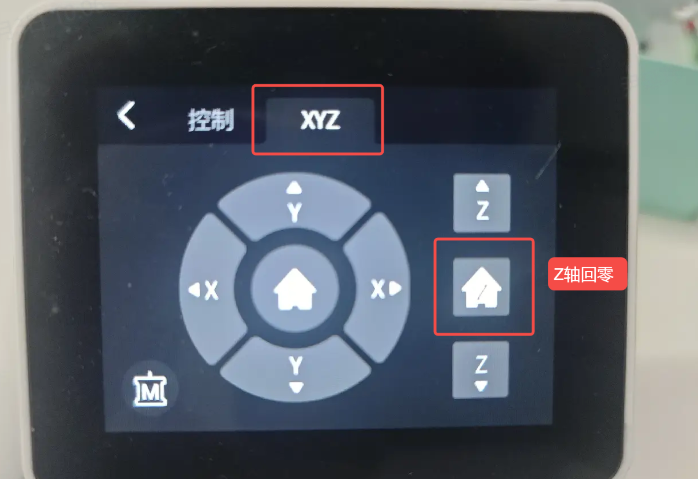
Z-axis homing
Z-axis homing
Z-axis homing

Tighten the tensioning screws.

Tighten the tensioning screws

Vibration Compensation Calibration

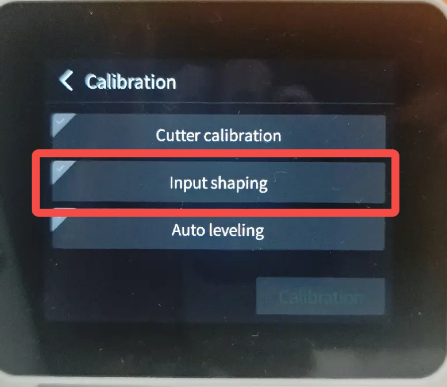
After tensioning the belts on all axes, perform a vibration compensation calibration. Tap “Help → Maintenance → Calibration” and check “Ripple Optimization” to start the calibration. Wait for the calibration to complete, and the printer will be ready for normal use.
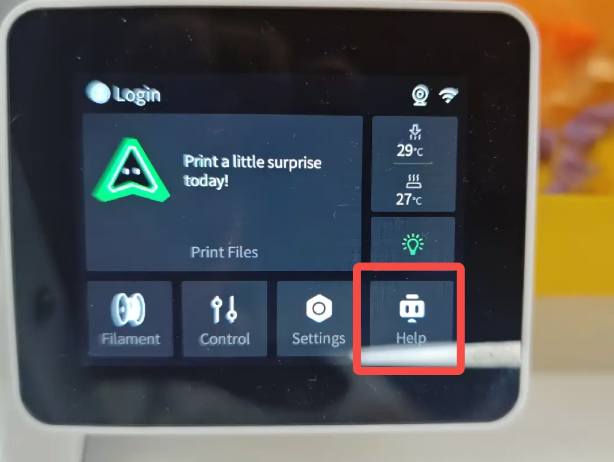
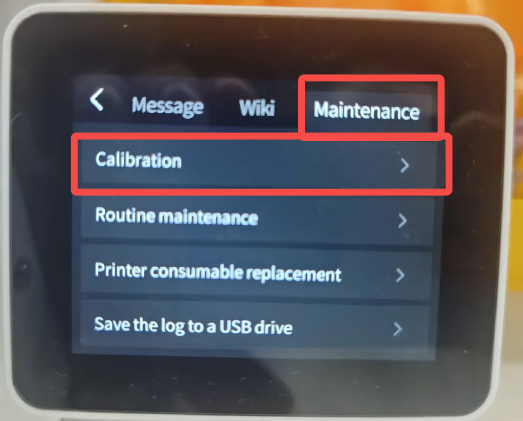
Vibration Compensation Calibration

SHOP

  • Store
  • Falcon Store
  • Where to Buy
  • K Series
  • Hi Series
  • Ender Series

COMMUNITY

  • Forum
  • Creality Cloud
  • Discord
  • Reddit
  • Open Source

SUPPORT

  • Downloads
  • Help Center
  • Video Guides
  • Warranty & Repairs
  • Creality Wiki

ABOUT

  • About Us
  • Contact Us
  • Distributors
  • Investor Relations
  • Affiliate Program

Be the First to Know

Get the latest news from Creality.

By subscribing, you agree to our Terms and Privacy Policy.

  • Youtube
  • Facebook
  • Instagram
  • TikTok
  • Twitter
  • Reddit
  • Discord
  • LinkedIn
Privacy PolicyTerms of SalesShipping PolicyFeedback
United States(English)

Copyright © 2026 Creality Co., Ltd. All rights reserved.