Tool
Thin L wrench or nozzle cleaner
New cutter

Operation Steps
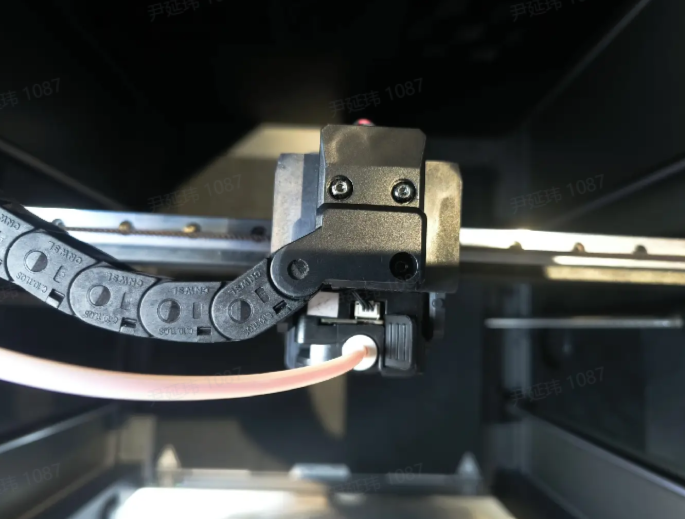
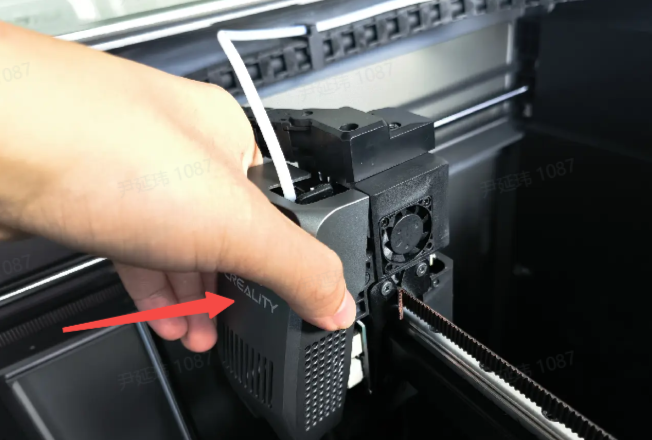
Move the hotend
Move the hotend to the center of the printer, leaving some space for operation on the left side of hotend.
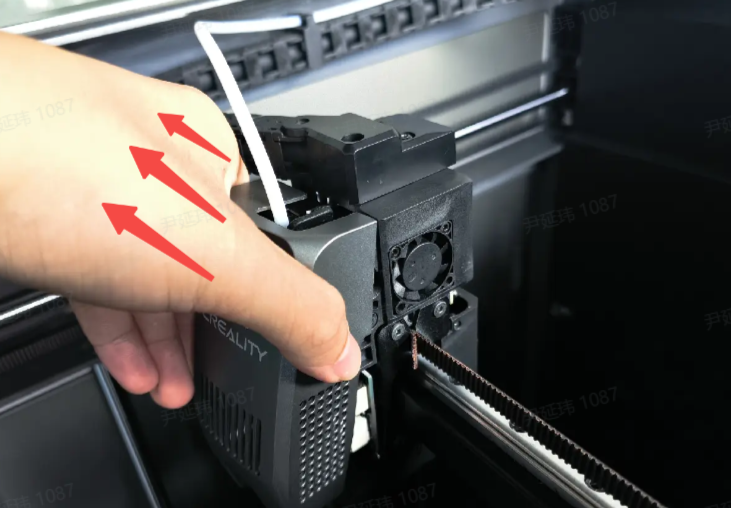
Remove hotend cover
Take off the hotend cover of the printer diagonally upward with your hands. Note that the cover is magnetically attached and is not fixed with screws.

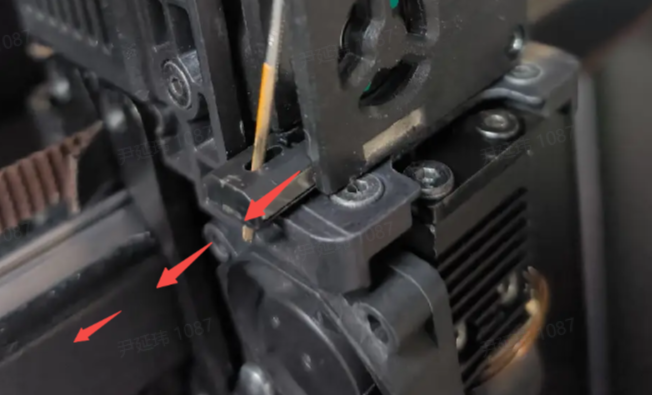
Insert the thin L wrench or nozzle cleaner
Use a nozzle cleaner or L wrench to reach in from the left side of the extruder gear and touch the cutter.
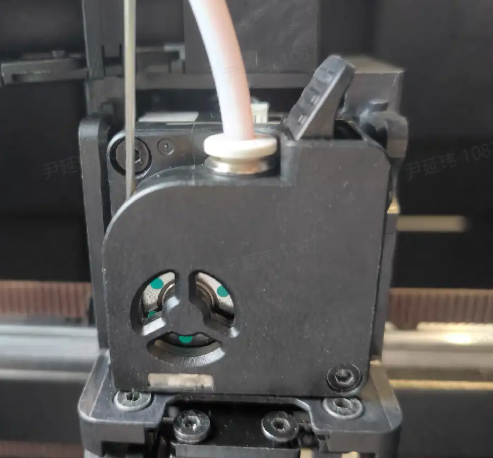
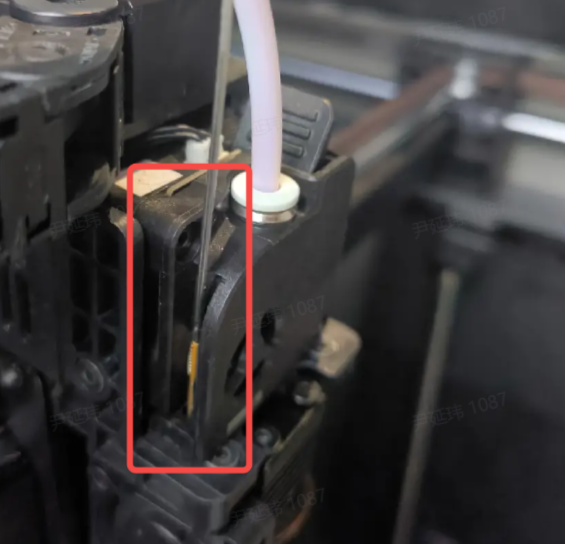
Pull out the cutter
After the tool is hooked onto the cutter, pull the cutter out slightly to the left.
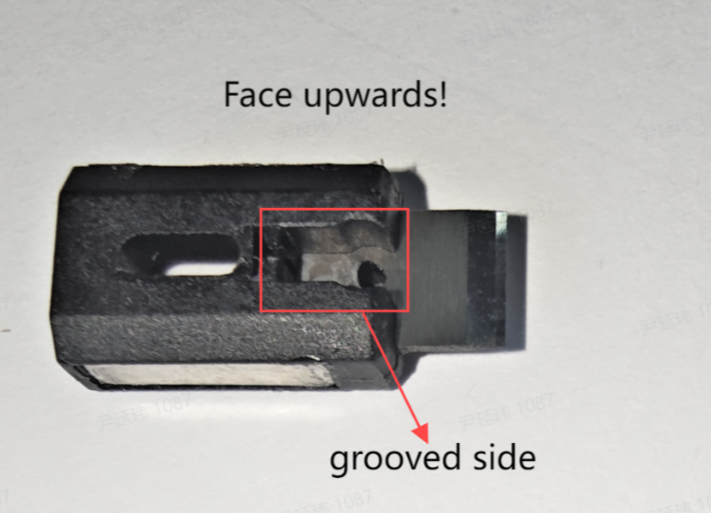
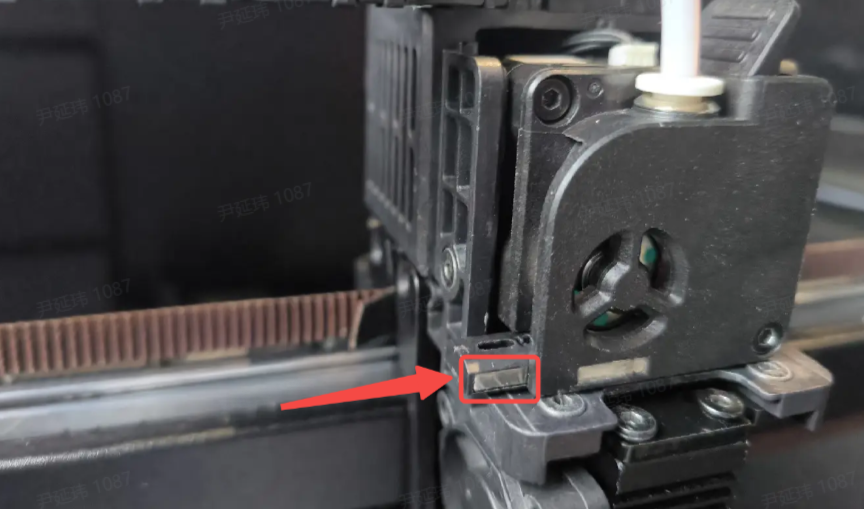
Install new cutter
Take out the new cutter and install it into the cutter position
Note:
The direction of the cutter: the grooved side of the cutter holder should face upwards, as shown in the figure below.
Install new hotend cover
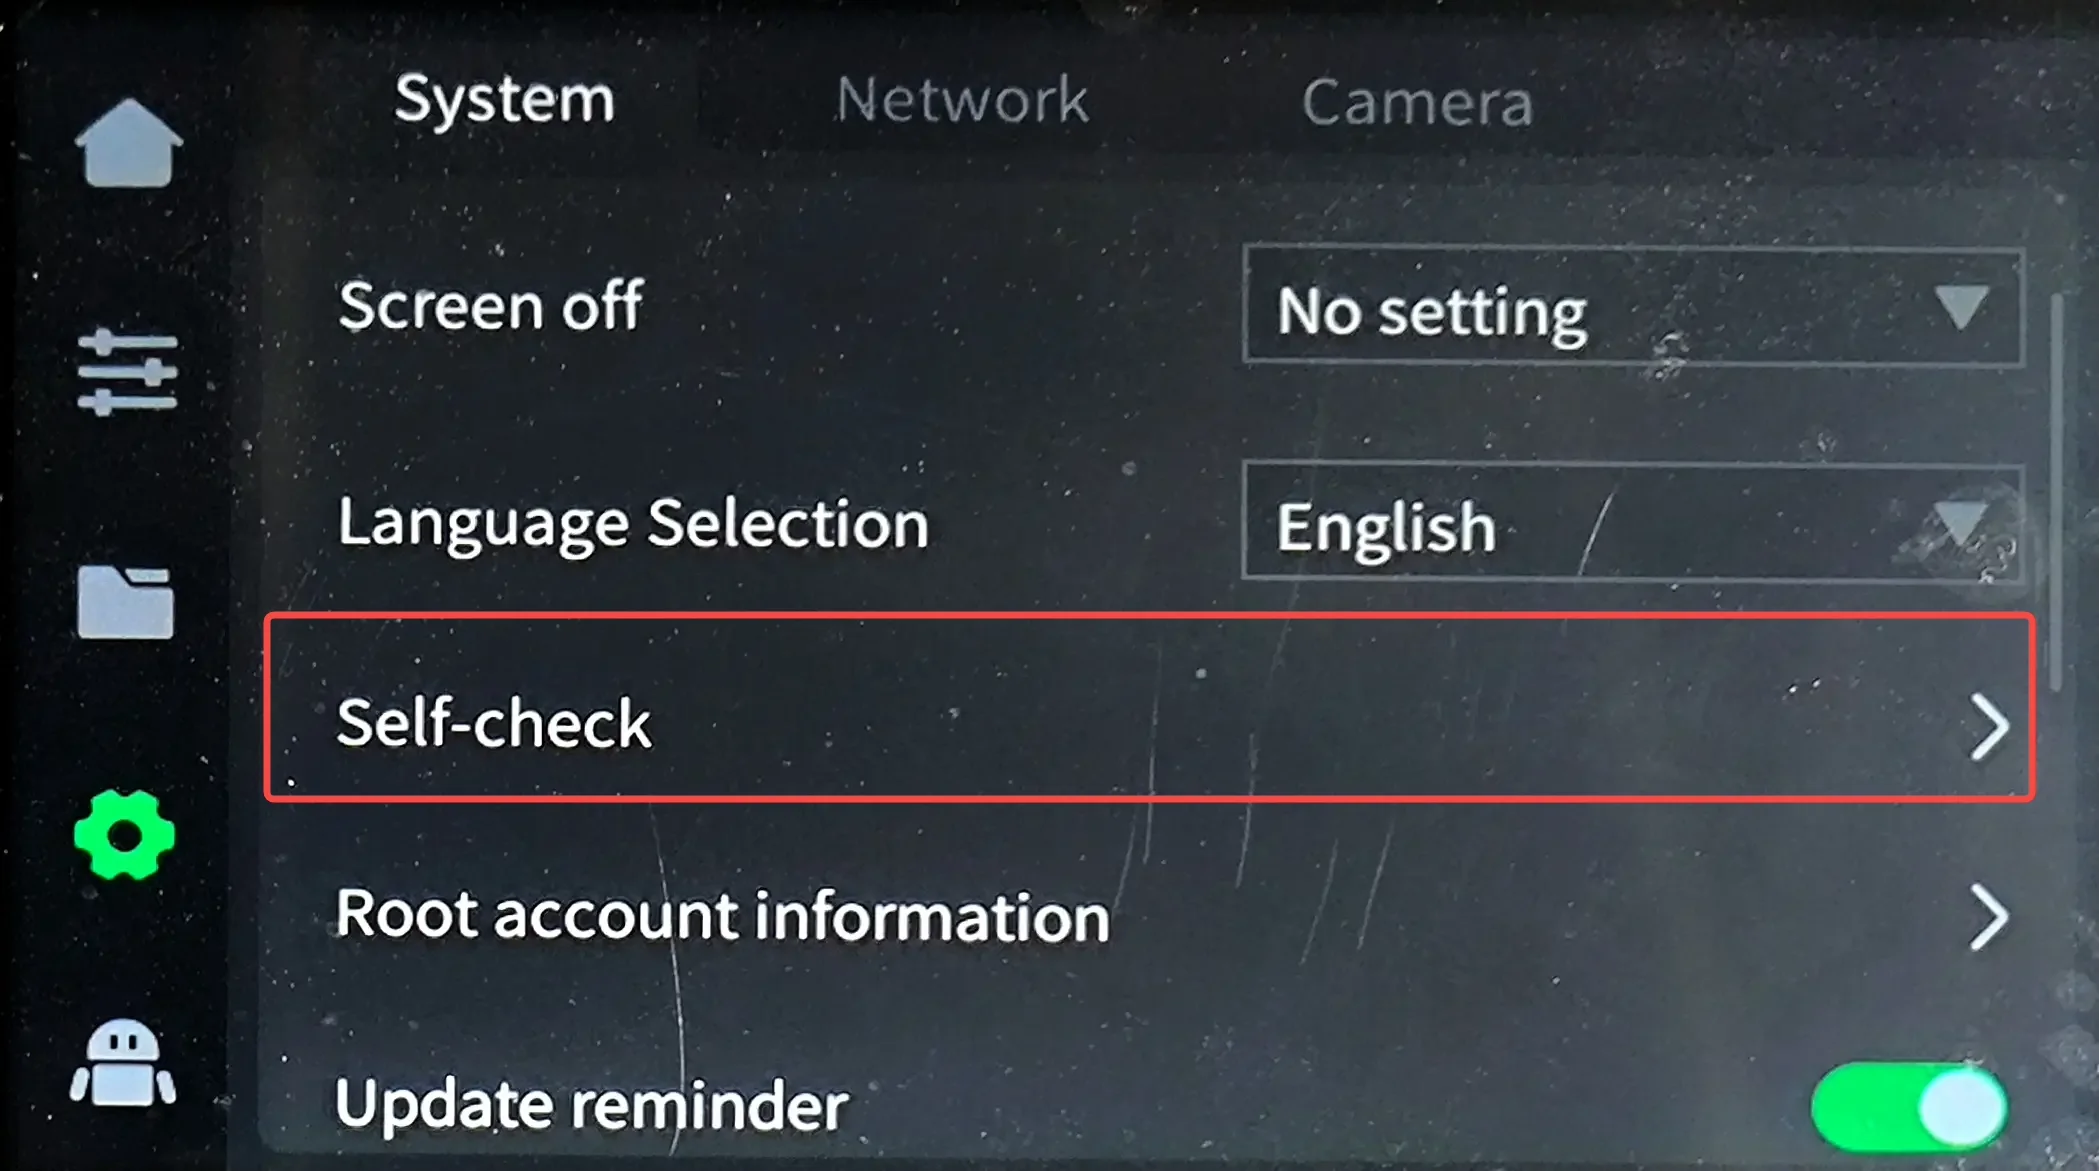
K2/K2 Pro Device Self-check
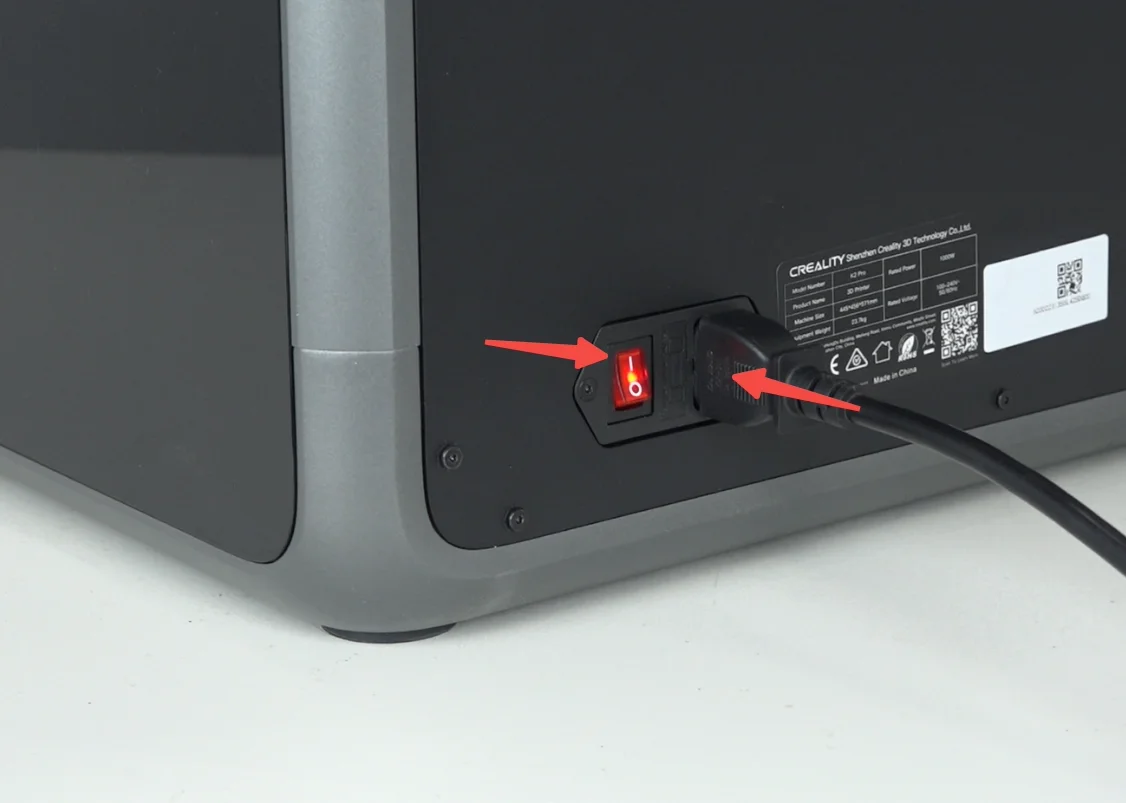
Plug in the power cord, and turn on the printer.
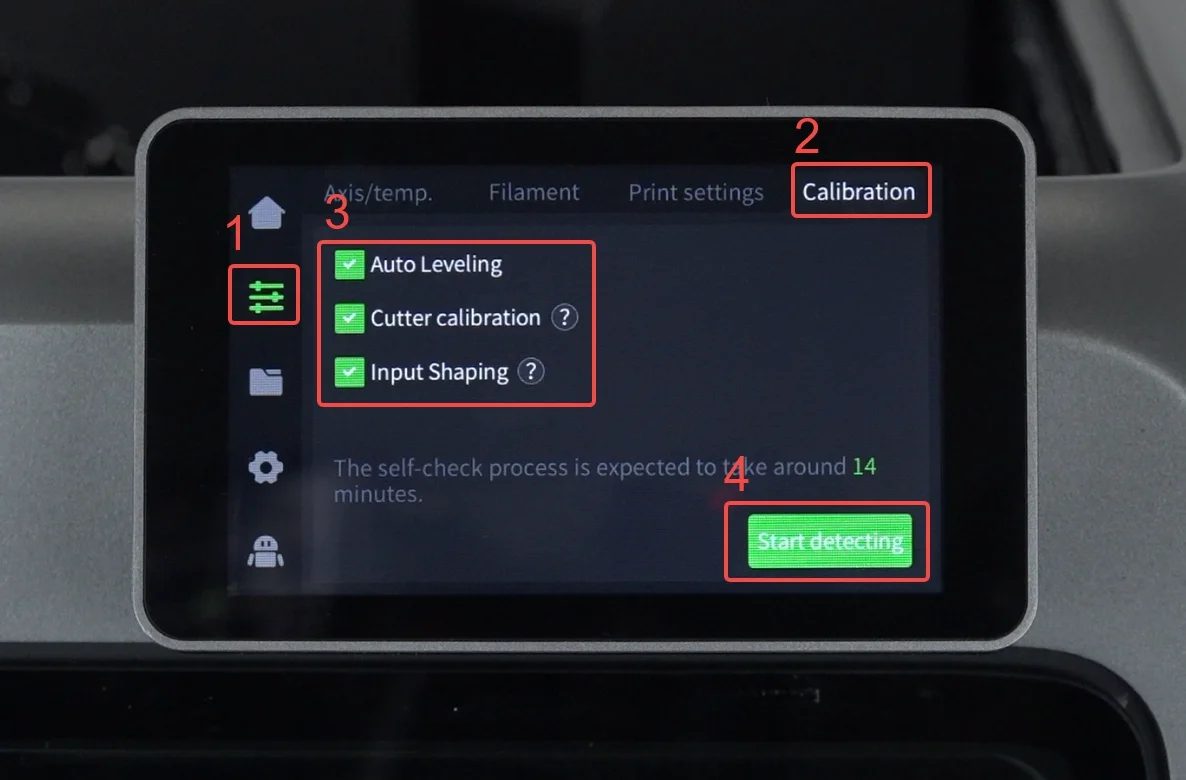
Click the screen "Preparation"-"Calibration"-Select all-"start detecting"
Calibrate K2 Plus cutter
Make sure the extruder is free of filament and re-run "Input Shaping" to calibrate the cutter