Step One
Ensure the printer is not printing, and observe if there is filament in the extruder:
1. No Filament in the extruder
If there is no filament in the extruder, and you have confirmed that the filament has been retracted by the CFS , you can proceed directly to Step Four.
2 Filament in the extruder
If there is filament in the extruder, you need to unload filament first, then proceed to Step Two.
Step Two
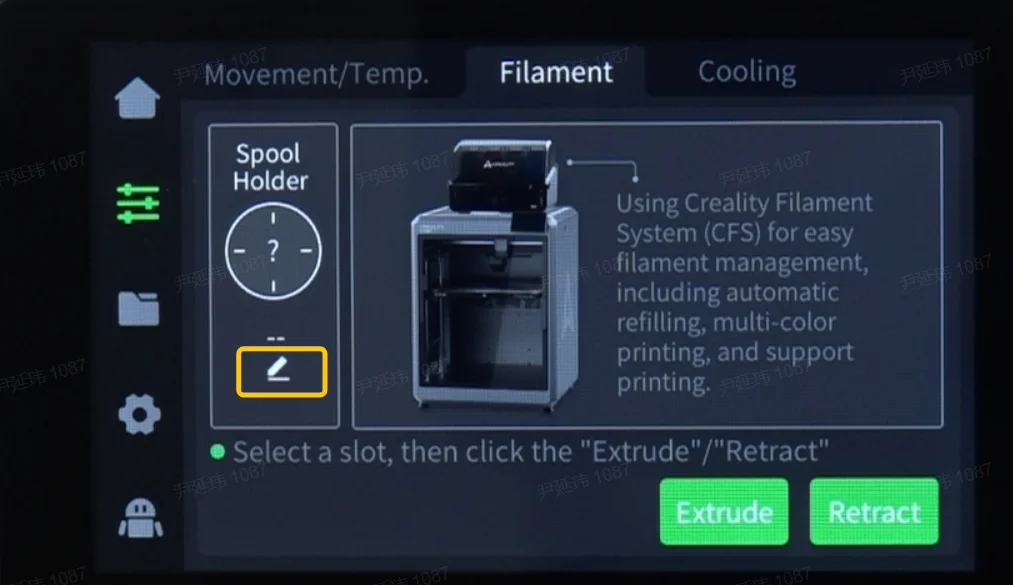
1. On the Filament page, click Retract, and the printer's extruder will move to the front-left position to cut off the filament, then retract it.
2. After clicking Retract, the nozzle will heat up to the set temperature, and the printer will cut off the filament and retract it. During this process, the "Extrude" and "Retract" buttons will be grayed out and unavailable.
Step Three
After the retraction is complete, the CFS will automatically retract the filament, and the "Retract" button will become available.
Step Four
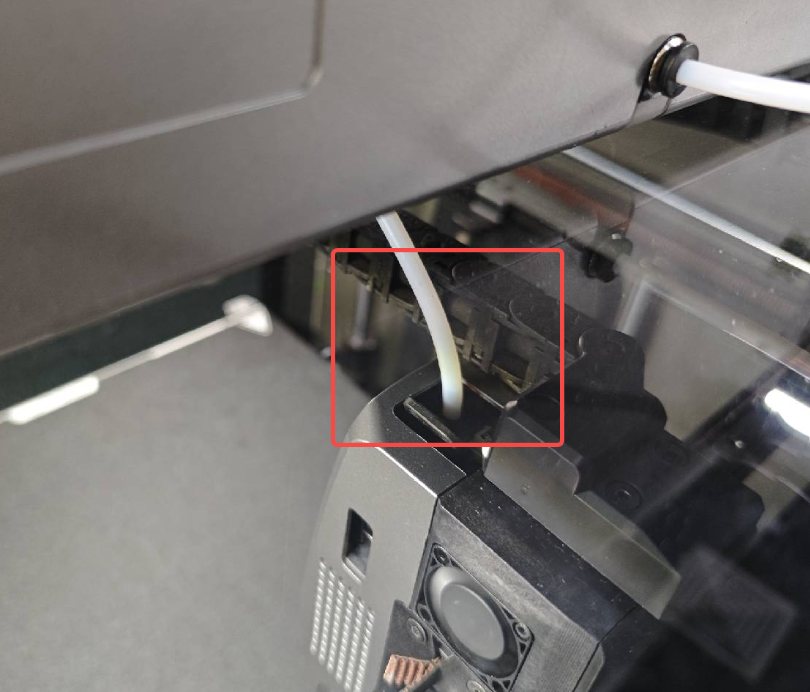
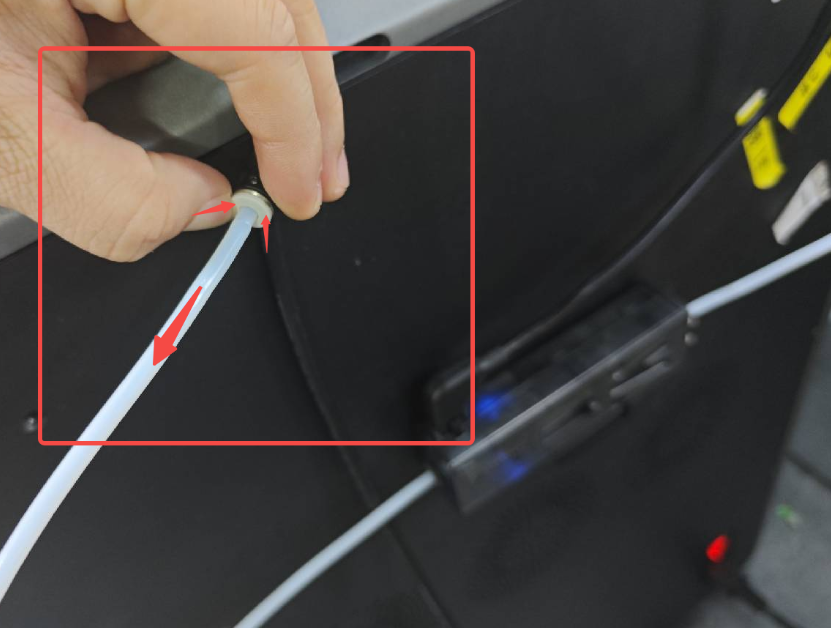
Press and hold the pneumatic connector of the PTFE tube (teflon tube), and plug out the PTFE tube (teflon tube) connecting the printer and the buffer.

Step Five
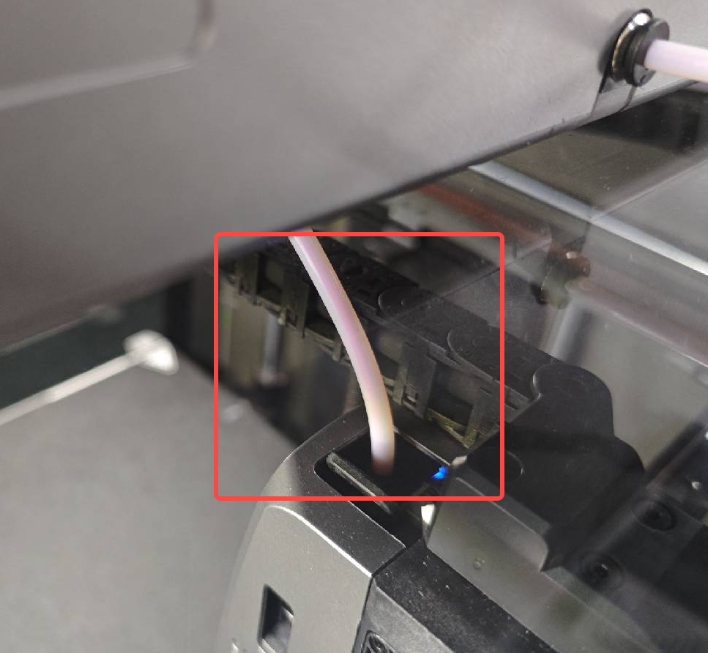
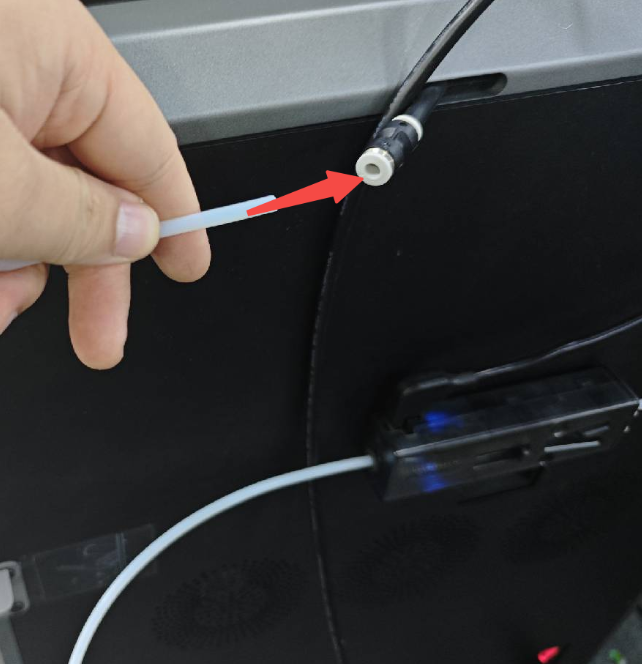
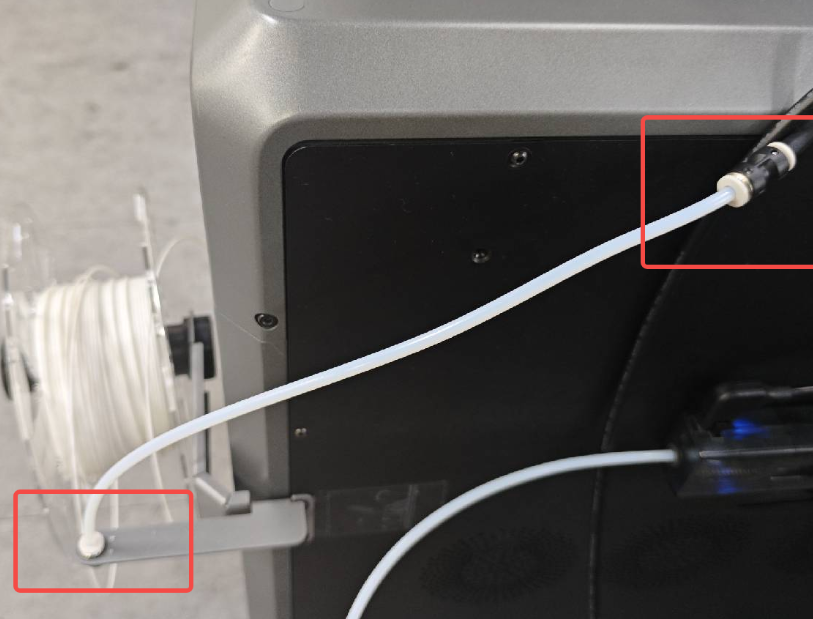
Insert the PTFE tube (teflon tube) from the external spool holder into the PTFE tube pneumatic connector of the machine (Refer to the wiki page: K2 Series Spool Holder Printing Guide).
Step Six
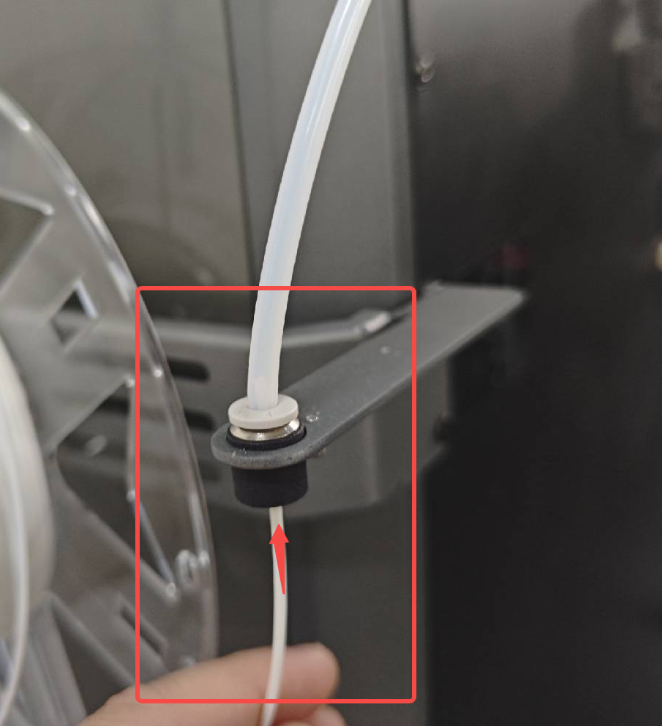
Thread the filament from the external spool holder into the PTFE tube of the spool holder, and gently push it until it cannot be pushed further.
Step Seven
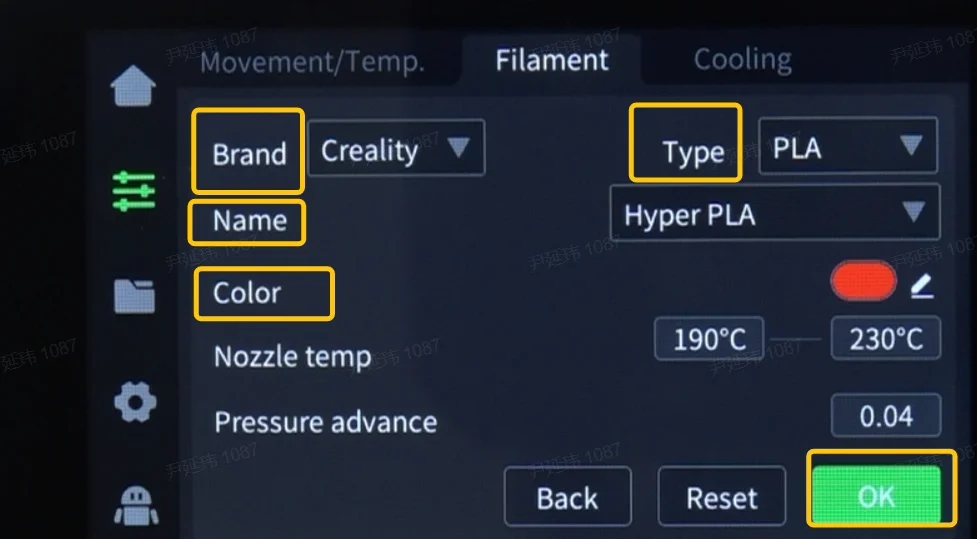
Edit filament information
On the filament page, click the edit button below "Spool Holder", and set the filament brand, filament type, and filament name respectively. Finally, set the filament color and click "OK" to save.
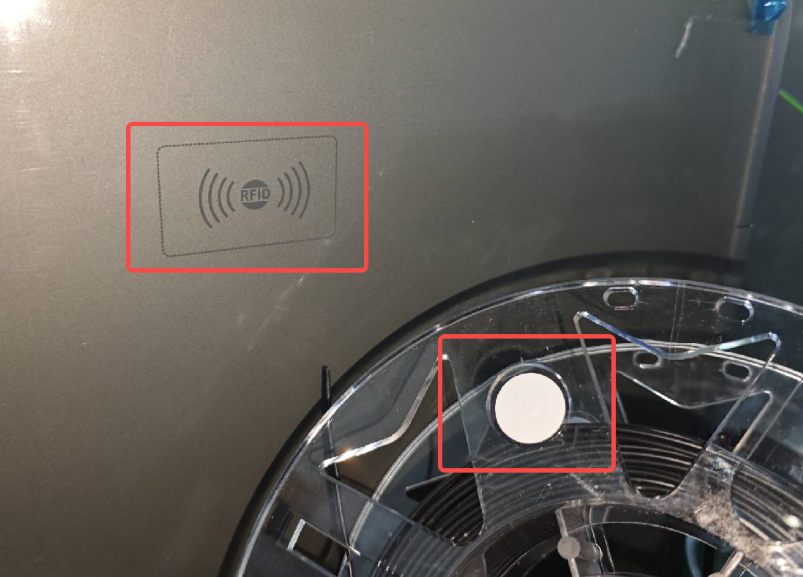
K2 Plus & K2 Pro External spool holder with automatic RFID filament identification
When using an external spool holder with K2, RFID filament cannot be automatically identified and filament information needs to be edited manually as per previous steps. However, K2 Plus & K2 Pro can enable automatic RFID filament identification when using an external spool holder.
For K2 Plus & K2 Pro,place the chip of RFID filament over the scanning area on the side panel. The printer will make a "beep" sound and automatically read the filament information. At this point, the "edit" button below the screen will display and filament information will be automatically recognized. You can manually modify it. After modification, the "RFID" indicator on the filament page will disappear.
Step Eight
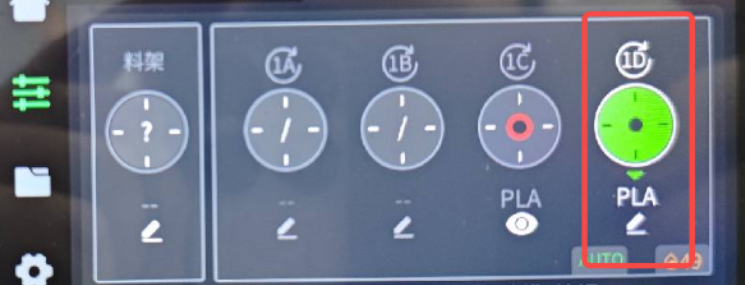
On the filament page, select the filament under "Spool Holder", then click "Extrude". Observe the nozzle; if filament is loading, wait until the "Extrude" button becomes available.
If no filament is observed, you can gently push the filament towards the extruder from the PTFE tube at the back of the printer, then click "Extrude" again.
After clicking "Extrude", the nozzle will heat up to the set temperature and start loading the filament. During the loading process, the "Extrude" and "Retract" buttons will be grayed out and unavailable.
Step Nine
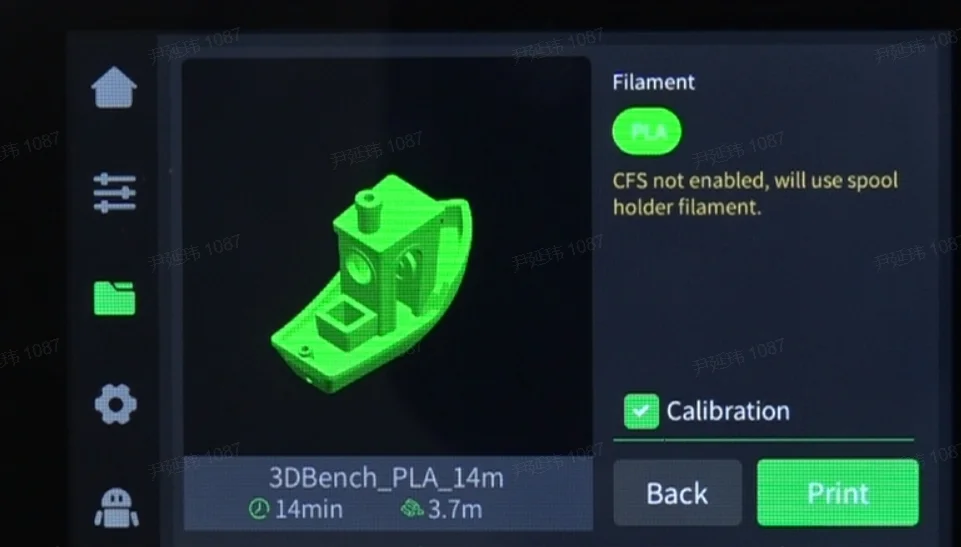
After the loading is complete, the filament from the external spool holder is extruded, and you can use the filament from the external spool holder for printing. When printing, you need to uncheck "Enable CFS" to print.