


Tools
- Needle
- Wrench
- Heating source
- Cutting piler
- Waste Card with hardness
Process
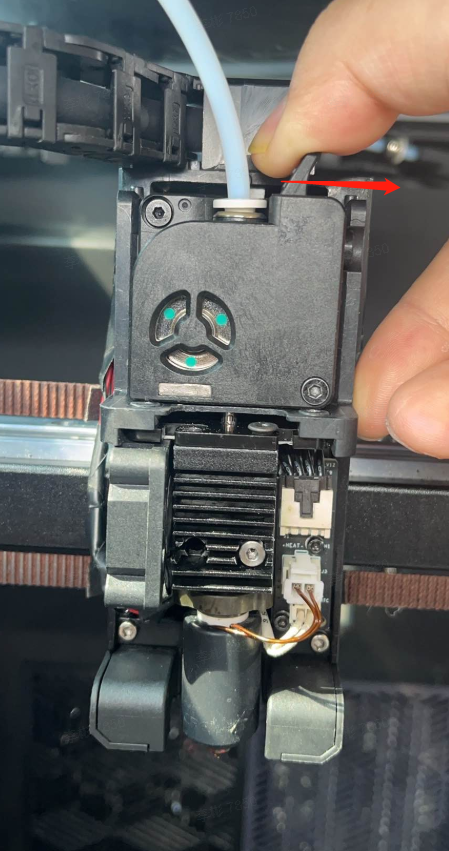
2.1 Remove the extruder shell
- Remove the three screws on the extruder by using a hex wrench.

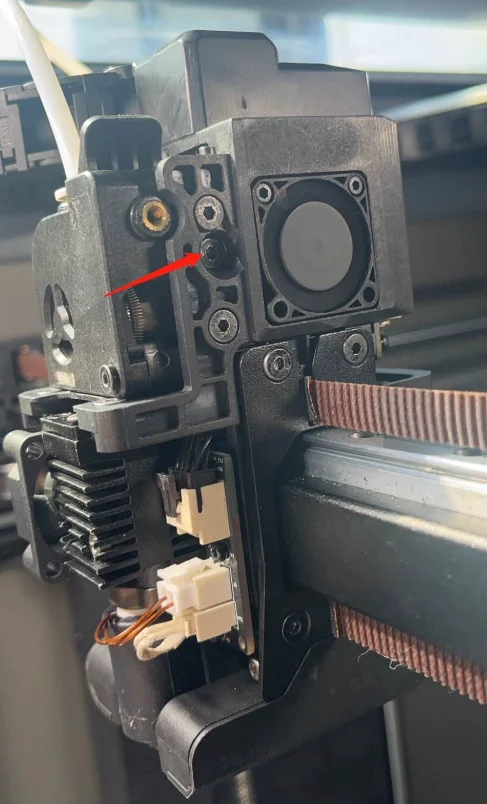
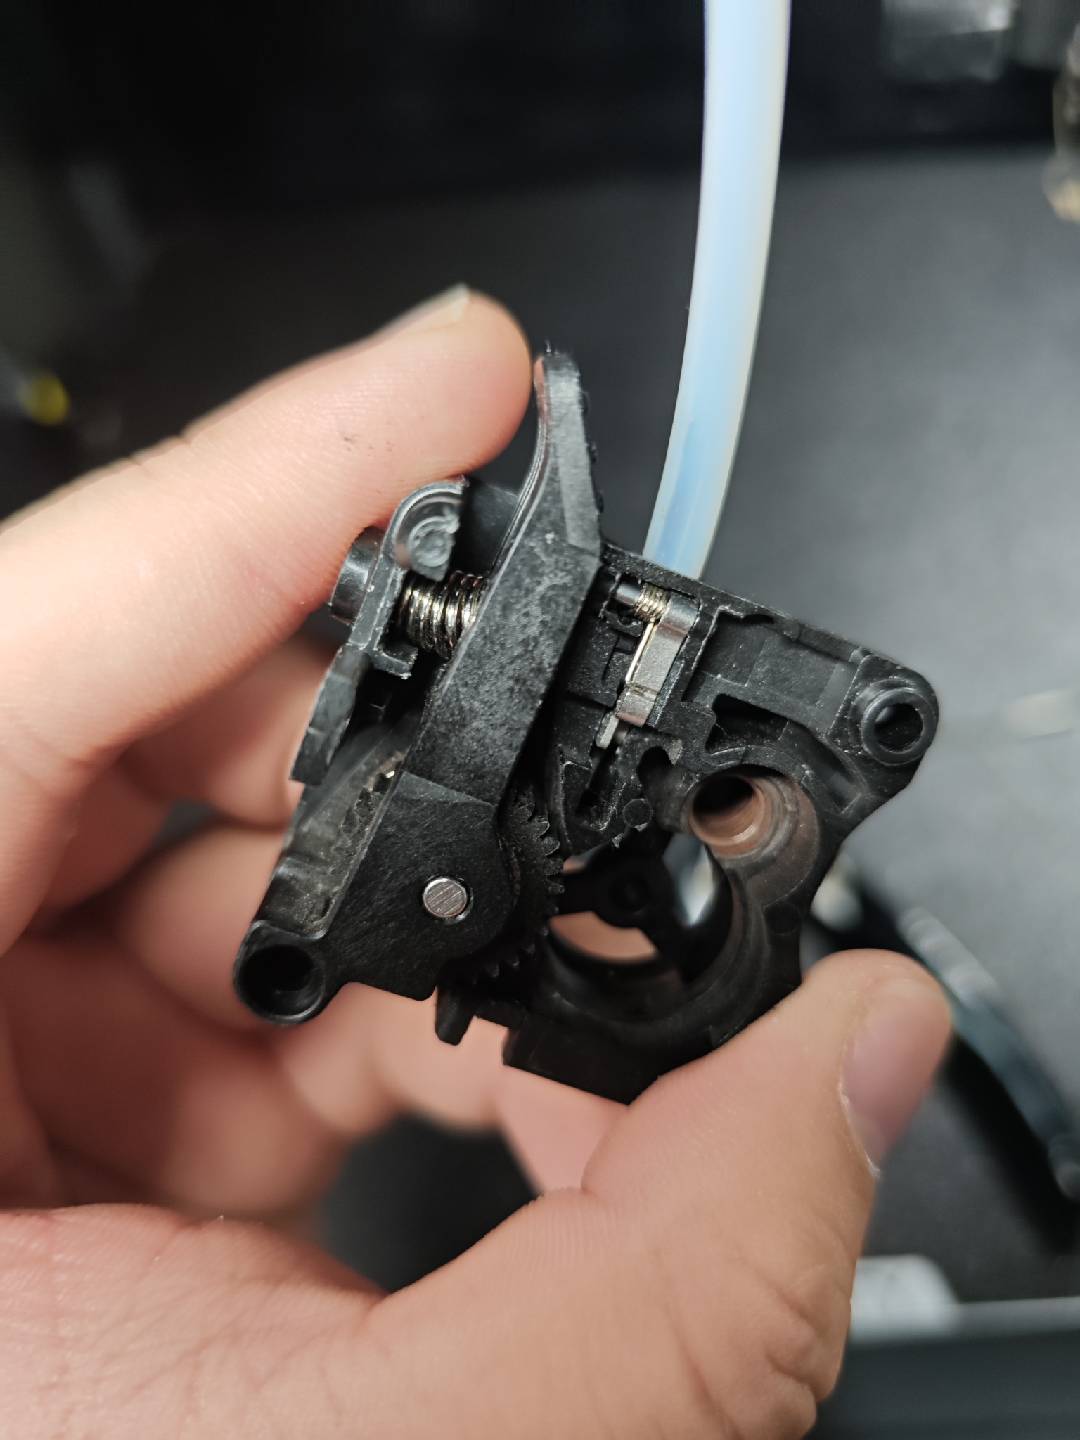
- Press the extruder compression block so that the extruder gear is separated. Remove the extruder shell.
[Pay attention to the Spring]
2.2 Troubleshooting for Clogged Heat Break
Method One
It is suitable for the case that the filament head can be seen in the heat break when it is clogged.
- Observe that there is a filament head in the heat break, and first heat the nozzle to the extrusion temperature.
-
- Use cutting pliers to pull out the deformed filament from the heat break.
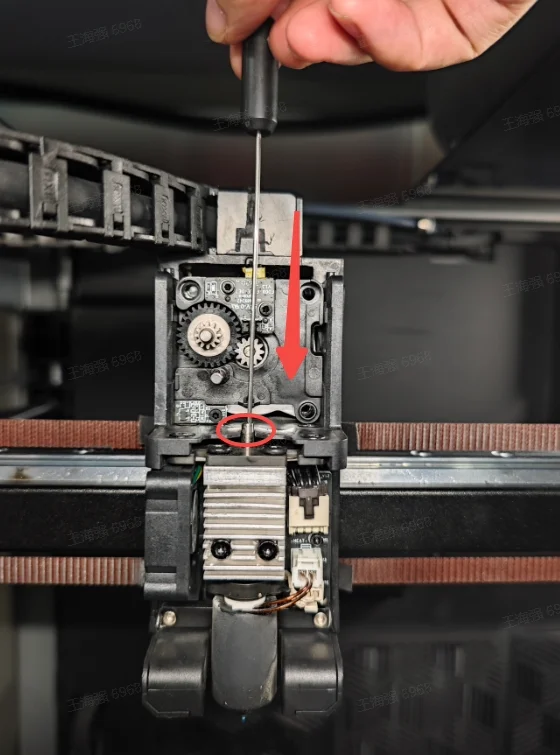
- Restore the extruder.
Method Two
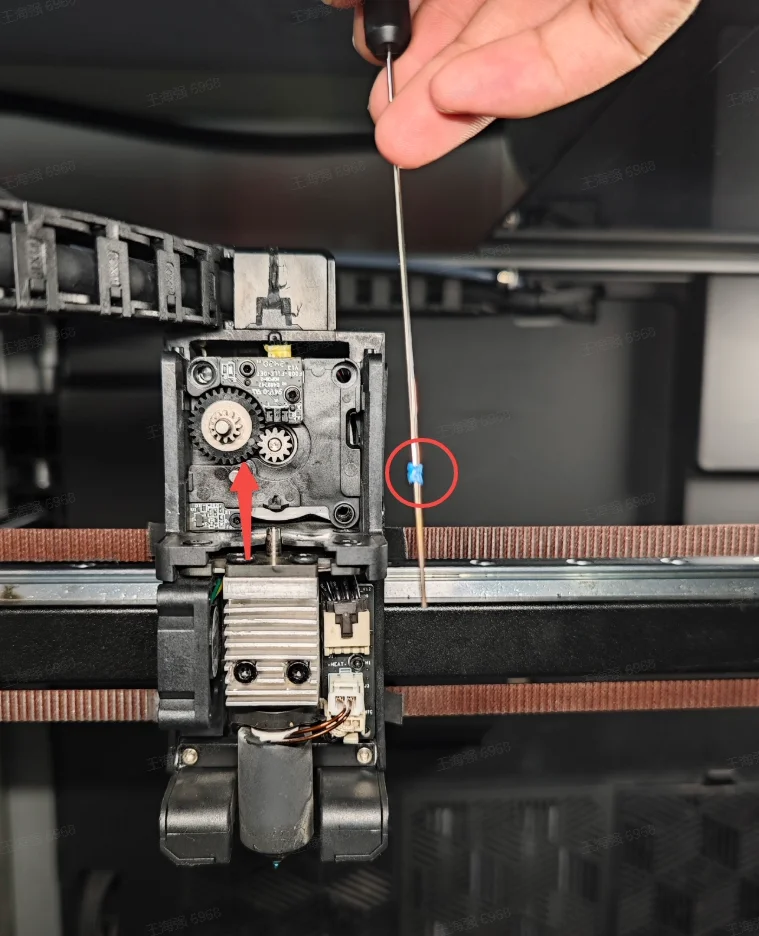
If the above Method One is not helpful (e.g. Fail to find the filament head in the heat break), you can replace nozzle directly by the following steps.
- Heat the nozzle to the filament extrusion temperature.

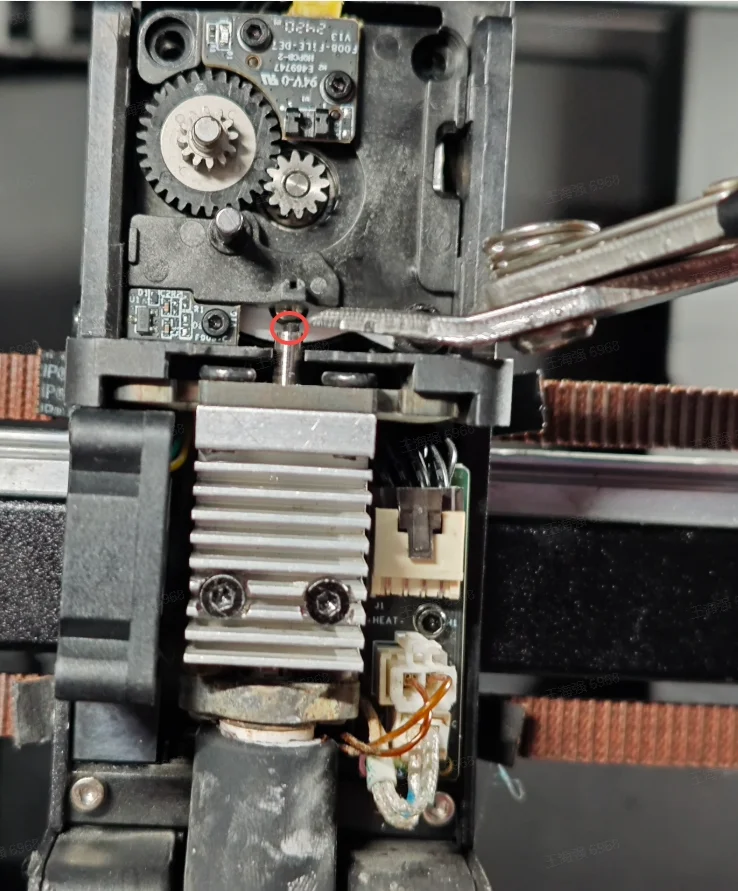
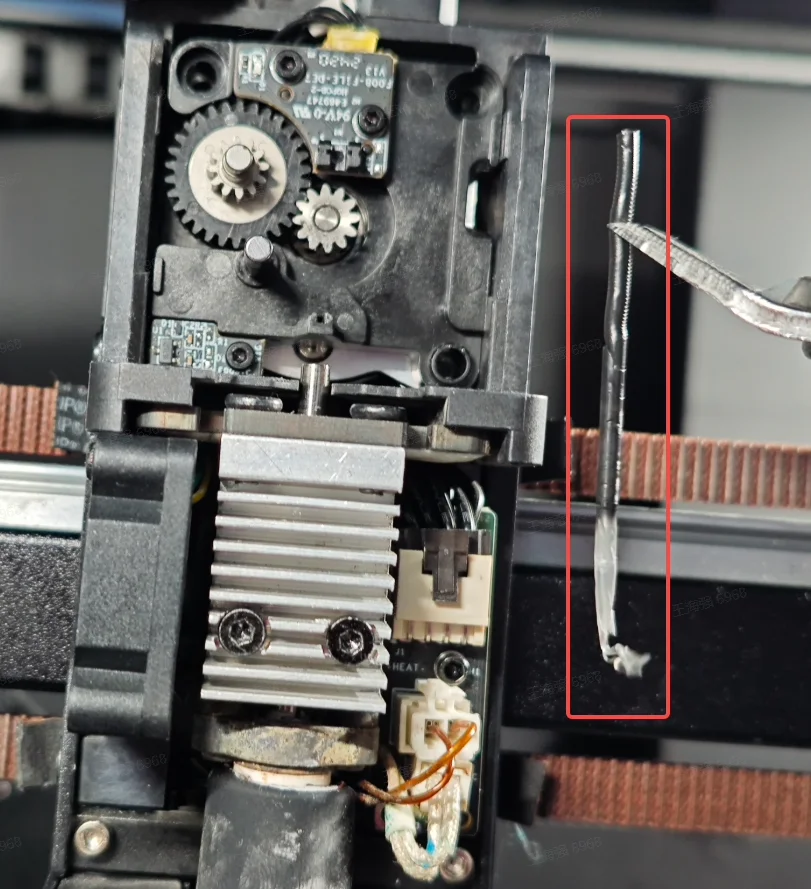
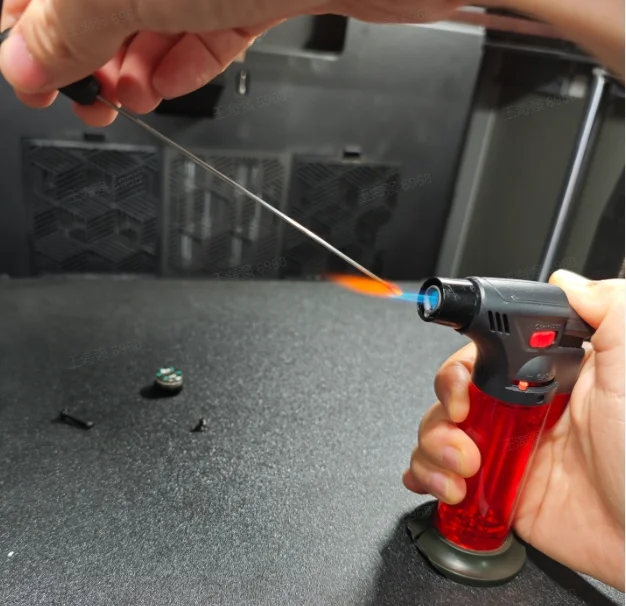
- Heat the tip of the needle.
- Insert the needle into the heat break and wait 30 seconds for the needle to be cooling.
- Slowly pull out the needle after cooling to take out the jammed filament in the heat break.
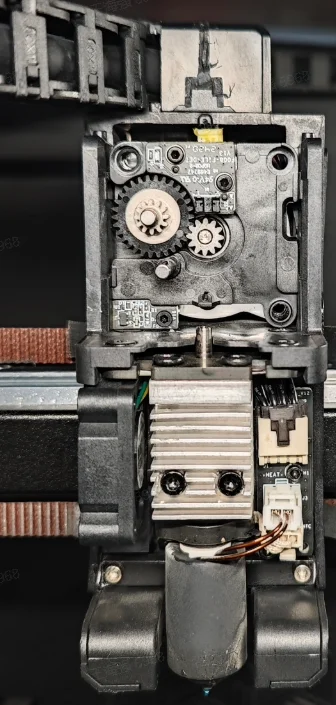
2.3 Cleaning Gear Debris
- Open the extruder front cover and check if there is any filament debris remaining on the extruder gear. Check if the gear is damaged or deformed. If damaged or deformed, refer to Replace K2 Plus Extruder Front Cover.
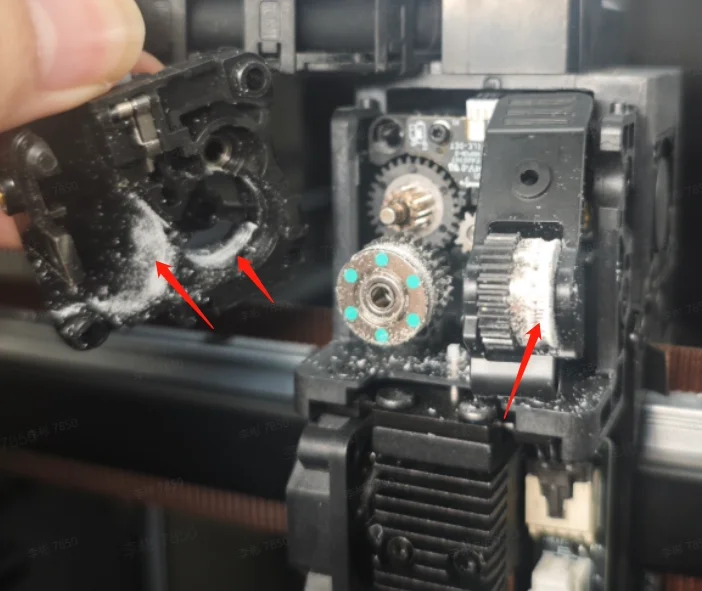
- If there is a large amount of filament debris remaining on the extruder gear, use a soft brush to clean the debris from the extruder gear.
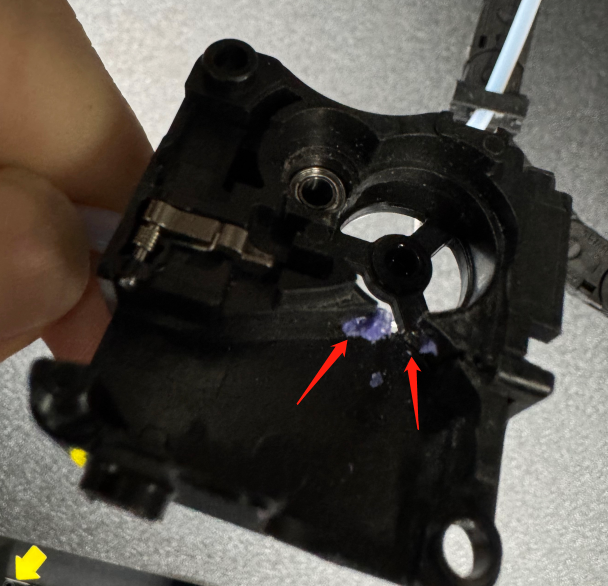
2.4 Troubleshooting for Jammed Filament in the Gear
Click "Extract" on the screen. Heat the nozzle to extrusion temperature.
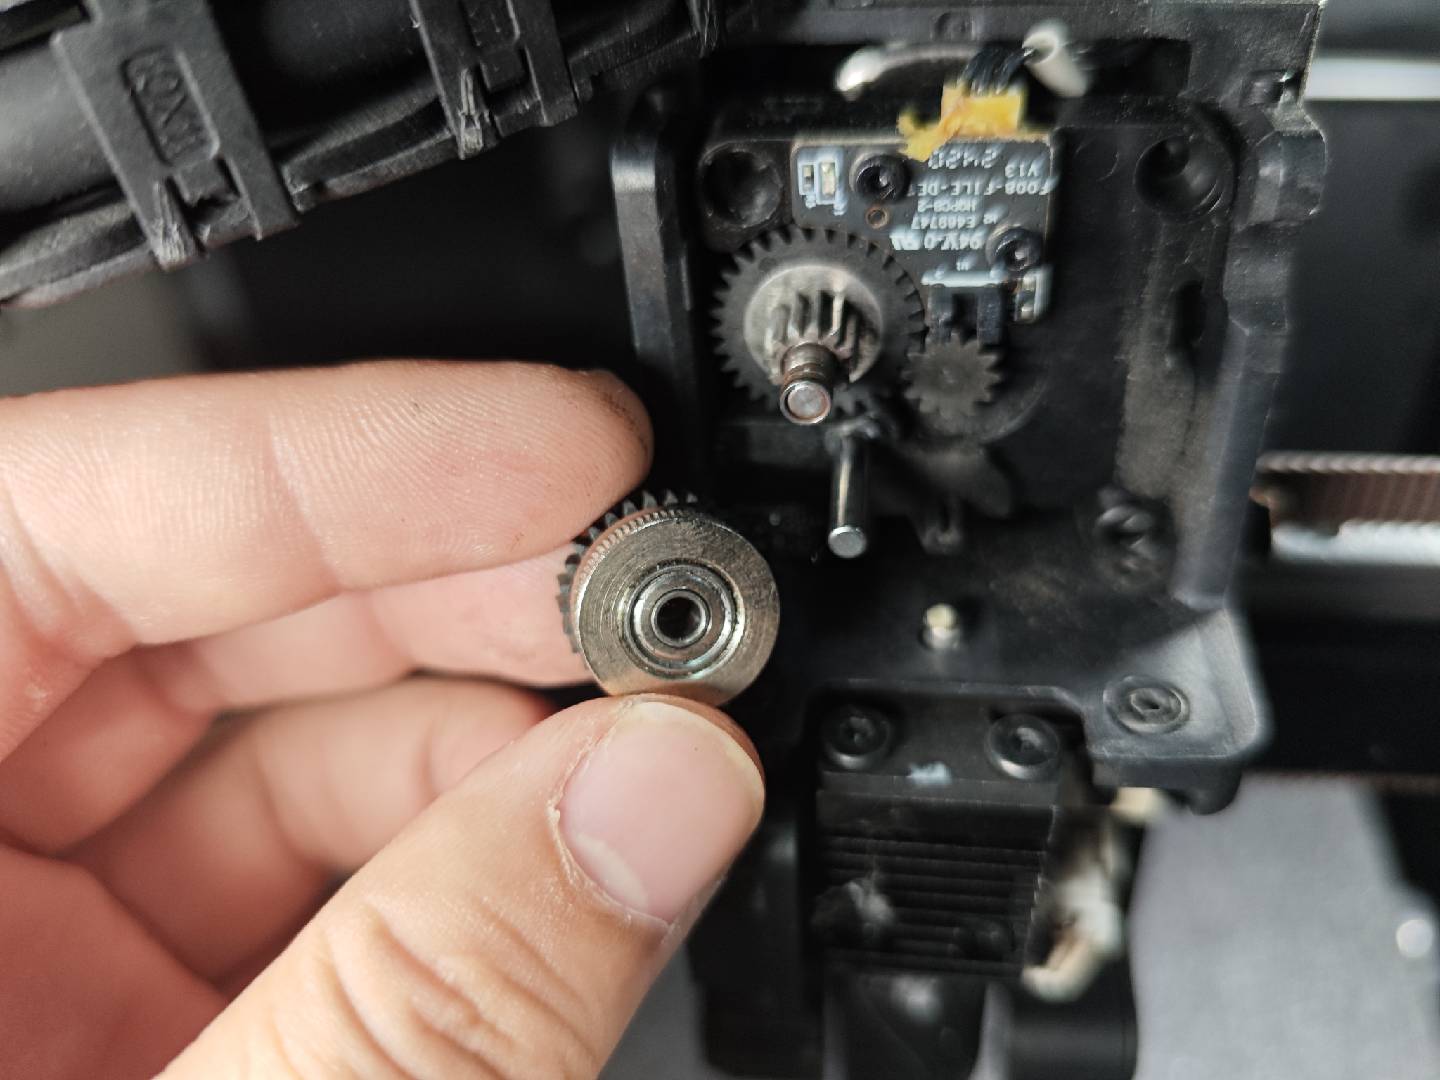
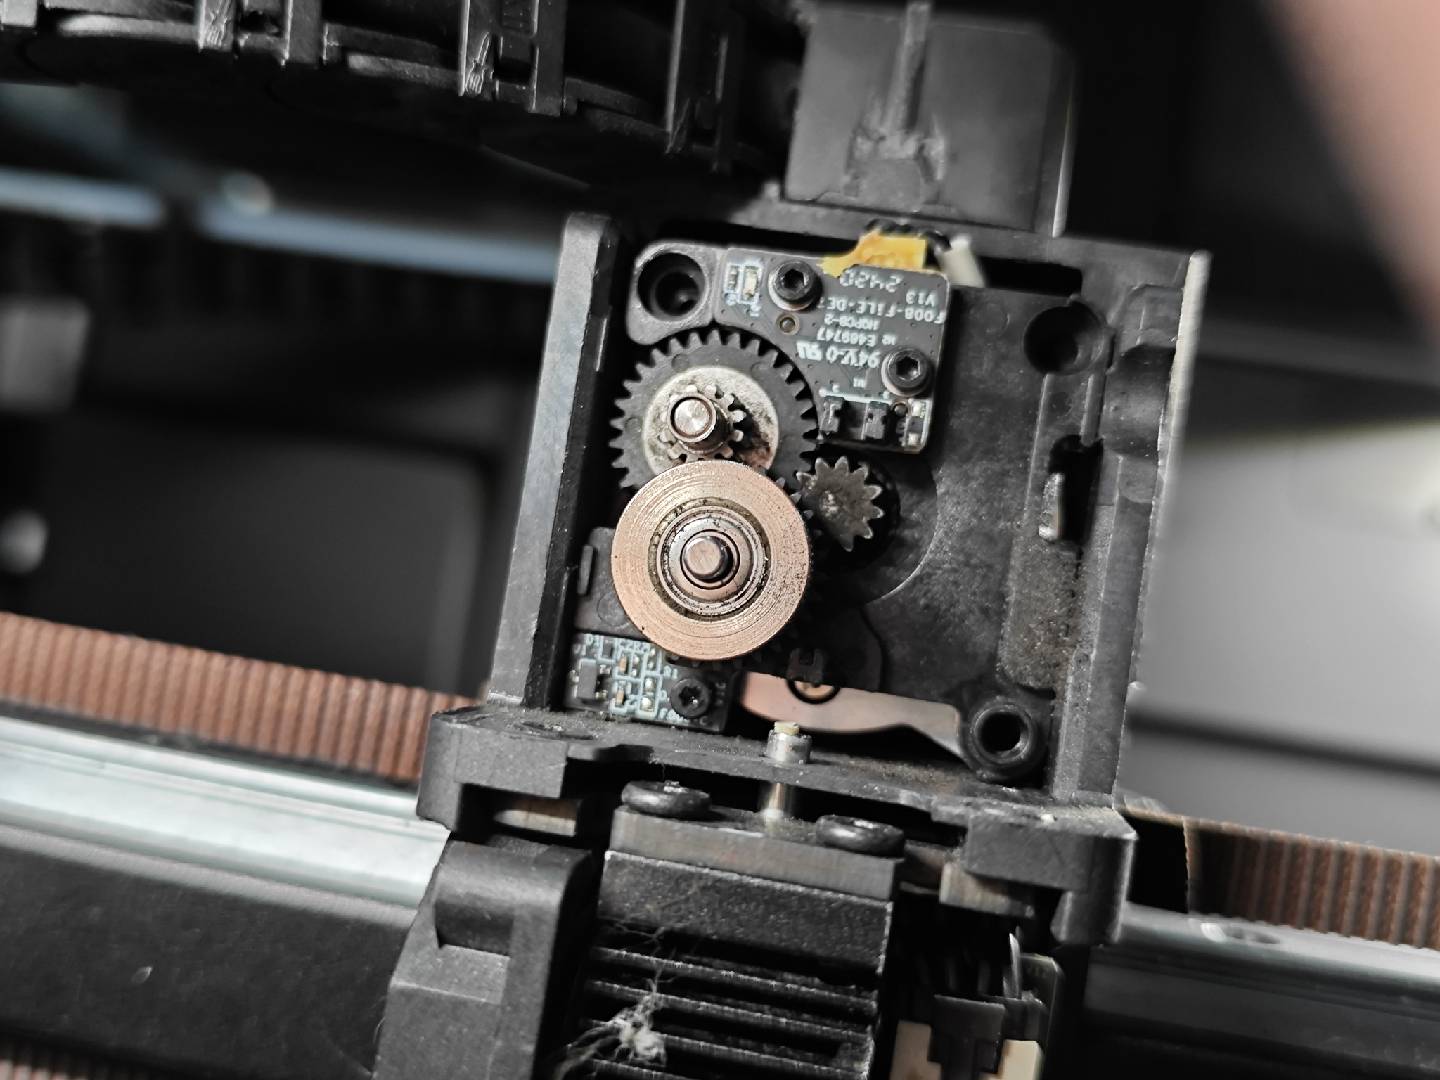
The filament cannot be extracted manually even if you hold the extruder clamp; probably the filament is jammed in the gear.
① First, separate the extruder gear assembly from the front cover (you can use a scraper/cutting plier or other tools)
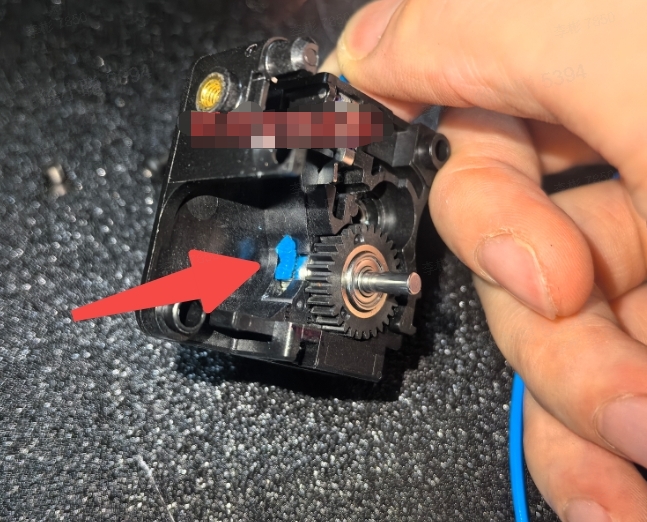
② Use cutting pliers to cut the jammed filament in the front cover, cutting above and below the filament's expanded section.
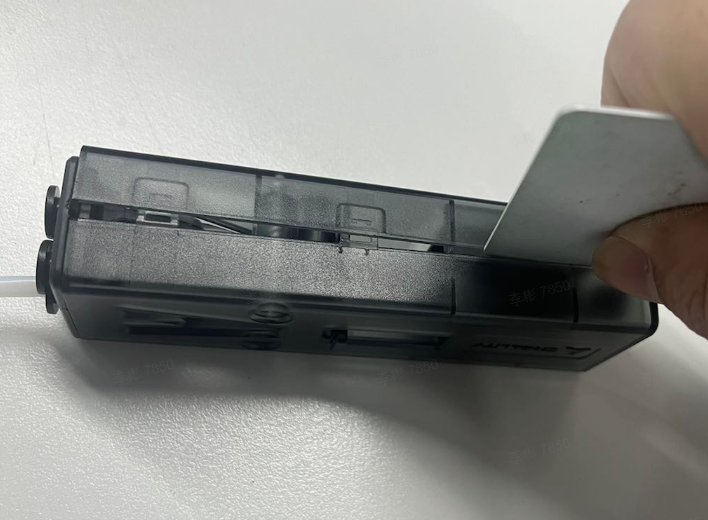
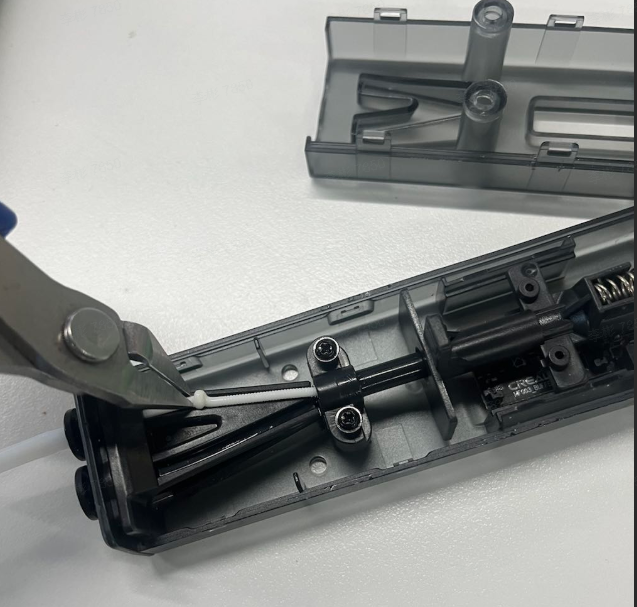
2.5 Troubleshooting for Jammed Buffer
① Remove the fixing screws of the buffer.
② Take a waste card and gently pry open along the gap in the middle of the buffer cover. As the buffer is assembled with buckles, be mindful of the position when prying open with the card to avoid damaging the cover by using excessive force.
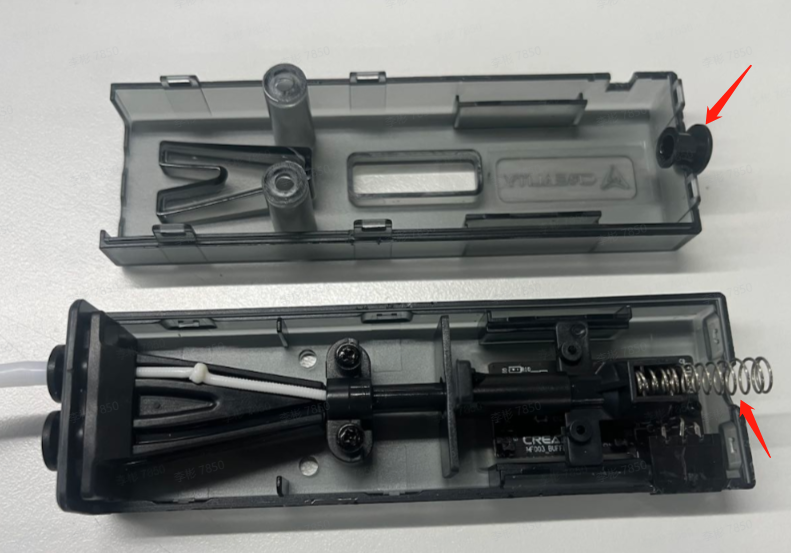
③ After disassembling, be careful not to lose the spring and connectors. Use cutting pliers to cut the expanded jammed filament, then pull out the other filament. Finally, reassemble and secure the buffer.
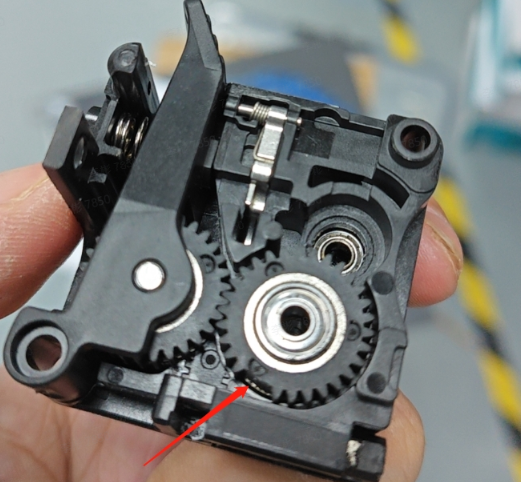
3. Restore the extruder
①If the gear pressure rod and spring came out during disassembly, you need to reinstall the spring and gear pressure rod first;
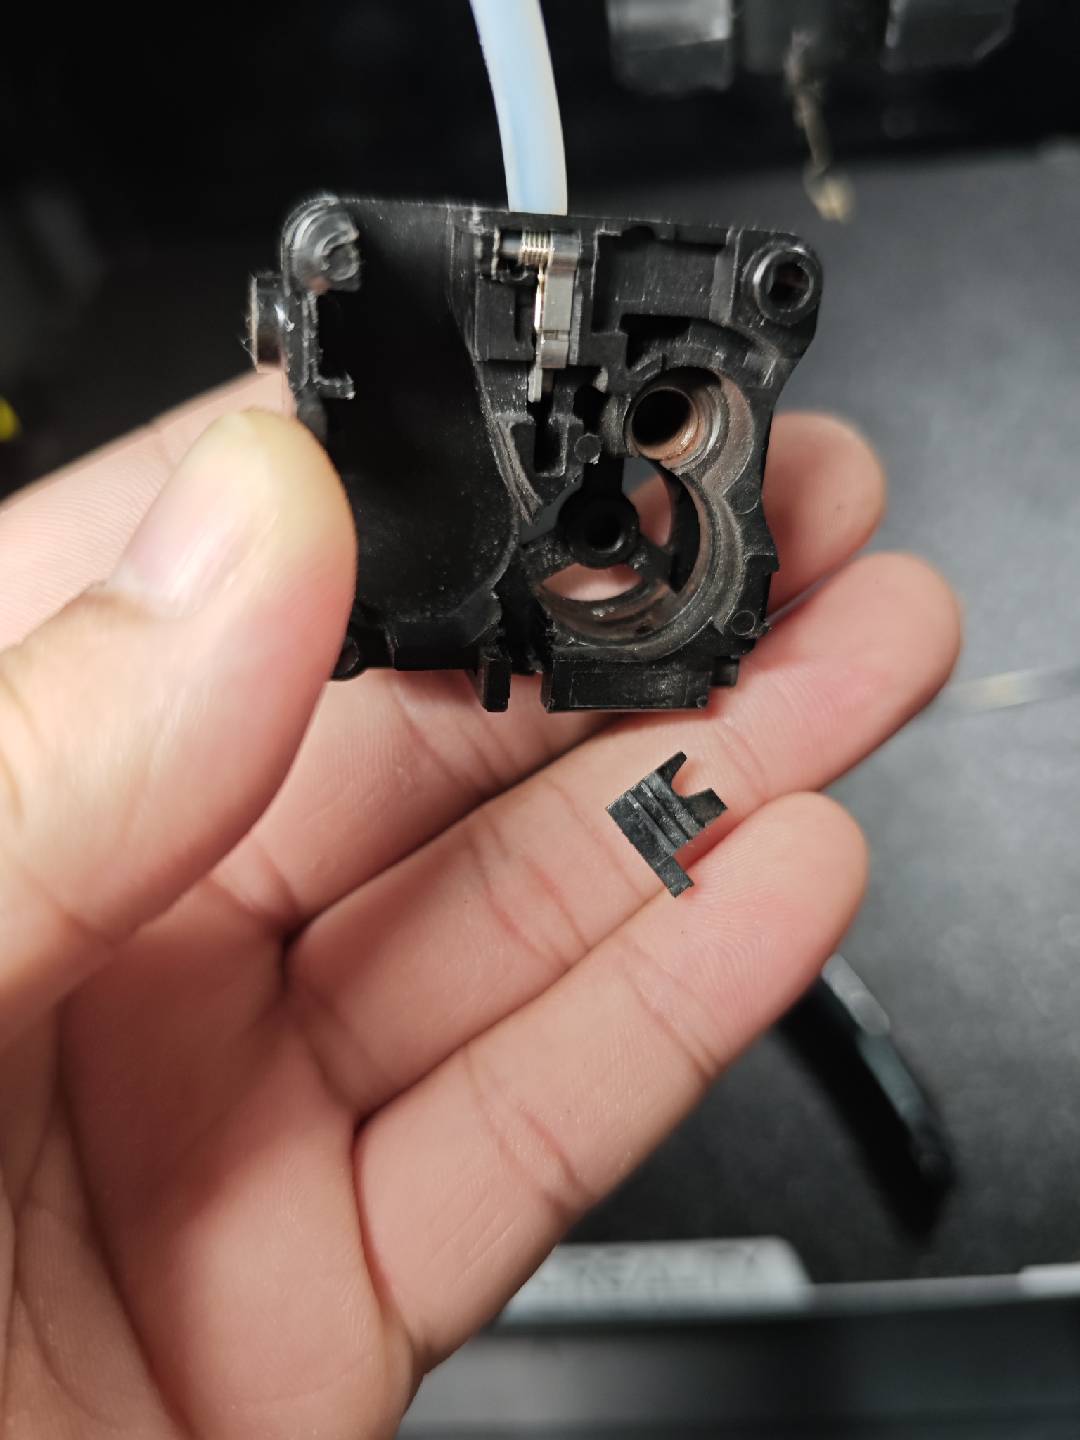
②It may be easier to restore if you first install the driven gear back into the extruder rear cover;
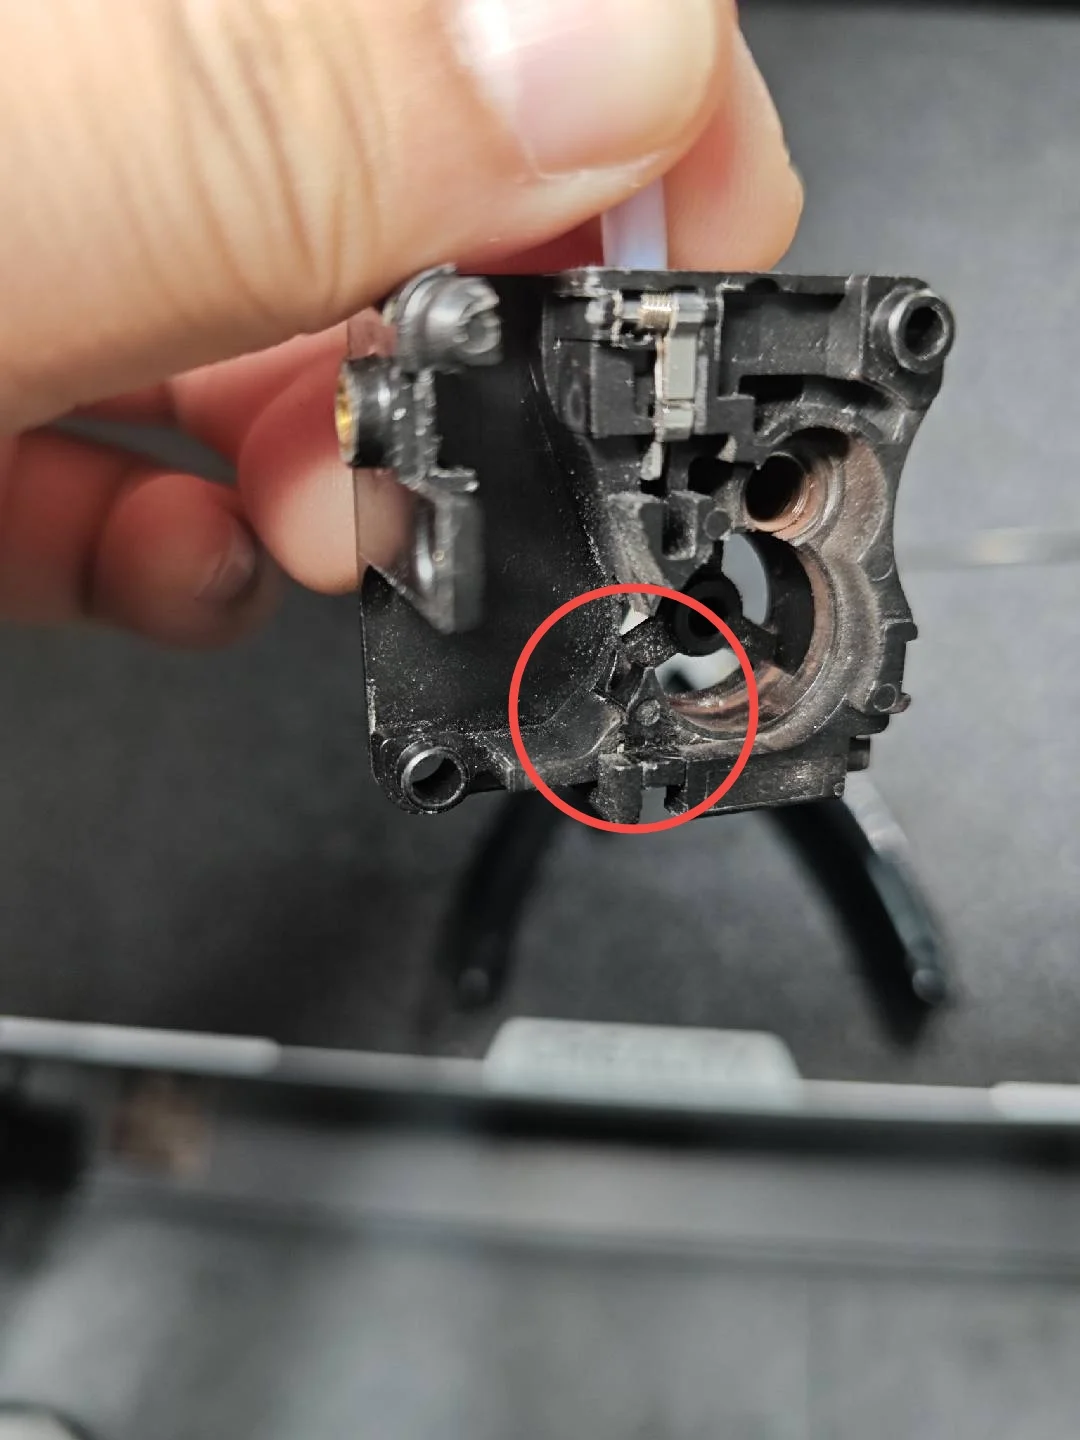
③Note! There is a small part at the bottom of the extruder front cover. If it accidentally came out during disassembly, it needs to be reinstalled;
2. After restoring the extruder, you can choose to resume printing. If it still cannot extrude filament normally, you can follow this Wiki for troubleshooting: General Troubleshooting Steps for K2 Plus Filament Loading and Unloading. If the issue still cannot be resolved, please seek help through the problem feedback channels in this Wiki Feedback Guidance on Device Faulty.