


Do you ever spend hours working on a 3D printing project, and it’s still not finished? It’s a common frustration we all feel, whether you’re a hobbyist or a professional 3D printer. Using a faster print setting for your 3D printer doesn’t mean that your work will become sloppy - it’s all about finding the right balance between speed and quality, and every 3D project is different.
You can reduce the print time for your 3D printer by optimizing your slicer settings and making small hardware adjustments, like using a larger nozzle. In this article, we’re sharing our go-to tips to reduce print time for 3D printers, including beginner-friendly advice for printing your 3D models faster without reducing the quality.
Why Does 3D Printing Take Longer?
The hardware, slicer settings, and geometry of your 3D printer will all impact its printing speed. The hardware includes the hotend, motion system, and nozzle type that you’re using, while the slicer settings include the speed, infill, acceleration, retractions, and layer height that you’ve selected. By comparison, your printer geometry is harder to adjust, as this includes how your 3D printer is oriented and the support or tools it needs during the printing process.
Hardware Tweaks That Make 3D Prints Work Faster
If speed is your priority when 3D printing, you may want to consider making hardware changes to achieve a consistently faster printing speed. Below, we’re sharing 3 beginner-friendly hardware tweaks to make if you’re looking to improve your printing speed.
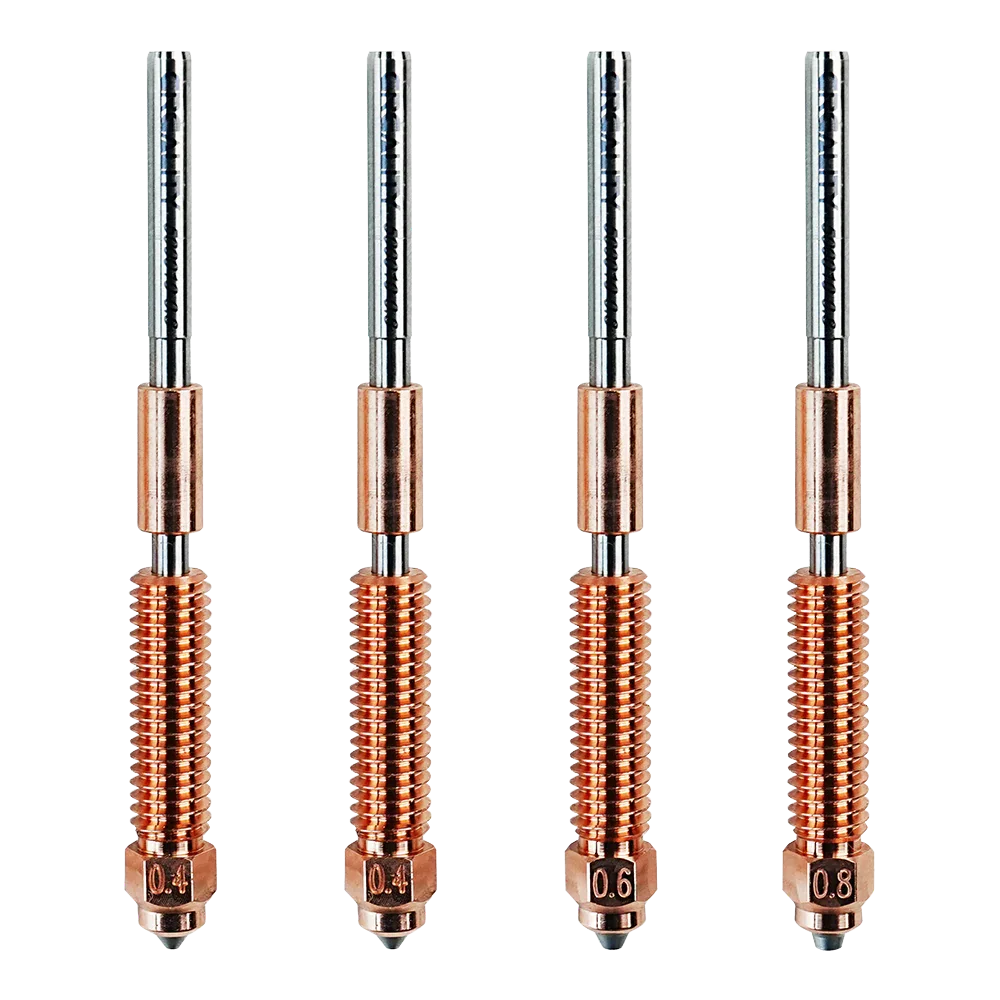
Select a Larger Nozzle to Increase Your Printing Speed
Using a larger nozzle will push out more filament with each pass that your printer head makes. This hardware change reduces the number of passes your printer makes, drastically reducing your print time. If you’re making larger models, you can usually switch from a 0.4mm nozzle to a 0.6 or 0.8mm nozzle without seeing any noticeable quality changes. This hardware tweak works great for prototypes and can help streamline your workflow, even if you need a slower printing speed for the final model.
Optimize Your Printer’s Set-Up
If you’re noticing that the printing speed of your 3D printer has gotten slower, it’s worth checking the printer’s linear guides, rails, and belts. If your 3D printer has a loose component, it will print more slowly. You’ll want to regularly check your printer’s mechanics to ensure they’re working smoothly to maintain a consistent printing speed.
Understand What Your 3D Printer is Capable Of
Every 3D printer is different, and it’s important to learn how to optimize your specific printer. At Creality, our 3D printers have a higher acceleration capacity, allowing them to sustain faster motion and speed safely for a longer period. Once you start using your 3D printer, pay attention to its output, including the speed and quality that it prints at. If you’re a beginner to the world of 3D printing, the Creality blog is a great place for growing your knowledge.
Slicer Settings That Save Time When 3D Printing
Every 3D project is different, whether you’re designing fidget toys or Pikachu 3D models. The best way to optimize your printing quality is to adjust your slicer settings for each project. There are 4 slicer settings that you can adjust to save time when 3D printing by improving your printing speed.
Increase Layer Height
The first slicer setting to adjust is your layer height. Increasing your layer height means that your 3D printer has to complete fewer total passes, drastically saving your time when printing.
You’ll need to consider your 3D model when choosing the threshold to increase your layer height by. For example, you could adjust a 0.12mm layer height to 0.2mm for most models, although you can expect to see a decrease in the smoothness of the finer details in your designs; but it’s an ideal trade-off for larger 3D models.
Raise The Print Speed Settings
The print speed parameter of your 3D printer is usually measured in millimeters per second (mm/s). Increasing your print speed setting will reduce your printing time, but setting the speed too high without making other adjustments to your 3D printer could lead to missed steps and reduce the quality of your finished model. Proper calibration is crucial for allowing you to raise the print speed setting without any negative effects.
Adjust Acceleration & Jerk
Acceleration is how quickly the 3D printer head reaches your chosen speed, while the jerk is the small directional changes the head makes during the printing process. You can adjust and increase the acceleration and jerk of your printing to reduce the time spent on non-printing movements.
Increasing the speed and movement will put more strain on the hardware of your 3D printer and may result in ringing, which is the appearance of faint lines and patterns on the surface of your 3D print, caused by mechanical vibrations in these moving parts.
Adjust the Shell Density and Infill for Quicker Printing
Your printer head will need to make fewer internal passes if you choose a lower infill density. Lines and zigzags are good infill patterns because they print more quickly, especially for 3D models that don't need a higher density.
If you’re only intending to display your 3D model, instead of using it in a practical way, you can also select a thinner shell thickness for a faster printing speed. We only recommend making this adjustment if you’re happy for your 3D model to be thinner.
Optimize Your 3D Printer Settings with Creality’s Beginner-Friendly Guides
Finding the fast speed settings for your 3D printer takes time and a lot of trial and error. To get the desired results, you'll need to maintain your 3D printer and find the ideal combination of slicer settings and hardware adjustments. Your Creality 3D printer will be able to achieve faster printing speeds without impacting the quality of your 3D model.