


If you have ever waited hours for a 3D print to finish, only to find the top surface covered in ugly bumps, holes, and rough patches, you have experienced the frustration of 3D printing pillowing.
It is s rarely a hardware failure; instead, it is usually a mismatch between your slicer settings and your printer's cooling capabilities. In this guide, we will break down exactly what 3D printer pillowing is, what causes it, and the slicer settings that can help you prevent it in future prints.
What Is 3D Printer Pillowing?
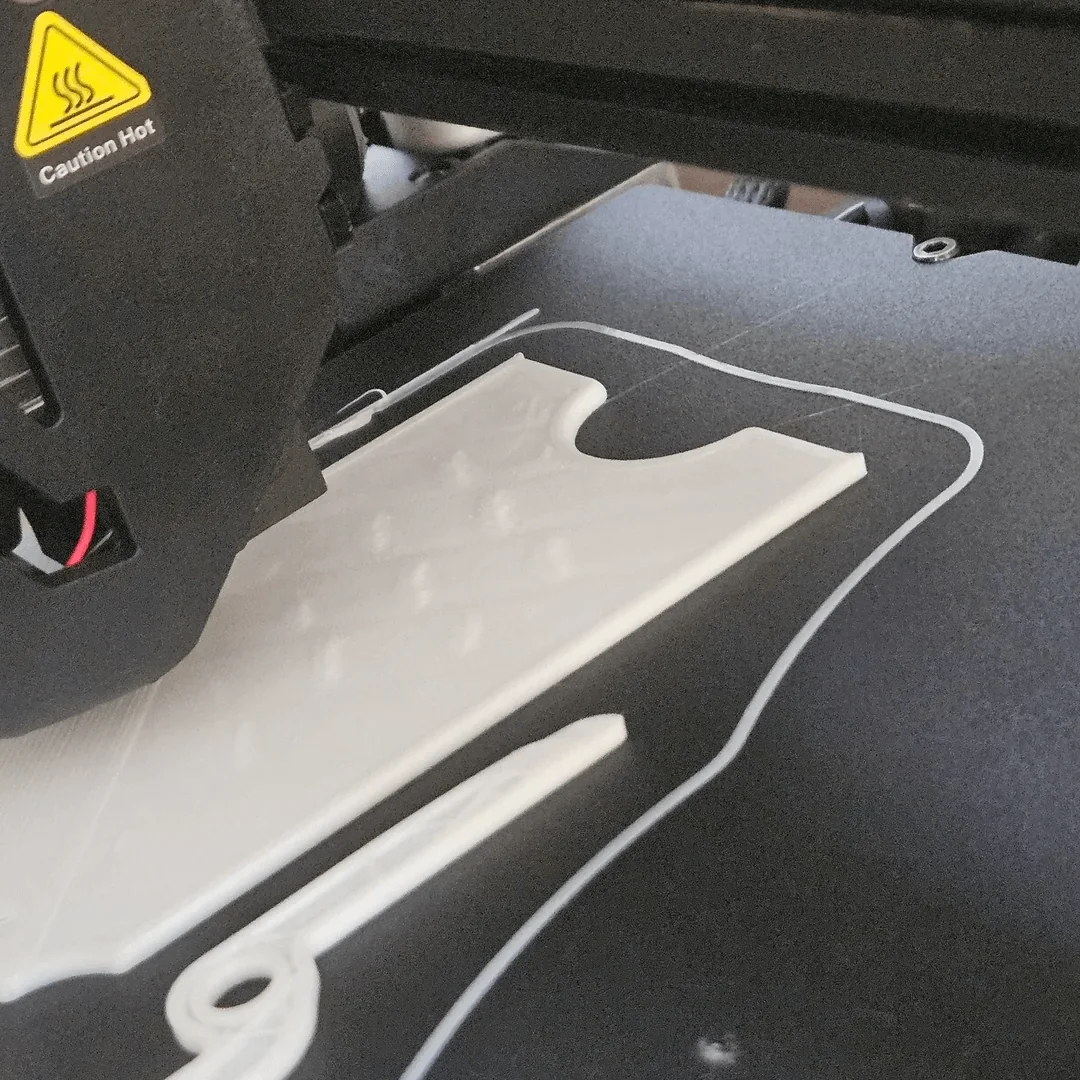
3D printer pillowing is a surface defect where the top layers of a print appear bumpy, puffy, or uneven instead of smooth. It happens when the top layers do not have enough support, causing the hot filament to sag slightly into the gaps of the infill before it cools. As a result, the surface can look like tiny pillows or a quilted pattern, which is why the issue is called pillowing.
Common signs of pillowing include:
-
Uneven or wrinkled top surfaces
-
Small dips or bulges across flat areas
-
Visible infill patterns showing through the top layer
-
Rough or inconsistent surface texture
Pillowing most often appears on large flat surfaces, such as lids, boxes, or decorative panels.
What Causes Pillowing on 3D Prints
Pillowing is almost always the result of an imbalance between heat, cooling, and the foundation upon which the top layers are being printed. Here are the most common causes.
Insufficient Cooling
When your printer extrudes the top solid layers over the infill, the plastic needs to cool and solidify rapidly to successfully bridge the gaps. If the part cooling fan is not blowing enough air, or if the ambient temperature is too high, the plastic stays molten for too long.
Instead of stretching tightly across the gap, the heat rising from the heated bed and the hot end causes the soft plastic to curl upward at the edges of the infill lines, creating bumps.
Too Few Top Solid Layers
One of the biggest reasons for pillowing is insufficient top layer thickness. Top layers need enough material to fully cover the infill pattern below. If there are only a few layers, the filament may stretch across the infill gaps and sag slightly before it cools.
As a result, the surface becomes uneven.
Low Infill Density
Your infill acts as the scaffolding for your top layers. If your infill density is set too low (for example, 5% or 10%), the gaps between the infill lines are massive. The printer is forced to bridge very long distances with a single thread of hot plastic.
The wider the gap, the more likely the plastic is to sag or break before it reaches the other side, completely destabilizing the top solid layers.
Printing Temperature Too High
If the nozzle temperature is higher than necessary, the filament becomes overly soft and flows more easily. While this can improve layer bonding, it also makes the top layers more likely to sag before solidifying. A slightly lower temperature often helps improve surface stability.
How to Prevent Pillowing in 3D Printing
Fortunately, pillowing is usually easy to prevent with a few adjustments. Try the following solutions if you notice uneven top layers.
Increase the Number of Top Layers
Adding more top layers is often the most effective fix. More layers create a thicker surface that can completely cover the infill pattern underneath. For most prints, 4–6 top layers provide a solid and smooth surface.
Increase Infill Density
If your infill density is extremely low, increasing it slightly can provide better support.
You don't need to dramatically increase it. Even a small adjustment can help. For many prints, 15–25% infill offers a good balance between support and material usage.
Improve Cooling
Good cooling helps the filament solidify quickly after it is deposited. Make sure the part cooling fan is functioning properly and running at an appropriate speed. Stronger cooling often improves top surface quality.
Reduce Printing Temperature
If the filament appears overly soft or shiny, the nozzle temperature may be too high. Try lowering the temperature by 5–10°C and see whether the surface quality improves.
Slow Down Top Layer Speed
Printing the top layers slightly slower allows the filament to settle and form cleaner lines. Some slicers allow you to set a separate speed for top layers, which can help produce smoother surfaces.
Best Slicer Settings to Stop Pillowing
Adjusting slicer settings is one of the most effective ways to eliminate pillowing. The following settings and parameters can help improve top surface quality.
| Setting | Recommended Range | Why It Helps |
| Top Layers | 4–6 layers | Provides enough thickness to cover infill |
| Infill Density | 15–25% | Adds internal support for top layers |
| Print Speed | 40–60 mm/s | Improves surface consistency |
| Cooling Fan | 80–100% | Helps filament solidify quickly |
| Nozzle Temperature | Slightly lower if needed | Reduces filament sagging |
Tips: These values are general guidelines. The optimal settings may vary depending on your printer, filament, and model geometry.
Pillowing vs Other Common Surface Issues
Not every rough surface problem is pillowing. Some printing defects can look similar but have different causes. The table below highlights the differences.
| Issue | Appearance | Main Cause | Typical Fix |
| Pillowing | Puffy or bumpy top layers | Weak infill support or poor cooling | Increase top layers and infill |
| Stringing | Thin strings between parts | Oozing during travel moves | Adjust retraction settings |
| Under-extrusion | Gaps between lines | Insufficient filament flow | Check extrusion settings |
| Over-extrusion | Bulging or excess material | Too much filament flow | Reduce flow rate |
FAQs About 3D Printer Pillowing
Does infill pattern affect pillowing?
Yes. Some infill patterns provide better support than others. Denser patterns with smaller gaps often support top layers more effectively.
Can pillowing happen with any filament?
Yes. Pillowing can occur with many materials if the settings are not optimized. However, materials that require strong cooling may show it more easily.
Is pillowing a normal or unavoidable 3D printing problem? No, pillowing is not unavoidable. It only happens when the top layers of a print aren’t properly supported or the printing settings aren’t optimized. With the right number of top layers, sufficient infill, proper cooling, and correct speed/temperature, pillowing can be completely prevented.
Final Thoughts
3D printer pillowing can make an otherwise successful print look unfinished, but it’s usually simple to fix.
By adjusting a few slicer settings such as top layers, infill density, cooling, and print speed, you will have 3D prints with smooth, clean top surfaces that match the rest of the model.