Welcome to Creality  SPARKX i7 Buy Now 🔥

Creality
Store
  • 3D Printers
  • Ecosystem
  • Support
  • Software
  • Blog
  • Creality Cloud
  • M1 & R1
  • United States (English)
Cancel

Quick Links

    Creality
    3D PrintersEcosystem SupportSoftwareBlogCreality CloudM1 & R1
    Store
    SPARKXFlagshipHi SeriesEnder SeriesHALOT Series
    SPARKX i7
    New
    SPARKX i7
    More Products
    Compare
    K2 SE
    New
    K2 SE
    K2
    New
    K2
    K2 Pro
    K2 Pro
    K2 Plus
    K2 Plus
    K1 Max
    K1 Max
    More Products
    Compare
    Creality Hi
    Creality Hi
    More Products
    Compare
    Ender-3 V4
    New
    Ender-3 V4
    Ender-5 Max
    Ender-5 Max
    Ender-3 V3 Plus
    Ender-3 V3 Plus
    Ender-3 V3
    Ender-3 V3
    Ender-3 V3 SE
    Ender-3 V3 SE
    More Products
    Compare
    HALOT-X1
    New
    HALOT-X1
    HALOT R6
    HALOT R6
    HALOT-MAGE S
    HALOT-MAGE S
    HALOT-MAGE
    HALOT-MAGE
    More Products
    Compare
    3D ScannersLaser EngraversFilamentsAccessories
    Sermoon P1
    New
    Sermoon P1
    Sermoon X1
    Sermoon X1
    Sermoon S1
    Sermoon S1
    Creality Raptor Pro
    Creality Raptor Pro
    Otter Lite/Basic
    Otter Lite/Basic
    More Products
    Compare
    Creality Falcon A1 Pro 20W
    New
    Creality Falcon A1 Pro 20W
    Creality Falcon A1
    Creality Falcon A1
    Creality Falcon2 Pro 60W
    Creality Falcon2 Pro 60W
    Creality Falcon2 Pro
    Creality Falcon2 Pro
    Creality Falcon2 22W
    Creality Falcon2 22W
    More Products
    Compare
    Hyper Series
    Hyper Series
    CR Series
    CR Series
    Soleyin Series
    Soleyin Series
    Ender Series
    Ender Series
    More Products
    Compare
    CFS-C
    New
    CFS-C
    SpacePi X4L
    New
    SpacePi X4L
    Creality SpacePi X4
    Creality SpacePi X4
    Creality Space Pi  Dryer
    Creality Space Pi Dryer
    CFS - Creality Filament System
    CFS - Creality Filament System
    More Products
    Compare
    Download Center
    3D Models
    Creality Cloud App
    Firmware & Software
    Service Center
    Help Center
    Creality Wiki
    Product Support
    Video Guides
    Product Comparison
    Filament Guide
    Discover
    User Stories
    3D Printing in Education
    Blog Center / How to Replace i7 Hotend (Quick-Release Guide + Safety Tips)
    Contents
    contents

    Join Our Newsletter

    Subscribe to our newsletter for 3D printing insights, step-by-step guides, and inspirations for your next 3D printing adventure.

    By subscribing, you agree to our Terms and Privacy Policy.

    Social Media

    • Youtube
    • Facebook
    • Instagram
    • TikTok
    • Twitter
    • Reddit
    • Discord
    • LinkedIn

    Contents

    • About the i7 Hotend
    • When to Replace the Hotend
    • Required Tools
    • Safety Preparation
    • Replacement Procedure

    How to Replace i7 Hotend (Quick-Release Guide + Safety Tips)

    Apr 20, 2026 09:08:26

    About the i7 Hotend

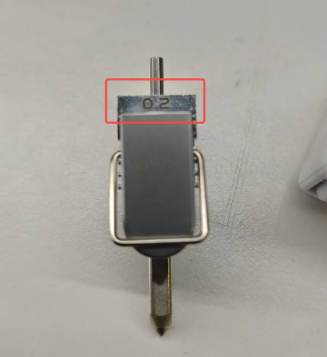
    The hotend is installed on the toolhead and is responsible for extruding filament. For the SparkX i7 printer, we offer hotends with four nozzle diameters: 0.2 mm, 0.4 mm, 0.6 mm, and 0.8 mm, allowing you to choose the most suitable option based on your printing needs.

    The i7 hotend features a quick-release design. In this guide, we will demonstrate how to replace the i7 series quick-release hotend.

    Note: If you replace the hotend with a different nozzle size, please remember to update the nozzle settings on the printer accordingly.

    When to Replace the Hotend

    When switching to a different nozzle size

    When the hotend is clogged

    When the hotend is damaged

    After more than six months of use, replacement is recommended

    Required Tools

    A new i7 Hotend Assembly

    Heat-resistant gloves

    Safety Preparation

    Before starting, make sure that the hotend and heated bed have cooled down to avoid burns. If the operation must be performed while the hotend is still warm, always wear heat-resistant gloves to ensure personal safety.

    Replacement Procedure

    The hotend can only be replaced when the toolhead is not loaded with filament. If filament is loaded, please unload it first, or manually press the cutter arm to cut the filament.

    Removing the Old Hotend

    Ensure the toolhead is unloaded, or confirm that the filament has been cut by the filament cutter.

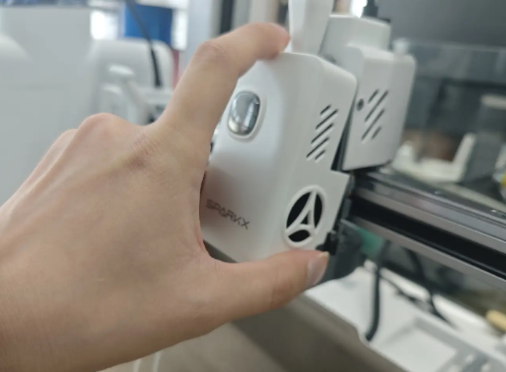
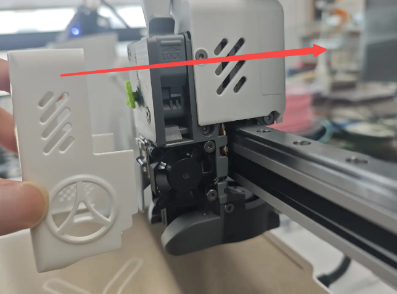
    Remove the toolhead front cover to expose the extruder and hotend.

    Removing the Old Hotend
    Removing the Old Hotend

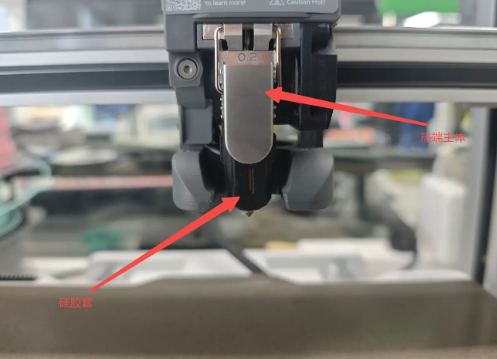
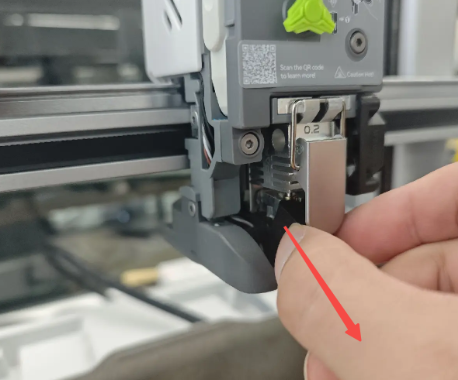
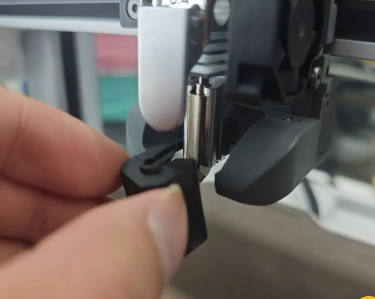
    Remove the hotend sock. You may use a wrench to gently pry it off for easier removal. Pinch both sides of the silicone sock and pull it outward and downward.

    Remove the hotend sock

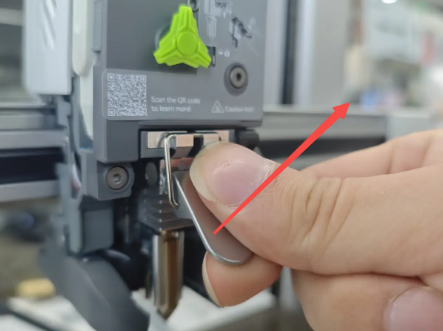
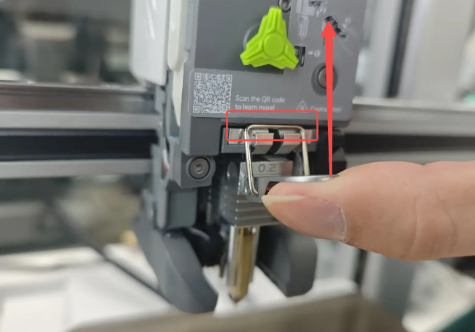
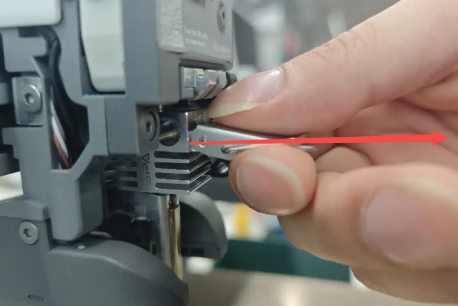
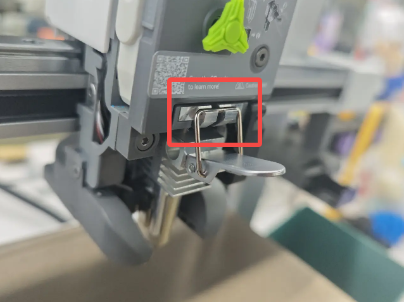
    Flip the hotend release lever upward. Hook the latch onto the upper protrusion and pull the lever upward until the hotend is released.

    Flip the hotend release lever upward
    Flip the hotend release lever upward

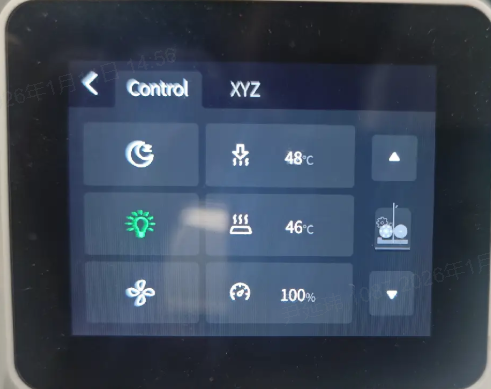
    If the hotend is too tight to remove, set the hotend temperature to 100 °C from the printer control interface, then try again.

    Warning: Do not touch the nozzle after heating to avoid burns.

    set the hotend temperature to 100 °C
    Do not touch the nozzle after heating

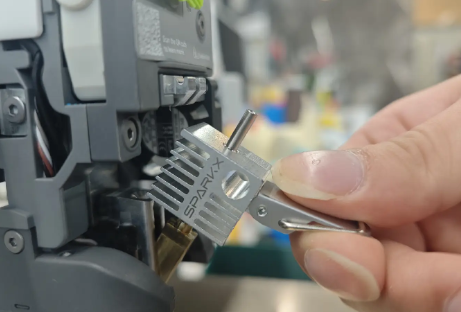
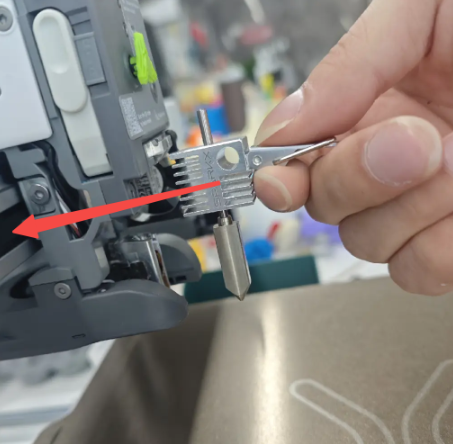
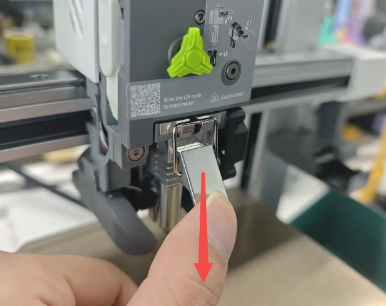
    Hold the release lever and pull the integrated hotend assembly straight out horizontally.

    Hold the release lever
    pull the integrated hotend

    Installing the New Hotend

    Prepare the new hotend to be installed.

    new hotend

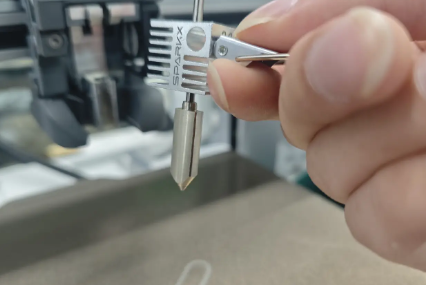
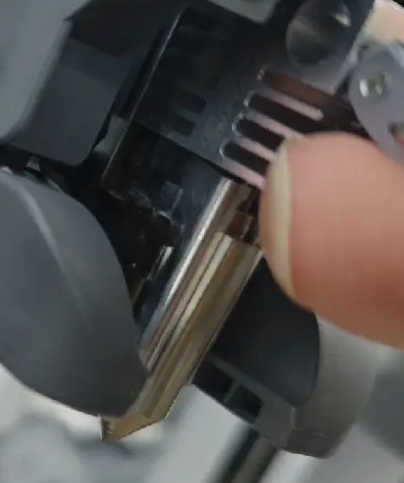
    Hold the release lever and insert the hotend horizontally into the heating assembly, ensuring that the nozzle is properly seated.

    Hold the release lever (2)
    insert the hotend horizontally into the heating assembly

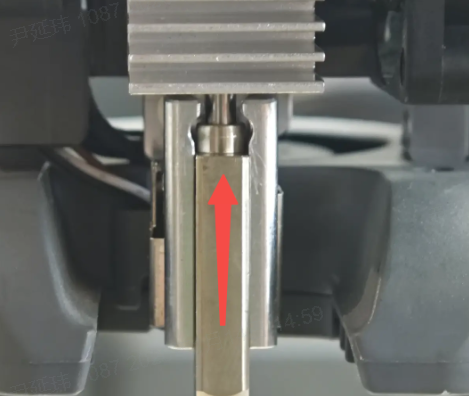
    As shown in the image, lift the Hotend upward.

    lift the Hotend upward (2)
    lift the Hotend upward

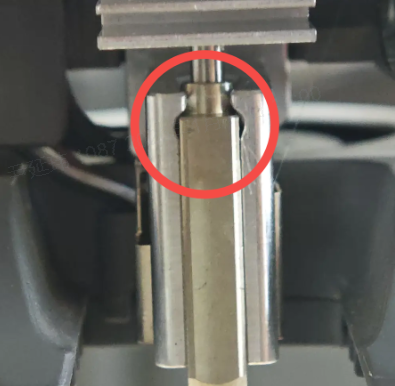
    Engage the latch hook into the upper slot and press the release lever downward to lock the hotend in place.

    Engage the latch hook into the upper slot
    press the release lever downward to lock the hotend in place

    Reinstall the hotend sock and the toolhead front cover to complete the installation.

      Align the notch of the silicone sock with the nozzle, push it in at an angle, then reinstall the front cover horizontally.

    Reinstall the hotend sock (2)
    Reinstall the hotend sock

    Check whether the installed hotend specification matches the printer settings.

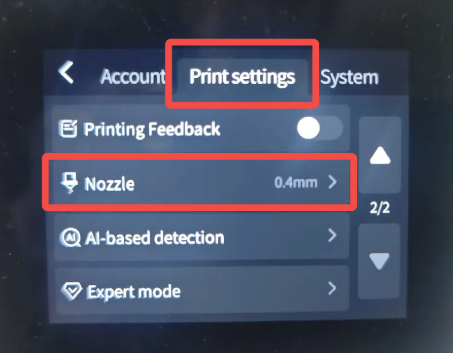
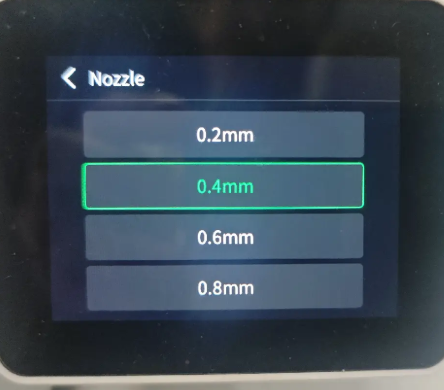
      On the printer, go to Settings → Print Settings → Nozzle to view and modify the nozzle parameters if necessary.

    Check whether
    nozzle print setting
    0.4mm nozzle

    SHOP

    • Store
    • Falcon Store
    • K Series
    • Hi Series
    • Ender Series

    COMMUNITY

    • Forum
    • Creality Cloud
    • Discord
    • Reddit
    • Open Source

    SUPPORT

    • Downloads
    • Help Center
    • Video Guides
    • Warranty & Repairs
    • Creality Wiki

    ABOUT

    • About Us
    • Distributors
    • ShareFest Events

    Be the First to Know

    Get the latest news from Creality.

    • Youtube
    • Facebook
    • Instagram
    • TikTok
    • Twitter
    • Reddit
    • Discord
    • LinkedIn
    Privacy PolicyTerms of SalesShipping PolicyFeedback
    United States(English)

    Copyright © 2025 Creality Co., Ltd. All rights reserved.