


Considering your first print with the Creality Hi Combo? Unpacking a brand-new tool is always thrilling. The Creality Hi Combo makes that adventure even better as you can color your fun. Today’s guide outlines a complete 3D printer unboxing and setting procedure, so you can begin printing immediately and efficiently.
Stick to these steps for an absolute 3D printer unboxing and setup experience. You can watch the video and content to operate.
Unboxing and Assembly
What’s within the box?
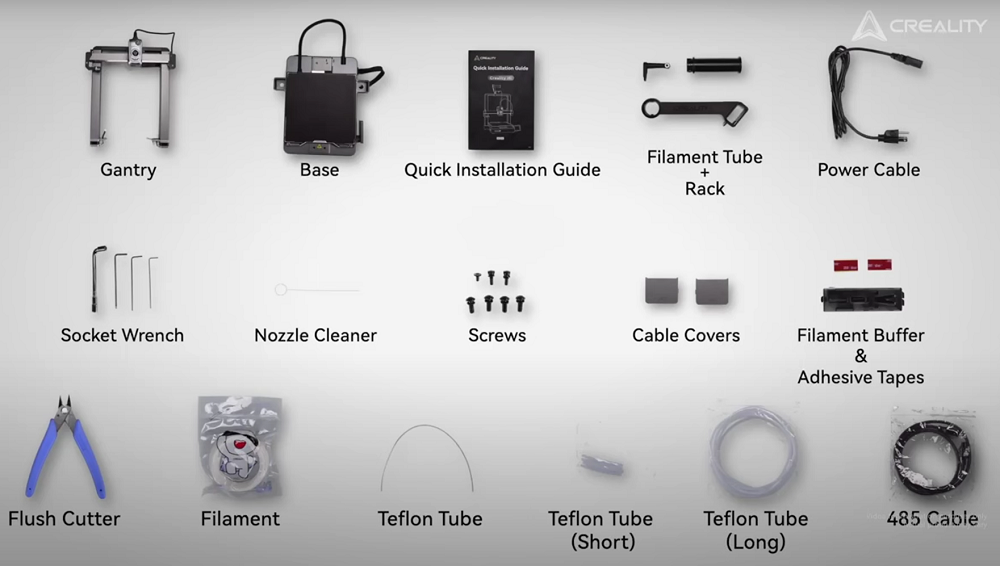
The Creality Hi Combo box contains all the key components:
-
Base
-
Gantry
-
Fast installation guide
-
Filament tube + Rack
-
Socket Wrench
-
Screws
-
Nozzle cleaner
-
Cable coverings
-
Filament buffer & Adhesive tapes
-
Filament
-
Flush cutter
-
Teflon tubes (short and long)
-
485 cable
-
Power cable
Every component is arranged safely in foam. The 3D printer unboxing method is secure and clean.
Step-by-Step Unboxing and Assembly
- Wide open the top of the package. Clear away all the foam layers, and take out all components and obvious accessories.
- Go through the quick installation guide. Then, keeps on extracting foam to unwarp the base and gantry.
- Cut the zip ties, withholding gantry, and build the plate. Install the build plate over the bed. Move the platform onwards to approach the screw positions.
- Set up the gantry on the base. That said, utilize four M4x8 screws to fix the two pillaers (two screws each side) and secure the piller connections from the side.
- This concludes the hardware body arrangement. The procedure is clear and feasible, surprisingly for newbies too.
Wiring Up and Spool Holder Setup
Wiring the Motors
Wire up every motor cable firmly. The Creality Hi Combo tags and ports match conveniently.
-
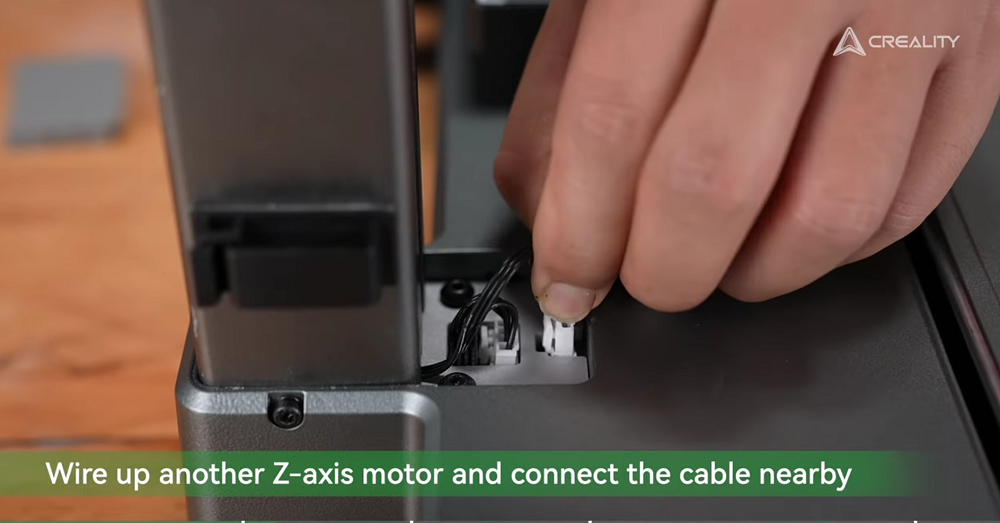
Connect the Z-axis motor on the side, and next install the cover.
-
Wire up the second Z-axis motor in the same manner, connect the cable within reach, and snap in the cover.
-
Fasten and connect the X-axis motor wire to its port.
Removing cabling guarantees effortless movement and prevents knots during activity.
Installing the Filament Rack
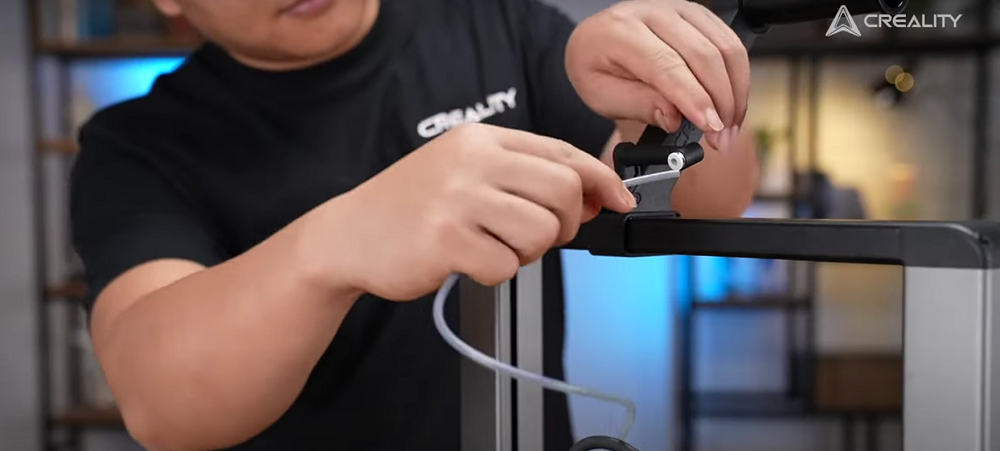
The Creality Hi Combo has a filament rack in the company of a tangle-free framework. Start by getting the spool holder parts ready. Secure the anti-tangle rack to the upper gantry bar utilizing a M3x5 screw.
Then, clamp the filament tube within the rack. Organize and insert the track in position on top of the gantry. Lastly, secure it with the buckle for a perfect fit.
Tube Connections
Then, direct the filament feeding tube:
-
Slip one side of the Teflon tube into the extruder.
-
Slip the other side of the spool holder on the filament rack.
This direction holds filament motion even and continuous. Besides, it’s significant to stick to this route precisely to avoid blockages while Creality print. With the body assembled and the wiring finished, the 3D printer unboxing and setup are half-finished.
Power On and Load Filament
Getting Started
When assemblage and wiring are done, it’s time to breathe life into Creality Hi Combo. This step marks the shift from setup to Creality print.
- Remove the screen protector, rearrange the screen to the best angle for viewing.
- Plug in the power cable and turn on the printer through the power button positioned on the base.
- Set up the printer according to the power-on guidelines and perform a printer self-test.
When the above series of adjustments were completed, it was pretty close to our goal.
Loading Filament
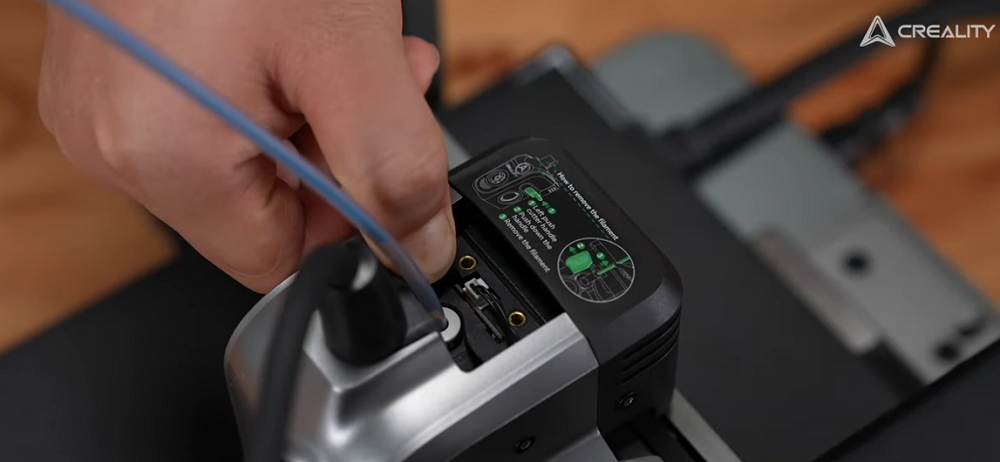
Correct filament loading is key for a trouble-free print. So, follow these steps attentively:
-
Cut the end of the filament at a clear angle, as this assists in setting it in without resistance.
-
Slip the filament into the Teflon tube linked to the extruder.
-
Push down on the extruder lever to unlock the loading route.
-
Push, gently, the filament in till you notice the indicator light switch on.
-
Tap “Extrude” on the touchscreen interface to start filament loading.
When the filament begins passing through the nozzle, select a local model file and hit “print”. You can choose from multiple types of filaments, such as PLA, PETG, TPU, ABS, and various composites like PLA-C, available at the Creality store.
Connect to CFS
The CFS improves the Hi Combo’s capacities, specifically for multi-color or multi-material printing. Organizing the CFS is easy if you keep to these steps in order.
Install the Filament Buffer
Bring out the filament buffer and adhesive tapes from the accessories. Then, take off the film from the adhesive tape and use the adhesive strips on the back of the filament buffer. Install the buffer onto the printer gantry and firmly push to fix it in place.
That said, the buffer ensures the filament motion is steady and helps avoid tangling in multi-color or longer Creality prints.
Reconnect the Teflon Tubes
You’re required to optimize the filament passage to incorporate the CFS.
-
Take out the Teflon tube from the earliest filament rack and the extruder.
-
Utilize the long Teflon tube offered in the package.
-
Wire up one side to the filament buffer.
-
Slip the other side into the extruder.
-
Bring another Teflon tube and link it from the buffer inlet to the CFS unit.
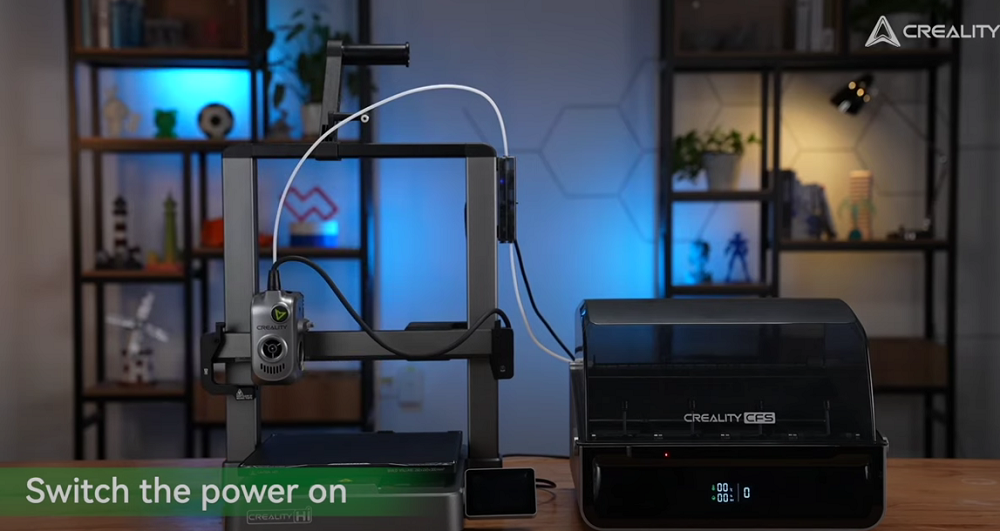
Final Wiring and Power-On
Utilize the two 485 cables carried in the box to finish the connection. First, connect one 485 cable from the filament buffer to the CFS. Next, attach the second 485 cable from the CFS to the printer foundation and turns on the main power to operate the CFS system.
Load Filament into CFS
The Creality Hi Combo functions best with Creality RFID filaments, and that the CFS identifies automatically. For this, unlock the CFS lid and put in your filament spool and hold back for the filament data to sync, no physical input required.
Load several filaments into at hand slots if you want to print with multi-color or multi-material. Next, choose a local multi-color model file through the screen and hit “Print” and observe the system handles the rest.
Pro Tip: Once setup, begin with a little model to test usefulness. So, use one of the preloaded demo files and see the way printer manages bed leveling, extrusion, retraction and color switching.
Final Thoughts
The Creality Hi Combo is simple to set up, even for beginners. Just stick to the step-by-step procedure above. Beginning with unboxing to creating your first Creality print, the method is quick, guided, and satisfying. This one is ready right out of the box if you’re searching for a reliable tool to begin your 3D printing journey.