


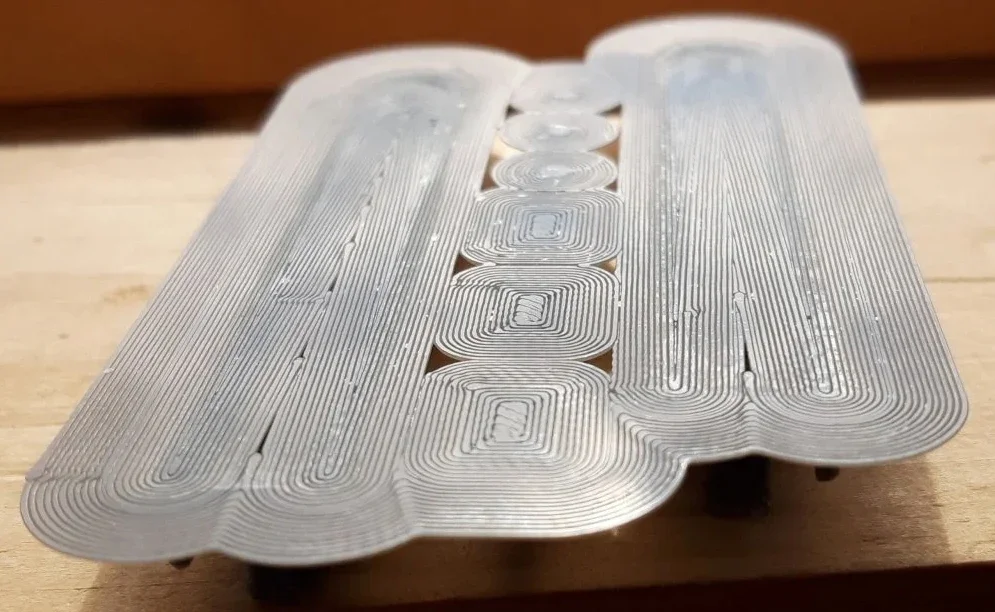
You pull a print off the build plate. The shape is right. The dimensions check out. But when the light hits it just right, there they are — fine horizontal scars wrapping around the surface like growth rings on a tree. Those are 3D print layer lines, and they’re the fastest way to turn an otherwise perfect model into something that looks… unfinished.
The truth is, 3D printer layer lines are not a mistake. With the right slicer settings, calibration, and post-processing, you can dramatically reduce and eliminate 3D printing layer lines. This article will show you exactly where layer lines come from — and how to keep them under control.
What Are Layer Lines in 3D Printing?
Layer lines, sometimes called layer ridges or step lines, are the faint horizontal marks you can see on most 3D-printed parts. They appear because FDM printers don’t create objects all at once. Instead, they build them up layer by layer.
Every time the nozzle lays down a new strand of filament, it stacks it on top of the previous one, leaving a tiny edge behind. Up close, or when you run your finger across the surface, these edges show up as a series of subtle ridges.
How noticeable these 3D print layer lines are depends on several factors.
Layer height: thinner layers capture finer detail and blend together more smoothly, while thicker layers leave more obvious steps on the surface.;
Filament type: materials like PLA tend to sand and finish well, while very glossy filaments or those filled with particles can make layer lines stand out more clearly.
Print speed and cooling: Very fast printing or uneven cooling can worsen lines by causing layer inconsistencies.
Print calibration: A well-tuned printer (proper E-step calibration, tight belts, leveled bed) produces more even layers.
Part geometry: Curved or sloped surfaces clearly show the “staircase” effect of layers.
Why Do 3D Printer Layer Lines Appear?
Layer lines show up for a few key reasons, all tied to how FDM printers build objects. Because the model is created one layer at a time, anything that affects how those layers are formed, aligned, or stacked will influence how visible the lines become.
Layer Height and Resolution
Every 3D printer has a limit to how fine its vertical detail can be, and that limit is controlled by the layer height you set in your slicer. When you print with thicker layers, each layer creates a more noticeable step on the surface. When you use thinner layers, those steps become much smaller and harder to see.

Nozzle size matters: A common guideline is to keep your layer height between 25% and 75% of the nozzle diameter.
Variable layer height: Some slicers (like Creality Print 6.0) offer adaptive or variable layer height. This feature automatically uses finer layers on curved or detailed areas and thicker layers on flat sections.
Plan your resolution: If surface quality is your goal, thinner layers are worth the extra time. If speed matters more than appearance, thicker layers may be the better choice.
Z-Axis Wobble and Mechanical Issues
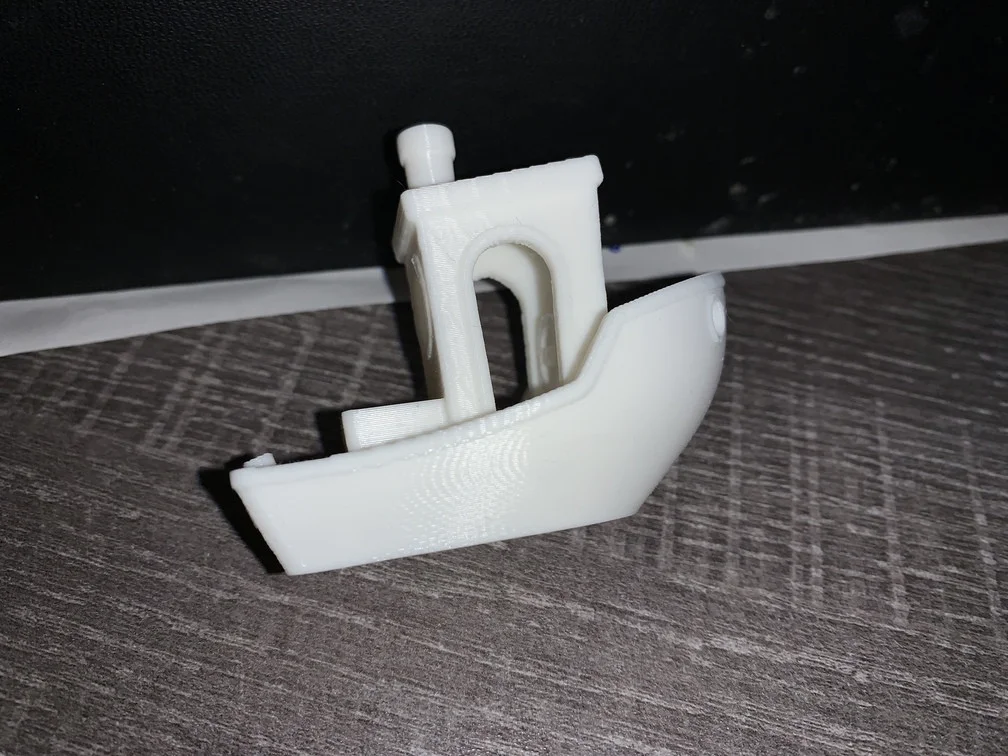
Not all layer lines are evenly spaced or perfectly straight. When you see repeating bands or wavy patterns, the cause is often mechanical, especially in the Z-axis, which controls vertical movement.
Z-band defect: This appears as regular horizontal ridges around the print. This is often caused by a bent lead screw, misaligned rails, or a coupler that’s too tight or binding. As the Z-axis moves up, small mechanical errors repeat themselves, creating visible bands.
Z-wobble: This produces a more uneven, wave-like texture on vertical surfaces. This can happen when a threaded rod isn’t perfectly straight or when bearings are worn or misaligned.
Inconsistent Extrusion
Layer lines can also be exaggerated by uneven extrusion. If the printer delivers slightly too much or too little filament on certain layers, the surface will show raised ridges or shallow gaps.
This might happen if the flow rate (the firmware’s E-steps or the slicer’s flow multiplier) is incorrect, or if the nozzle is partially clogged or clogged. Sudden changes in filament diameter (cheap filament) can also introduce inconsistency.
Flow calibration: Calibrating extrusion is critical. Print a simple cube or use a calibration pattern, measure if the right amount of filament is extruded, and adjust the E-step or flow setting
Temperature and binding: Too low a hotend temperature can under-extrude on some layers; too high can over-extrude and ooze.
Speed, Acceleration, and Cooling
Print speed and acceleration influence layer quality as well. Printing too fast or with uneven cooling can accentuate layer lines. By using moderate speeds (e.g. 40–60 mm/s for outer walls), tuning acceleration, and ensuring adequate cooling, you allow each layer to be deposited cleanly.
How to Remove Layer Lines From a 3D Print
Reducing layer lines starts with dialing in your printer and slicer settings. These adjustments happen before or during printing, and they’re often enough to make a noticeable difference without any post-processing.
Reduce Layer Height in the Slicer
The most straightforward way to get smoother walls is to lower the layer height. In your slicer settings, such as Creality Print, switching from 0.2 mm to 0.1 mm can significantly reduce visible layer steps. The trade-off is longer print time, but surface quality improvement is usually worth it.
Calibrate Flow Rate and E-Steps
Consistent extrusion is critical for clean layers. Start by checking how much filament the extruder actually feeds when you command 100 mm. If the result isn’t accurate, adjust the E-steps in the firmware or fine-tune the flow multiplier in your slicer.
Improve Z-Axis Stability
Any instability in the Z-axis will show up as uneven layer lines or repeating bands.
Step 1: Tighten any loose screws on the frame and Z carriage to eliminate play;
Step 2: Inspect the lead screw and couplers. The lead screw should be straight and clean, and the coupler should be secure without being over-tightened;
Step 3: Ensure the Z-axis rails or rods are properly aligned and lightly lubricated so the axis moves smoothly from one layer to the next.
Adjust Print Speed and Temperature
Finally, optimize print speed and temperature to smooth your 3D print:
Print slower on the outer wall: Use a modest outer-wall speed (40–60 mm/s) and even limit acceleration (about 3000 mm/s²).
Optimize temperature: Dropping the temperature to around 210 °C can reduce rough bands with PLA. Conversely, too-cool extrusion can underfill a layer.
Layer timing: If a layer is very thin, enable a minimum layer time or slow down the print so it isn’t skipping ahead before the previous layer sets.
How to Get Rid of Layer Lines in 3D Printing (Post-Processing)
If layer lines are still visible after printing, post-processing techniques can smooth them out. Here are the popular methods:
Sanding
Sanding is the most common way to remove layer ridges. Using progressively finer grit sandpaper will mechanically smooth the surface.
Filler Primer and Painting
Spray filler primer (often an automotive-style primer) is great at filling minor gaps and layer lines. Lightly spray several thin coats, letting each cure before the next. The primer’s pigments and solvents fill the tiny ridges between layers, creating a uniform surface.
Related Post: How to Paint Your 3D Prints (2026 Guide)
Chemical Smoothing
This method effectively “eats away” the ridges: as the acetone vapor softens the ABS, the surface tension pulls the ridges flat, creating a shiny coat with no visible layer lines.
Resin Coating or Epoxy
A modern and effective post-process is to coat the print with a thin epoxy or resin. You mix the resin and brush it on as you would paint. The resin is self-leveling, so it fills in the layer gaps as it cures. After curing (usually a few hours), the surface is rock-solid and glossy.
FAQ About 3D Print Layer Lines
Q: Can I avoid layer lines in FDM printing?
A: Any FDM (filament) printer builds in layers, so some layer lines cannot be avoided. You can minimize them, but you won’t ever see an FDM part with no lines whatsoever.
Q: How do I get rid of 3D print lines without sanding?
A: Your best bet is to optimize printing. Use small layer heights, properly calibrate your printer, and fine-tune speed/temp as described above.
Wrapping Up
3D printing layer lines are a normal part of FDM printing, but they don’t have to ruin your final part. By understanding the causes—layer height, mechanical alignment, extrusion consistency, and print settings—you can significantly reduce how noticeable those lines are.