

In the world of 3D printing, for a better 3d printing experience, there will be an important step, which is the use of slicing software. For beginners, slicing software may be a little difficult to operate, but don't worry, there will be detailed steps here. After reading these steps, you can print the model you want easily.
First, you need to install the 3d printing slicing software on your computer as the following.
1.1 Double click Creality Slicer_1.2.3.msi
1.2 Choose“Next” to continue
1.3 Choose the installation path “Default Path” (C:\Program Files(x86)\Creality Slicer) and choose “Next” to continue
1.4 Click“Install” to install the software
1.5 Waiting some time, choose “Finish” to over the installation
Second, when you have installed the 3d printing slice software, you need set language and choose the 3d printer model as the following.
2.1 Running Creality slicer
2.2 Select language→next
2.3 Choose 3d Printer model name(you ordered)→Next
2.4 Finish the setting.
Third, this is the printing mode you need to understand.
The Creality 3d printer software has a built-in fast print mode and full configuration mode. The default mode is the fast print, if it is necessary, you can switch to the full configuration mode.
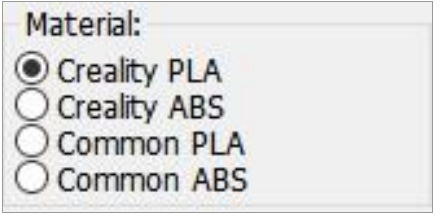
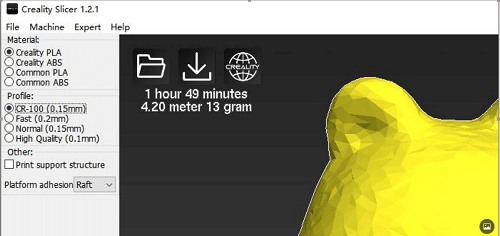
About the first 3d printing mode, you need to have a clear understanding of the material, profile, and others.
Material:
Profile:
2. Fast (0.2mm), this mode is suitable for large-size simple models. It will greatly shorten the printing time, such as printing the cubes.
3.Normal (0.15mm), this mode is suitable for printing most models and is the best balance between 3d printing speed and accuracy.
4. High Quality (0.1mm), these modes sacrifices print speed to provide better print accuracy. If you want to improve the printing efficiency, you can also try to use the relevant settings of the CR-100.
Others:
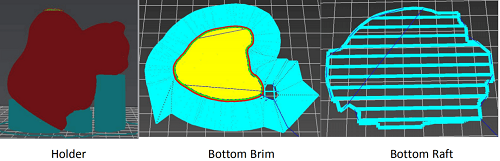
2.Bottom Brim: A few rounds will be printed on the outside of the bottom of the model to provide better adhesion for the model.
3.Bottom Raft: A raft will be printed on the underside of the model, to provide a flat print surface for the model even when the platform is slightly tilted.
Fourth, this is the command in the window.
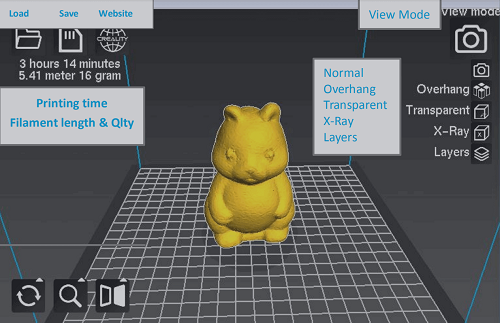
Normal: Used to view the overall outward and modify the model.
Overhang: Used to view the dangling position of the model, the red display part is left floating.
The transparent: The model is in a translucent state.
X-Ray: The surface of the model parallel to the platform is dark, others are translucent.
Layers: Display the slice of the model and the nozzle movement. Different type, the movement path will be a different color:
Red: The outer surface of the model.
Yellow: Grid filled.
Emerald: The outer surface of the 2~n layers.
Dark green: Auxiliary structure such as support.
Blue: Empty.
In “Layers”, we can drag the right progress bar to view the print path of different layers. Click below to view the switch to display only the current layer or display the current layer path.
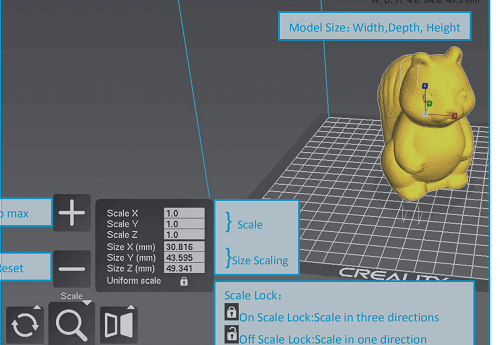
When the model is gray, the model size is larger than the platform size, and the slice will not be sliced normally. The model scale needs to be adjusted to be smaller than the size of the platform.
About rotate, scale, mirror:
Rotate: Select the circle and drag, so that you can turn the model.
Scale: Changing the number you can change the size of the model.
The Function of Right Mouse Button
Center on platform
Delete object
Multiply object
Split object into parts,
Delete all objects,
Reload all objects,
Reset all objects positions,
Reset all objects transformations
Fifth, this is the 3d printing way you need to know.
Offline printing is one way to use the storage card for printing, do not need a computer, it is easy to use and operate, we advise users to choose offline printing.
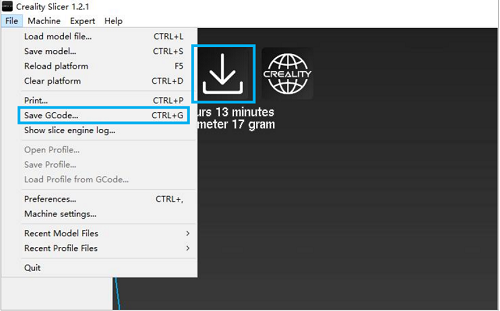
Note:The name of the file should be alphabet and numbers, It can not be a special symbol, or the printer won’t work.
Select the path in the pop-up window and write the file name. It is important that the file name must be alphabet or numbers, not special symbols.
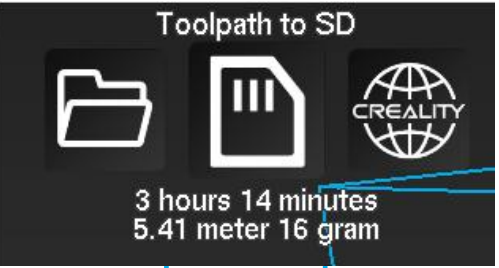
Note: If you have inserted the storage card, it will show “Toolpath to SD”, click it will be kept to the storage card.
On line 3d Printing
Online 3d printing needs to connect the computer to the 3D printer by data cable. The 3d printer cannot be powered off in the printing process, and the computer cannot sleep or go screen saver, or the data transmission will be a failure, it is inconvenient to use, we do not advise users to choose this way.
It is recommended to turn off the anti-virus software before installing the driver to prevent the accidental and cause the installation to fail.
1、Connecting the computer to the printer by USB cable.
2、Set up the Creality Slicer as follows.
2.1 Choose“File”→“Preferences”, Choose “Pronterface UI” and click“OK”.
2.2 Choose“File”→“Machine Settings”, and select the max number at the serial port, “Baudrate” is 115200.
2.3 Load the model, this icon shows that we have contacted the computer. Click, it will be s one new Pop-ups window.
We can click on the gray ring on the window to control the motion of the XYZE axis. "0.1, 1, 10, 100" are each amount of motion. The text box in the lower right corner can be input G code to control. If you are not familiar with it, please do not change anything. Click “Print” to start 3d printing. Please be careful during printing to avoid 3d printing failure.
Note: If you cannot connect properly, please install the corresponding driver or download the third-party driver software.
Sixth, 2.4 Printing Durable color models
6.1 In the beginning, make sure that the printer you buy supports two-color printing.
6.2 Open or drag different parts of the two-color model you want to print into the software.
6.3 Right-click the model and select "Multiply Object", After the software prompts the slicing to complete, you can start printing.
Seventh, make Lithophane
1. Open or drag a photo to the software.
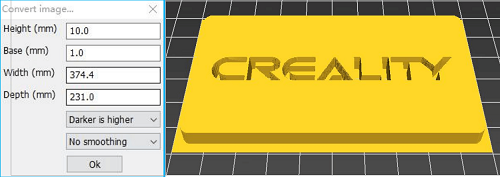
2. Input the appropriate parameters, that we can start to print after the slicing is complete.
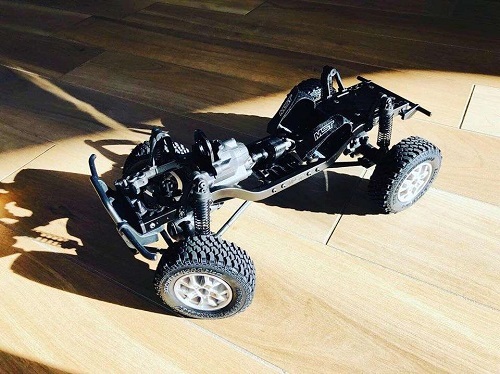
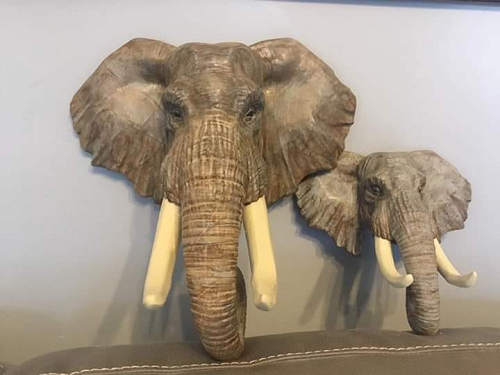
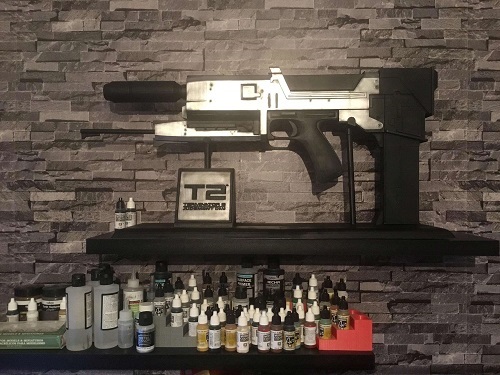
There are some special models shared from our customers, which are made by Creality 3D Printers, If you are interested in sharing us with your amazing models and 3d printing stories, you can send us by email below.