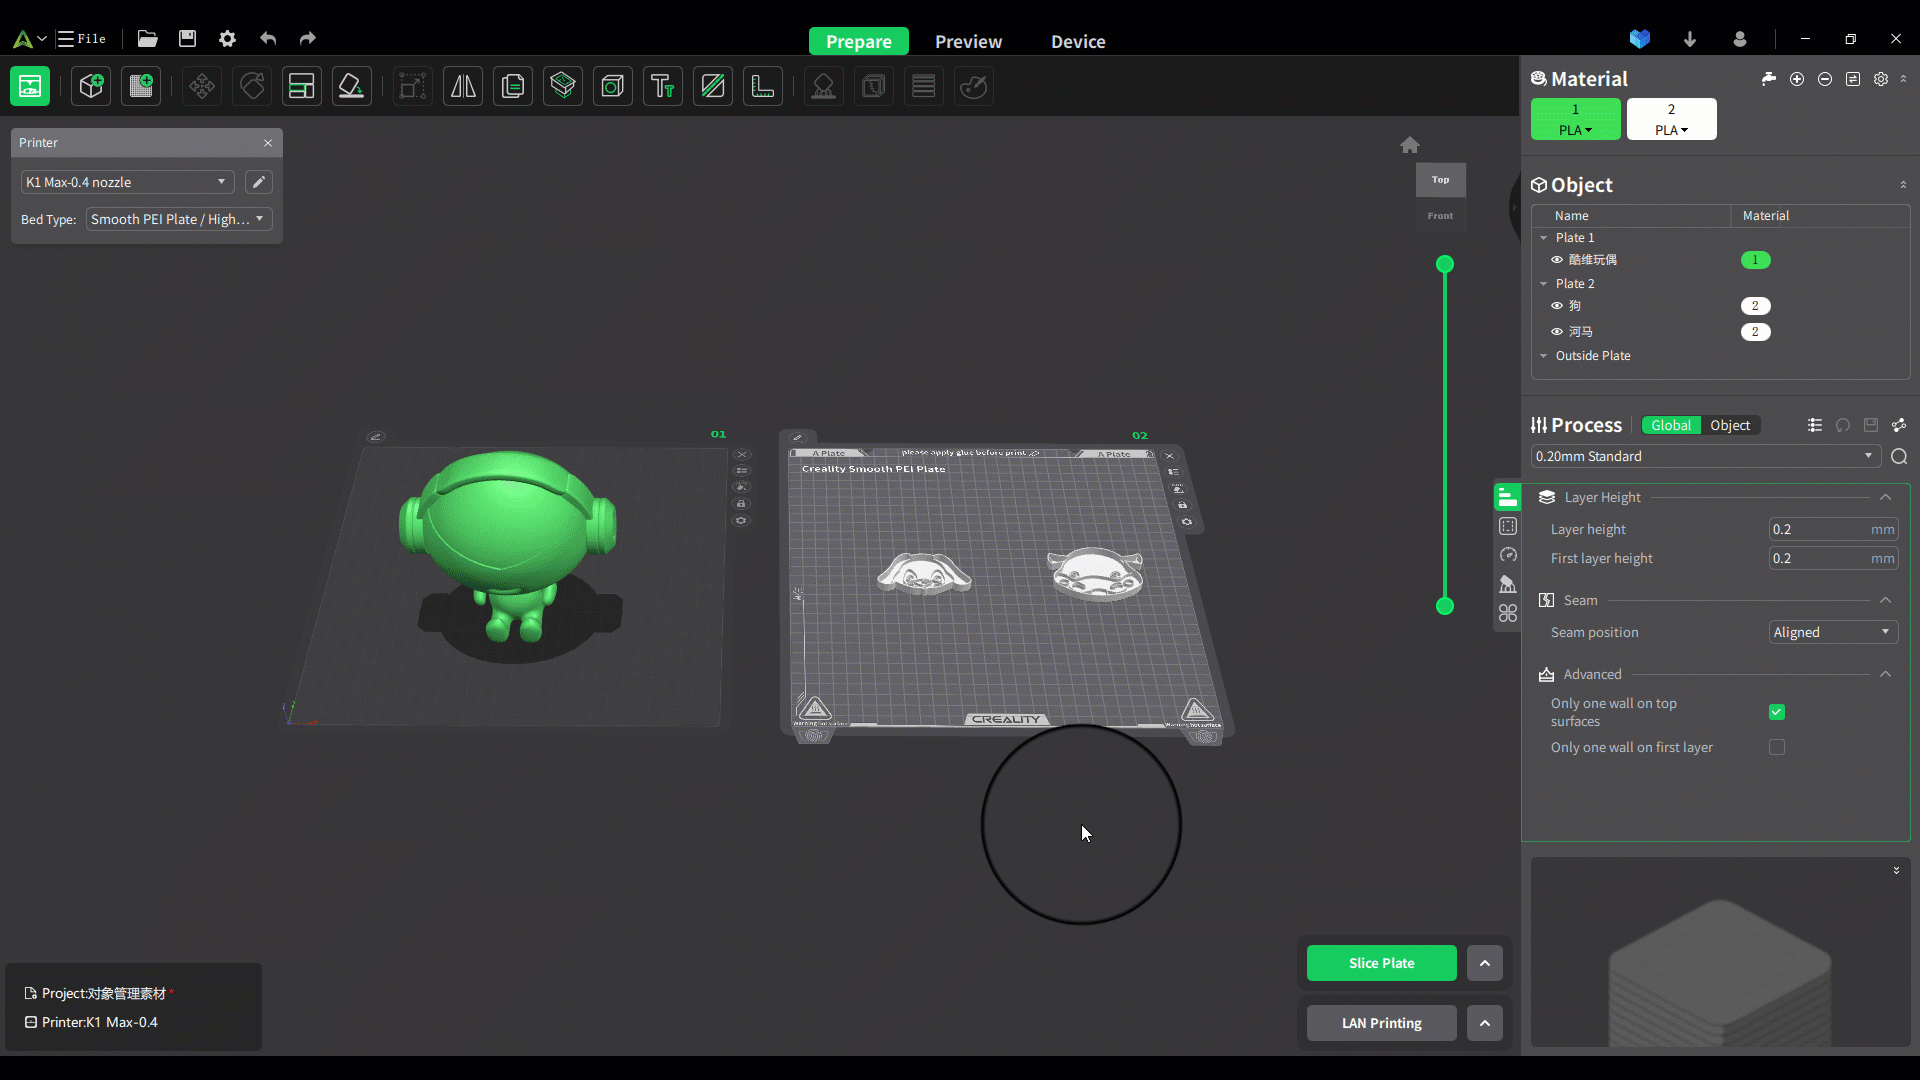
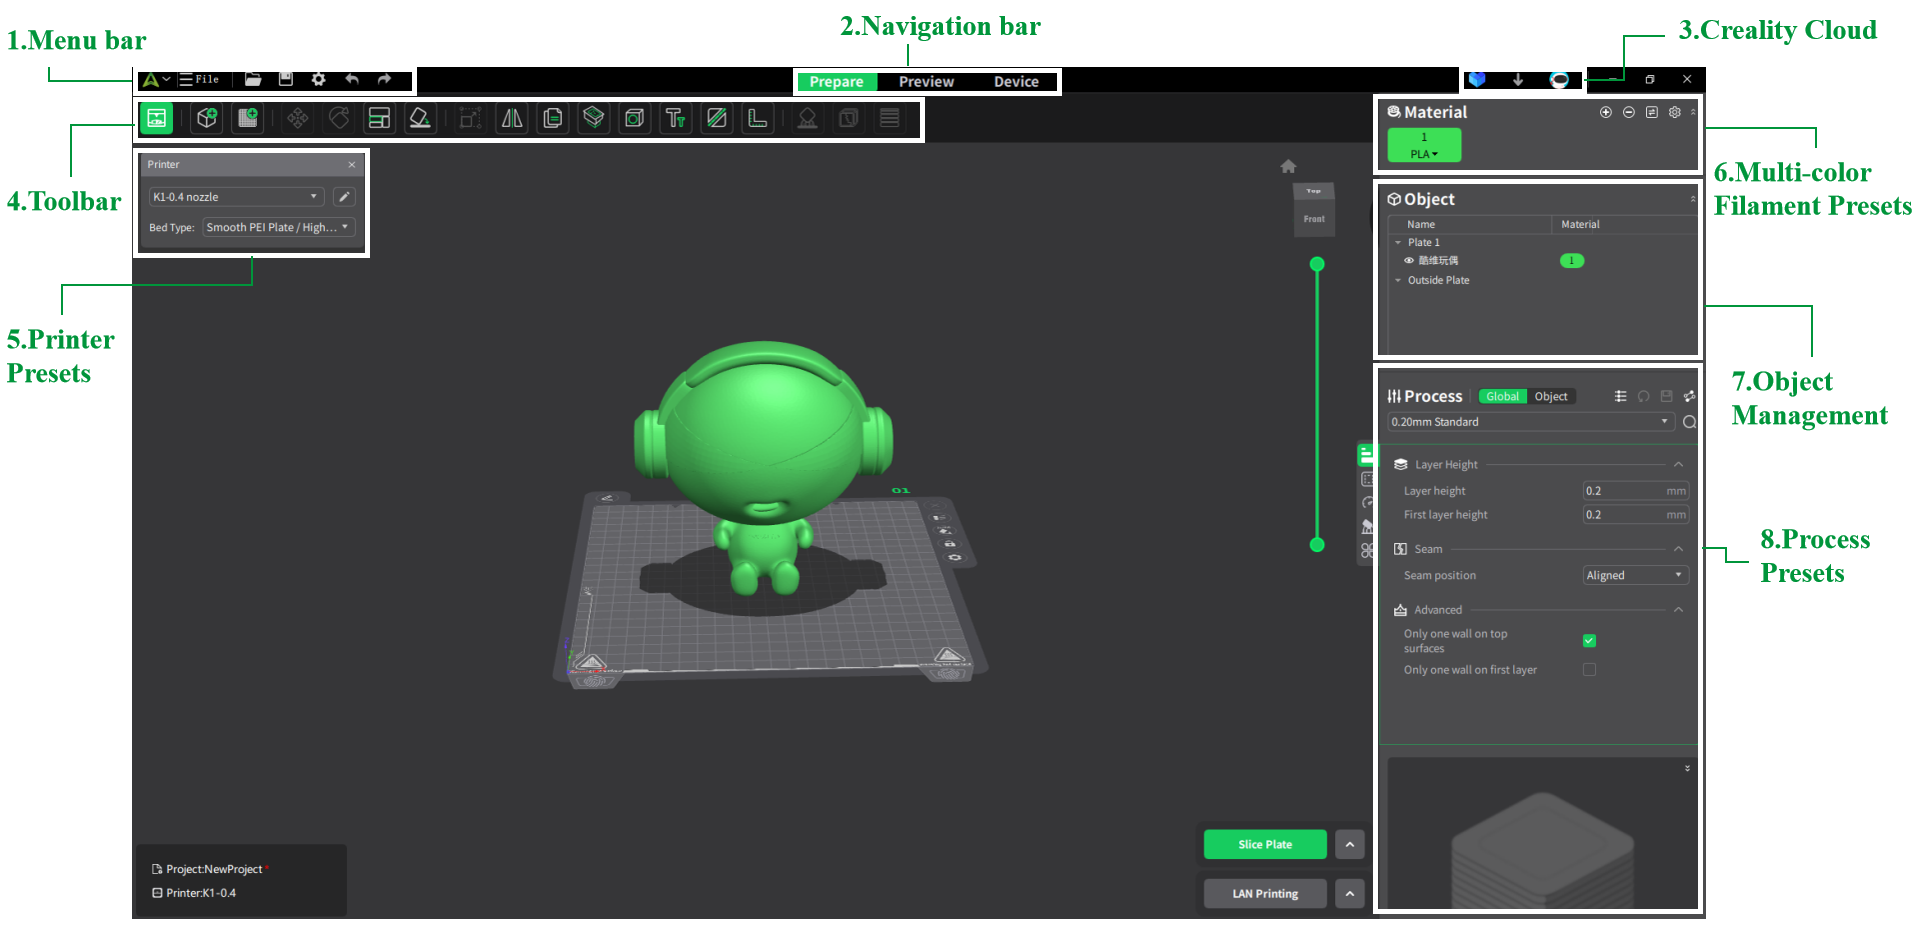
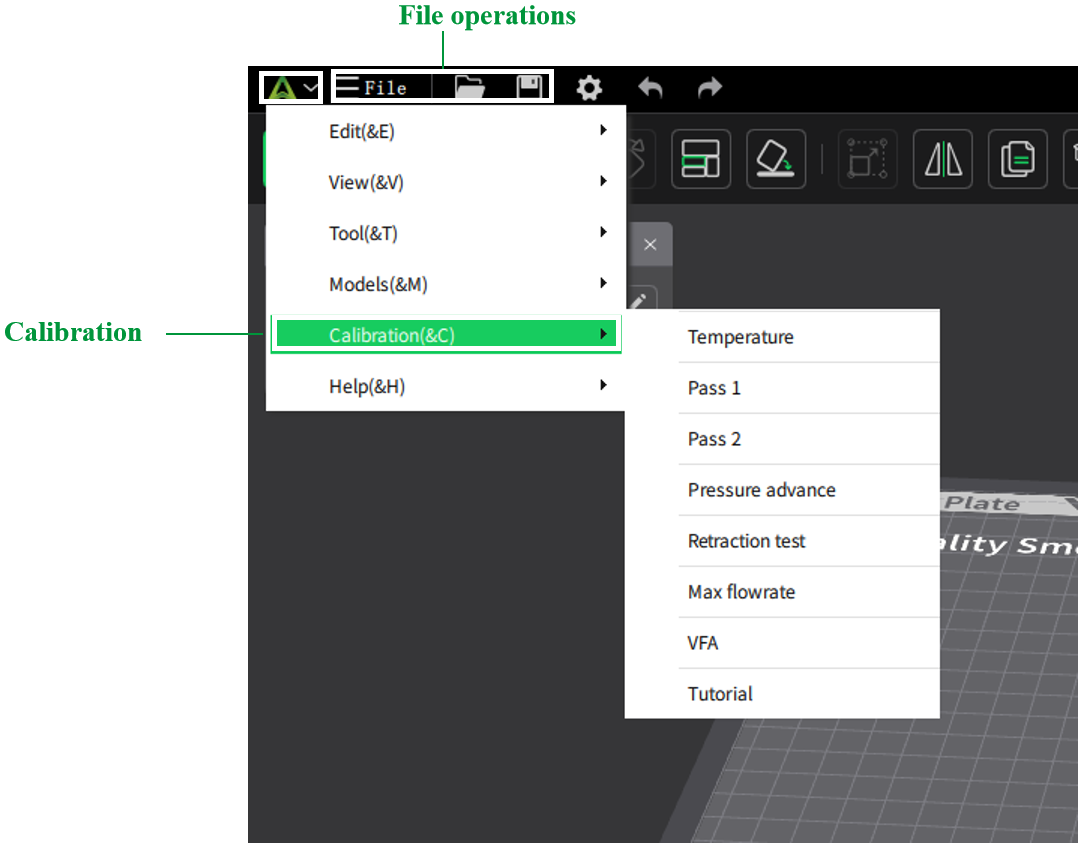
Menu Bar
The menu bar primarily handles general operations such as opening, saving, creating new files, which is the first step in 3D printing. Calibration can also be performed here to confirm the best parameters.
Navigation Bar
The usage process of Creality Print is divided into three stages: Prepare, Preview, and Device.
- The Prepare stage includes loading, adjusting, and setting up the model to ensure smooth slicing and printing.
- The Preview stage is used to view the slicing effect of the model, facilitating modifications and adjustments before printing.
- The Device stage allows you to monitor the printing progress and remotely control the printer.
You can switch between the different panes to complete corresponding tasks.

Toolbar
The toolbar is used during the Prepare pane to adjust the 3D model. Here, you can import models and add plate, adjust the model's position (move, rotate,etc.), edit the model's style (scale, mirror, clone, etc.), and support painting, seam painting, and more.

Creality Cloud
The software integrates some functionalities of Creality Cloud and synchronizes with the Creality Cloud app account information. It also features a rich 3D model library for searching, downloading, and collecting models. You can login to your personal account here and access the personal center to view basic information, slices, model, and devices. The model library provides numerous models for download, and the download management feature lets you check download progress and manage downloaded files.
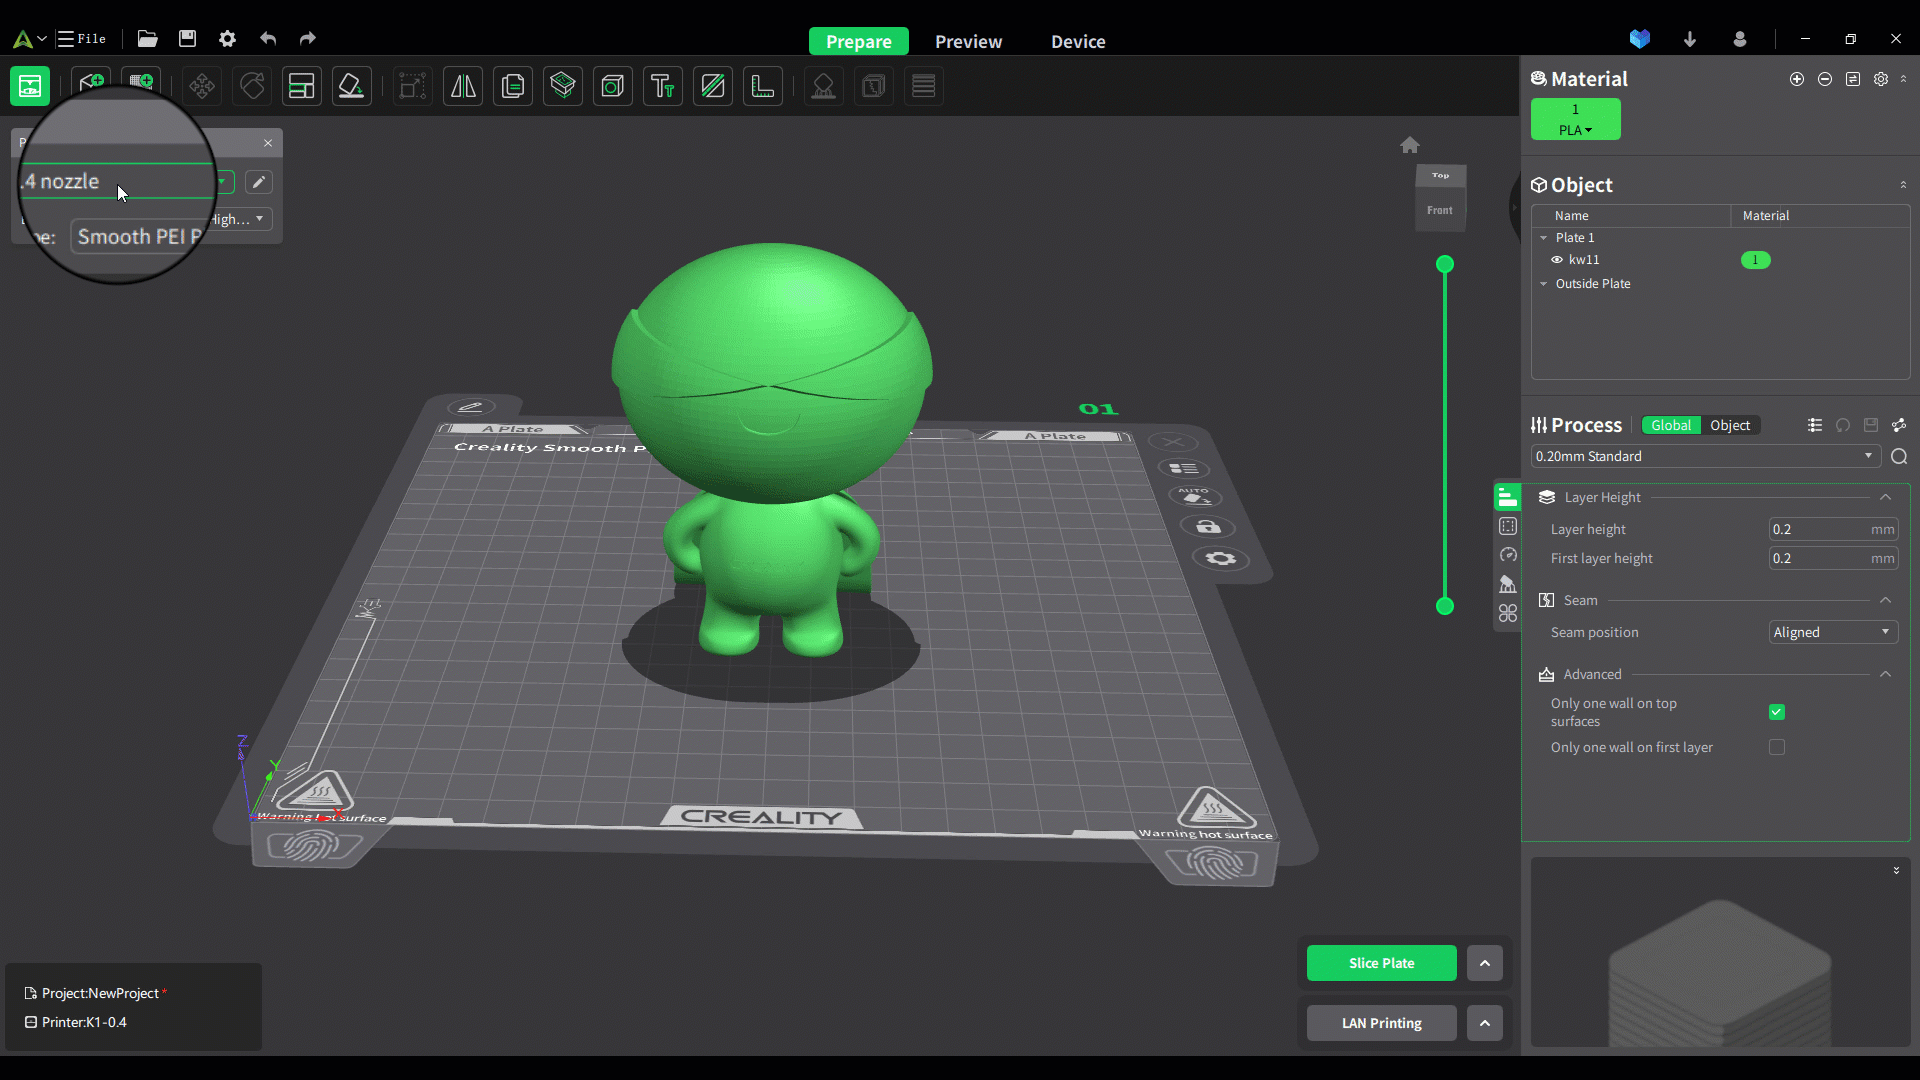
Printer Presets
We have prepared custom materials and processing parameters for each printer. If the selected printer does not match the actual one used, these default parameters may not align, affecting print quality. To ensure optimal printing results, please select the correct printer you will use. You can access the printer management panel here. For further parameter modifications, click the "Edit" button.
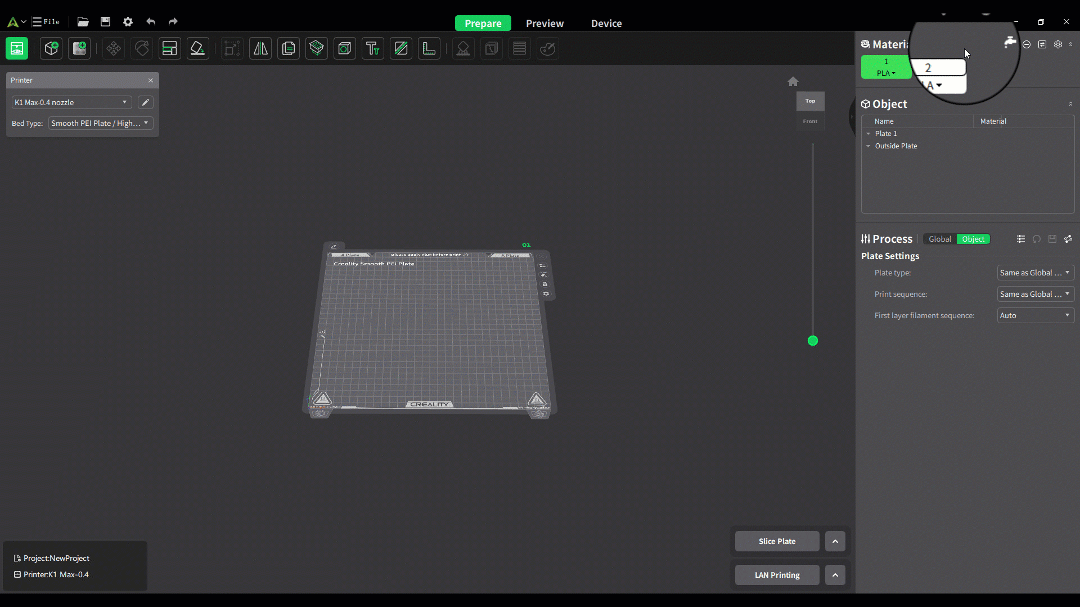
Multi-color Filament Presets
Multi-color filament management helps users conveniently manage types of filaments. If your printer supports multiple colors, you can select, add, or delete filaments here, and apply different filaments to different models; if your printer is single-color, you can still add all the filaments you use and apply different filaments to different plates' models. For further parameter modifications, click the "Edit" button.
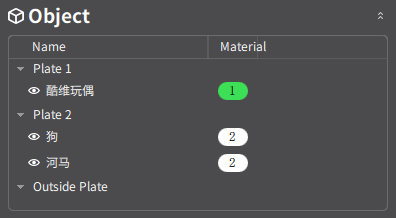
Object Management
Object management displays the structure of the entire project, including the plate, objects, and their used filaments.
Process Presets
Process parameters in the slicer refer to various settings that affect quality and strength during printing, determining the print process such as layer height, sparse infill density, etc. These are critical factors in ensuring successful prints. We have tested various process parameters for different printers. These preset parameters can meet most printing needs. Numbers represent layer heights, and you can select corresponding layer heights based on your needs. Smaller layer heights result in higher print precision but longer print times.

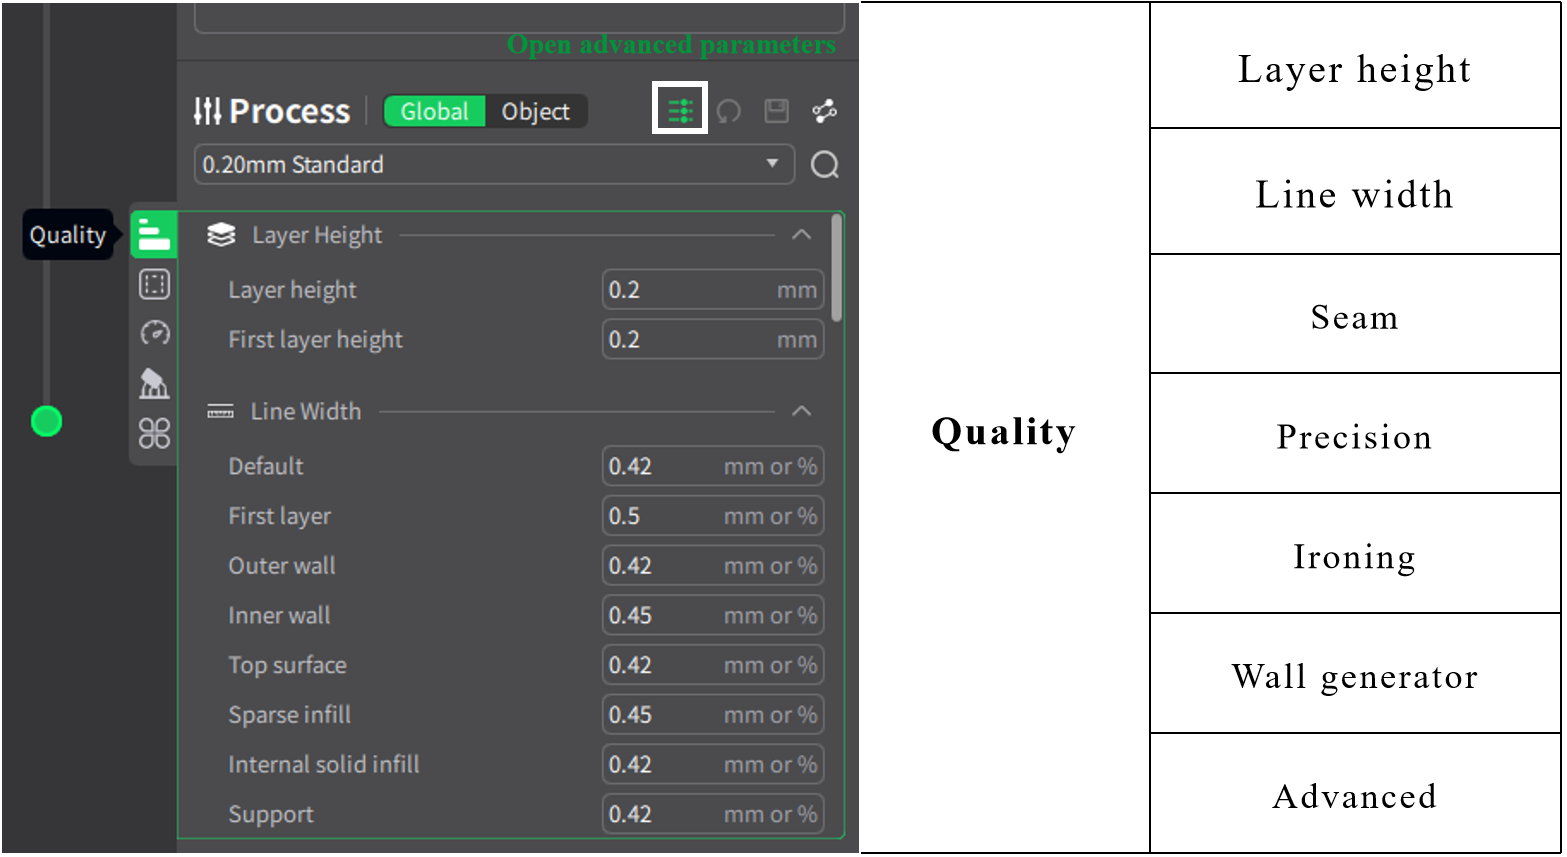
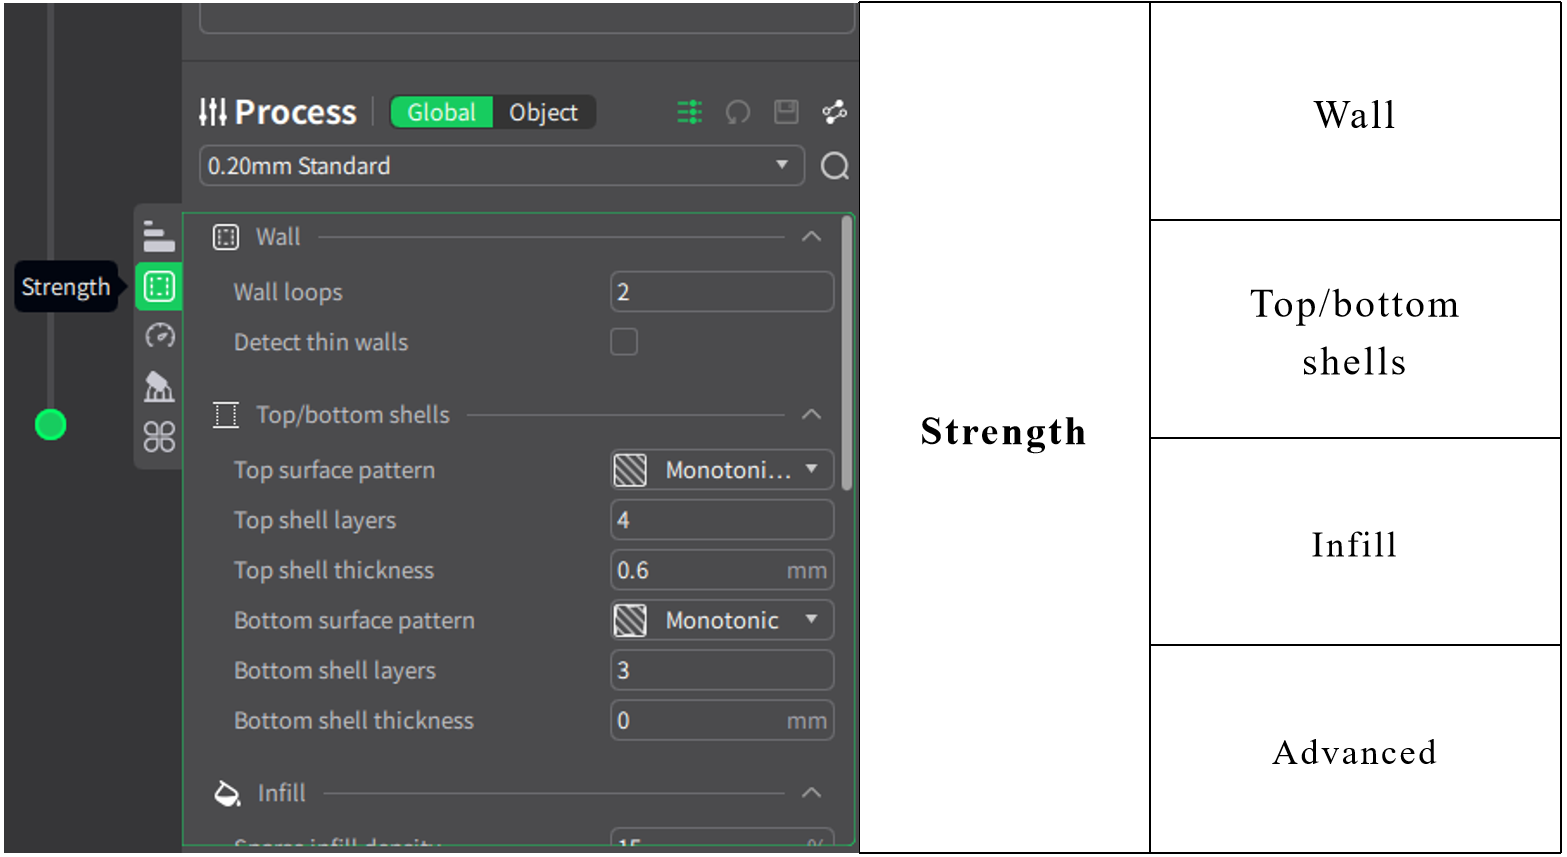
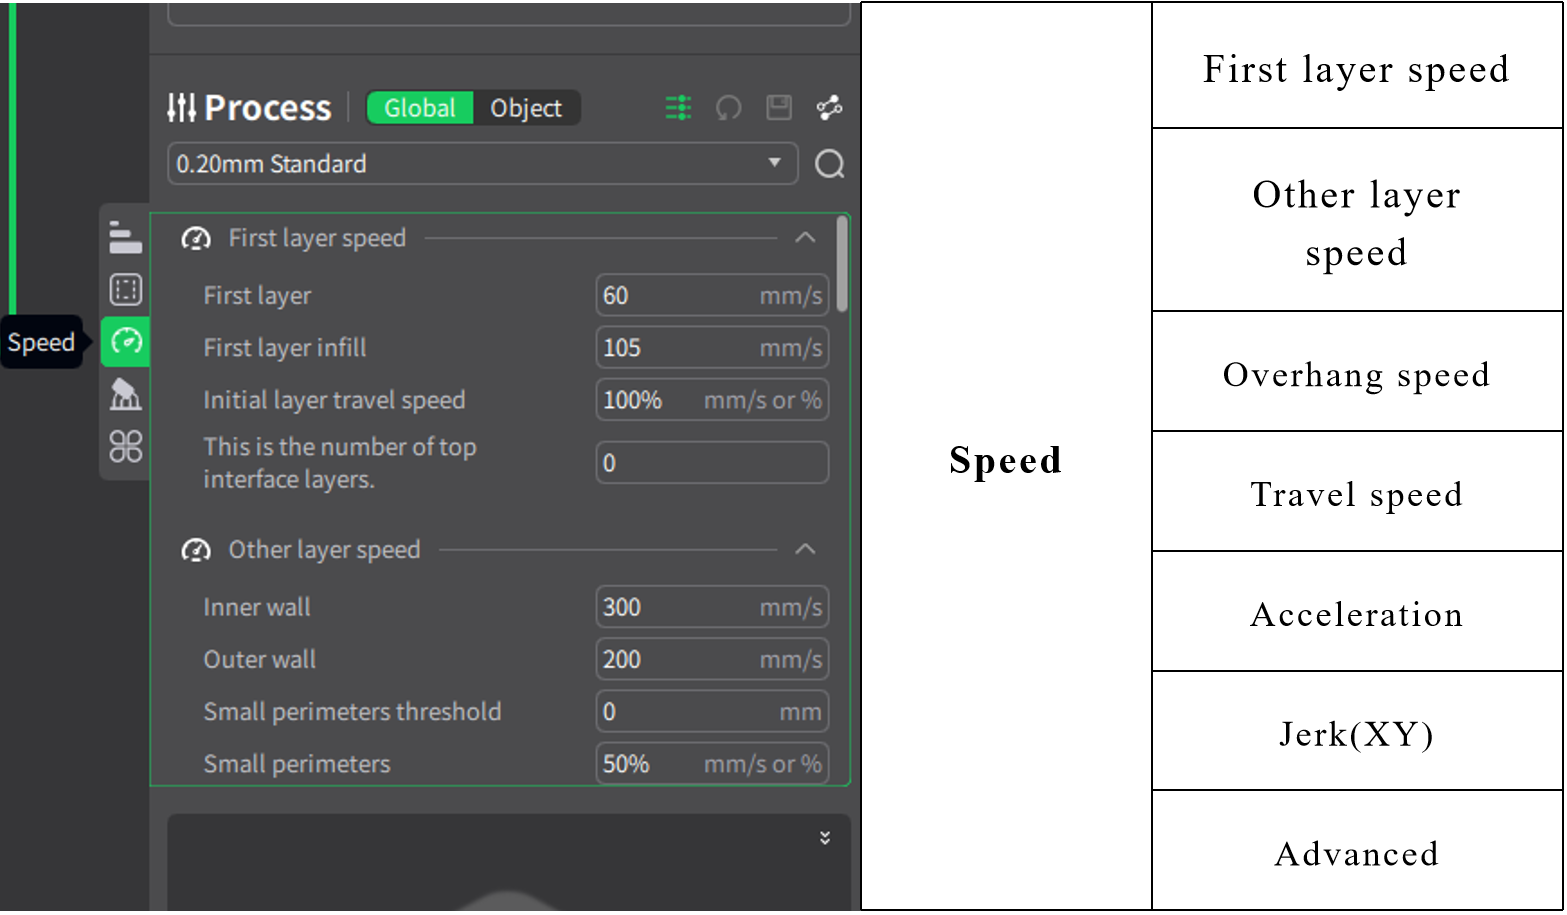
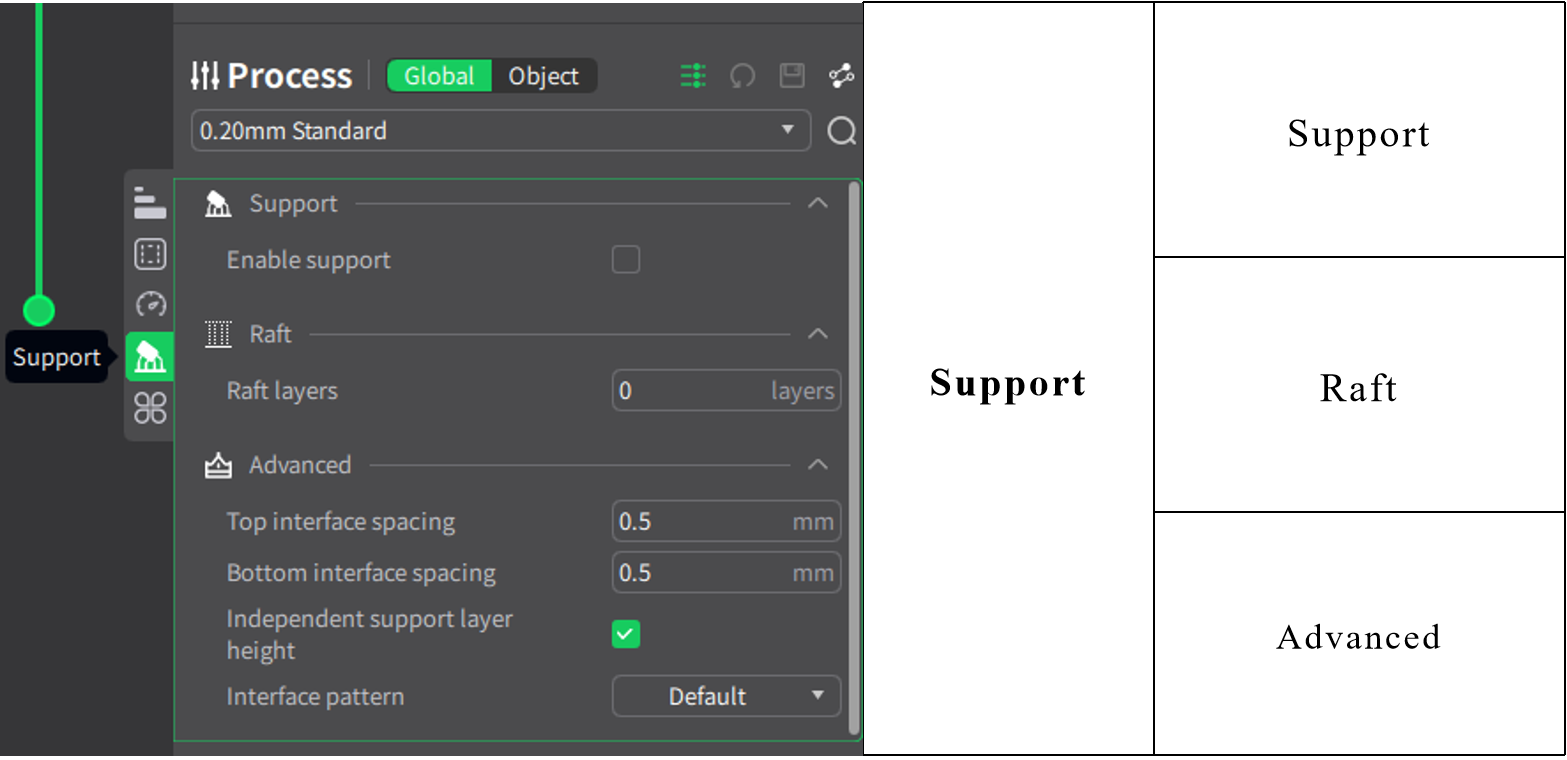
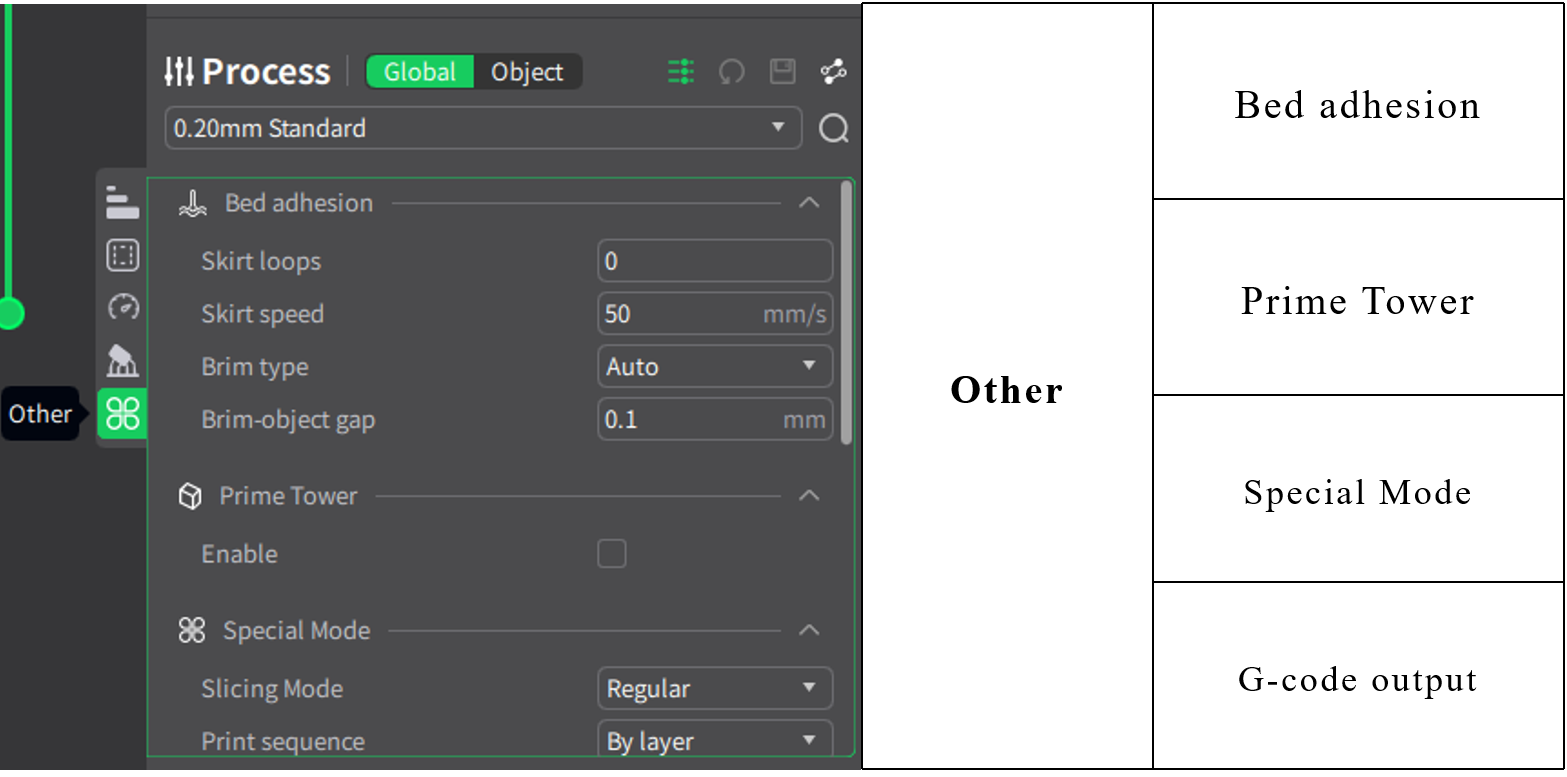
To modify parameters for a specific object, switch to the object's location. Changes will only take effect for that object.