


Ever had your 3D prints warp or lift in the corners during mid-print? When you spend a few hours, only to have your prints warped, curled, or worse – completely ripped off the build plate, this is naturally frustrating. But a 3D printing brim is there to rescue the situation.
In this post, we’ll explore what a brim is in 3D printing, why and when to use (or skip) it, how to set it up in Creality Slicer, and troubleshooting tips if your brim refuses to behave. Ready to stop battling warped prints? Let’s dive in.
What Is a Brim in 3D Printing?
A brim with 3D printing is a thin, flat extension that covers the bottom of your print. It is similar to the brim of a hat – it extends out from the primary object to provide additional surface area. A brim touches the edge of your model, as opposed to a 3D printing raft, which is under your print.
This extra material prints at your original layer height, giving a wider foundation that lifts the contact point between your print and build plate.

What Does a Brim Do in 3D Printing?
The primary task of a brim is to increase bed adhesion and prevent warping. When your printer lays down that crucial first layer, the brim increases the total surface area in contact with the build plate, causing your print to stick to the bed harder.
Increases contact area: Providing extra lines of contact around the model, the brim effectively raises the bed-contact area, reducing corner lifting.
Counters warping: Especially on plastics like ABS or Nylon, thermal shrinkage causes edges to be pulled upwards; the extended grip of the brim holds them down.
Stabilizes smallfootprints: Small designs or objects having small areas at the base will welcome the added anchorage.
Primes the mozzle: Similar to a skirt, the brim ensures even extrusion before the model itself begins.
Boosts first-layer consistency: More subdued, gentle brim lines help you tweak your first-layer height and flow settings.
When to Use & Not Use Brims in 3D Printers
Understanding when to use a brim is just as important as knowing how to use one. Brims are not always required, and applying them when they are not necessary can be a waste of time and resources.
When to Use a Brim
Small base areas or contact points Miniatures, figures, and models with narrow bases or thin legs often lack enough surface area to stick well onto the print bed. An added brim will provide a larger contact area, which will hold the part in place while printing.
Tall, narrow geometries Tall print with little base will wobble or even topple. A brim gives such sections a stable base by spreading the base area, thus stability of the print.
Warp-prone materials Filaments like ABS, PETG, and Nylon, which also shrink and curl up on the edges when cooling down, can really benefit from the additional grip provided by a brim. Even filaments like PLA, which usually experience fewer adhesion problems, may need brims for extremely large, flat prints or prints with sharply cornered shapes.
Challenging print surfaces If you're printing on a glass bed, an unheated platform, or from materials like PEI or magnetic plates that have worn a little bit, a brim can be protection by improving initial adhesion.
Bed leveling or temperature fluctuations If you're unsure of your bed leveling or printing in a colder temperature with drafts, a brim makes up for it by gripping the print better during those all-important first layers.
When Not to Use a Brim
While brims are helpful, they’re not always necessary. Here’s when to skip them:
-
Models with large, flat bases Prints like phone stands, storage trays, or enclosures adhere well enough on their own. Adding a brim in these cases only wastes material, increases print time, and results in more cleanup.
-
When surface finish at the bottom matters If you're printing an ornament or any part where the base is going to be seen or need to sit flush on a surface, a brim may cause small marks or require sanding to smooth out. That can disrupt beauty or utility.
-
Prints with intricate base-level features Fine features or tiny filigree at the bottom edge of a model can combine with the brim when printing, which is hard to remove and can be destructive to the final product. In such cases, it's best to increase bed prep or use a skirt.
How to Add Brims in Creality Slicer
Creality Slicer, also named Creality Print, is a professional 3D printing modelling software for Windows, macOS, and Linux. This program enables you to add supports, rafts, skirts, and brims easily to a 3D print. Let's see and follow these steps:
Step 1: Open the software, go to "Others" option as instructed;
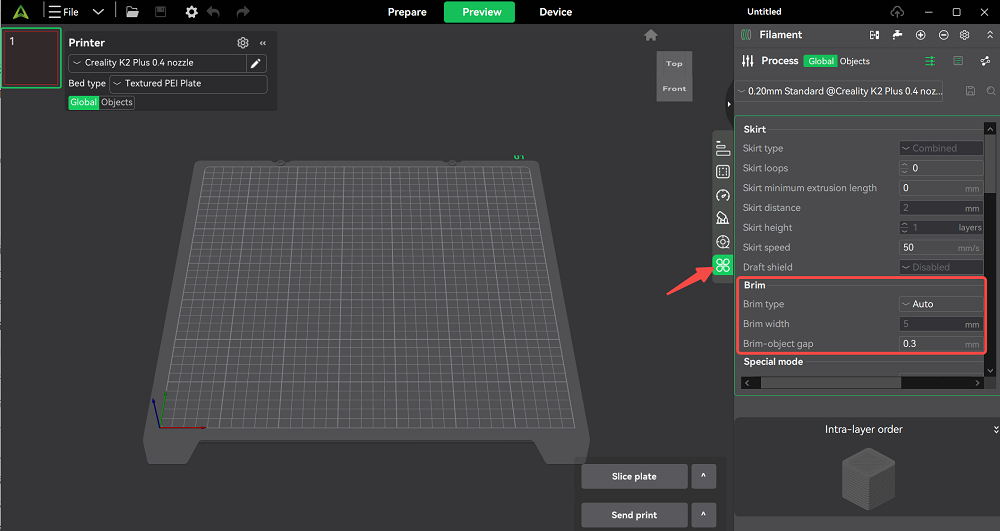
Step 2: Then scroll down to choose the brim type, width, and gap.
Common Brim-Related Issues & Fixes
Even though brims are simple tools for better adhesion, they can cause problems if not configured correctly. Here are some common issues users face — and how to fix them:
Brim Fuses Too Tightly to the Model
When a brim is printed too close to the model, or layer height is too low, this problem crops up. Here are some effective solutions:
-
Increase the brim gap (if your slicer supports a brim offset setting).
-
Raise the initial layer height slightly.
-
Use fewer brim lines (3–5 instead of 10+).
-
Gently remove with a hobby knife or fine sandpaper if already printed.
Difficult Brim Removal Leaves Rough Edges
Over-extrusion or high bed temperature causes brim to bond too strongly. Therefore, it's not that easy to remove the brims.
-
Reduce the first-layer flow rate (e.g., 90–95%).
-
Let the print fully cool before removing.
-
Consider reducing bed temp for the first layer.
-
Use a brim with fewer outlines or try switching to a skirt if adhesion allows.
Brim Warps or Lifts Off the Bed
Poor bed adhesion or uneven surface temperature results in brim warps.
-
Ensure the bed is clean (use IPA/alcohol to wipe).
-
Level the bed precisely.
-
Increase bed temperature slightly.
-
Apply adhesion aids (glue stick, hairspray, or a textured surface like PEI).
Brim Causes Elephant’s Foot on Model Base
Heat spreads from brim to the model leads to over-melted lower edges.
-
Enable “Elephant Foot Compensation” in your slicer.
-
Slightly raise nozzle Z-offset.
-
Use a narrower brim (fewer outlines or smaller width).
Brim Not Generating in Slicer
When your slicer settings are not correctly configured, the brims may fall short of your expectations.
-
Ensure “Brim” is enabled in the slicer under Build Plate Adhesion.
-
Check the minimum brim width or line count isn’t set to zero.
-
Try re-slicing the model or resetting to default adhesion settings.
Brim Uneven or Gaps in Brim Lines
If the bed is not level, or the first-layer height is inconsistent, an uneven brim is thus generated.
-
Re-level the bed.
-
Adjust nozzle Z-offset for even first-layer squish.
-
Slow down first-layer speed for better adhesion and accuracy.
Summary
3D printing brims are a simple but powerful tool for improving print success, especially with small bases, tricky materials, or uneven beds. They boost adhesion, reduce warping, and offer extra stability without altering your model. Simliar to support and rafts, use brims when needed—skip them when they’re not.