


How to Remove Support from 3D Print: Understanding Why 3D Prints Need Support
Types of 3D Printing Supports
Breakaway Supports
-
No post-process steps like using solvents or water soaking
-
Easily remove by hand
-
Compatible with PLA, PETG, and ABS material
-
Since force is required for removal, they may not be suitable for delicate or intricate structures
-
It is not ideal for tight or narrow spaces and can leave strands during removal
-
Cannot be reused after removal
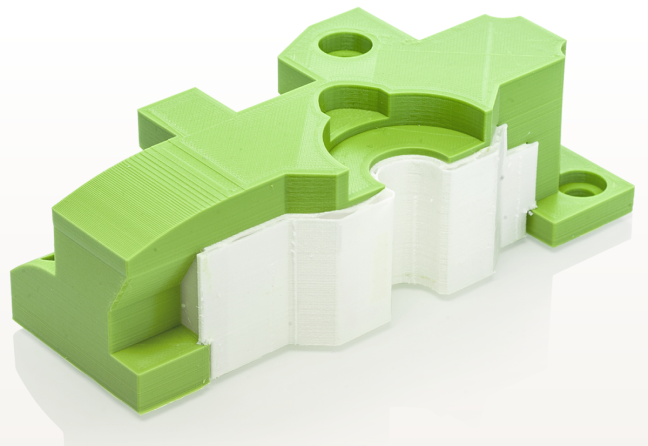
Soluble Supports
-
Ideal when printing complex geometries, moving parts, and intricate designs
-
No manual removal reduces the risk of damaging the print
-
Leftover support materials are easy to dispose of following local regulations
-
Thicker infills and a slower printing speed require a longer print time
-
Soluble filaments like PVA are prone to nozzle clogging since they can quickly crystallize under heat
-
Soluble supports are generally more costly than breakaway alternatives
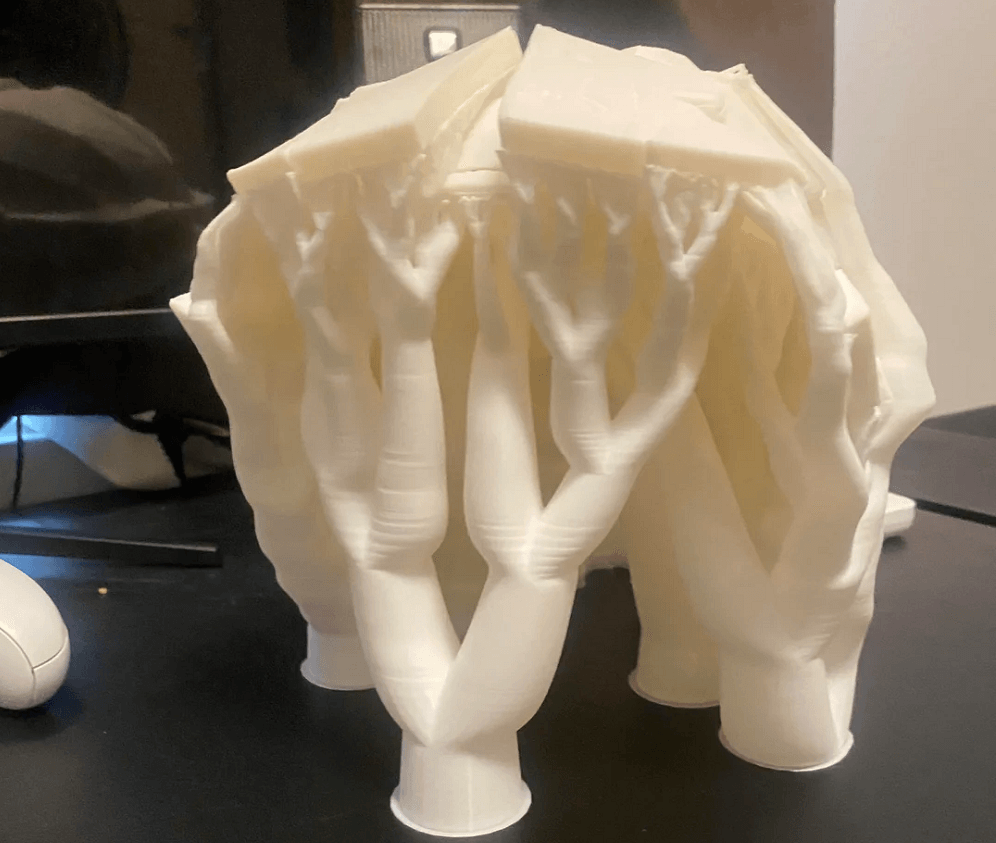
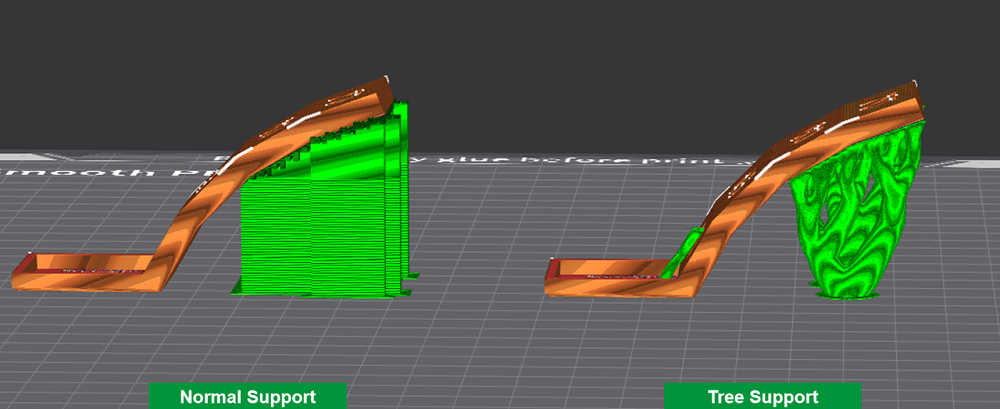
Tree Supports
-
A thicker base provides a more stable foundation for overhanging structures
-
Minimal contact points are less likely to affect the finish or leave marks
-
Removal is easier than other support structures
-
It can require a longer slicing time, increasing the overall print duration
-
It is not ideal for complex geometries or narrow, deep pockets
-
It may cause damage or leave marks on larger, flat areas
Linear Supports
-
Ideal for flat, steep, and angular overhangs
-
Exceptional support for prints requiring additional stability
-
Simplistic design for faster printing times
-
May be more difficult to remove due to their thickness and larger surface area
-
It can leave imperfections and visible marks
-
Require more filament to print
When and Why to Remove Supports
-
The print complexity - Complex prints are more prone to damage during removal, so waiting until they're cured can protect delicate features.
-
Print material - The type of resin you use can also impact the support removal process. Some resins are more susceptible to deformation, so it's important to consider the materials you use.
-
Your preference - Ultimately, you have to decide whether cured or uncured removal is best for the print type and what method you're most comfortable using.
Tools and Materials Needed for Removing 3D Supports
-
Pliers
-
Cutters
-
Tweezers
-
Hobby knife
-
Sandpaper
-
Solvents like warm water, citric acid, and isopropyl alcohol
How to Remove Supports from 3D Print - Step-by-Step Guide
-
Allow the printed model to cool fully. Supports with low density are generally easier to remove, especially when they are still soft and pliable, which improves the ability to detach them cleanly from supported areas.
-
If curing the print, use a UV curing device to harden.
-
Perform a thorough inspection of the printed model to identify any areas where supports could be difficult to remove, checking all surfaces for remaining supports. Pay special attention to spots where access to supported areas may be limited. Adjusting the appropriate setting in your slicer can improve the ability to remove supports cleanly. If you encounter difficult support removal, finding the right solution may involve changing support settings or using different tools. Always take care to avoid damaging the main structure of the printed model during support removal.
For Breakaway Supports
For Soluble Supports
Post-Processing
Helpful Tips for Support Removal
Here are some helpful tips you can use to make the support removal process easier.
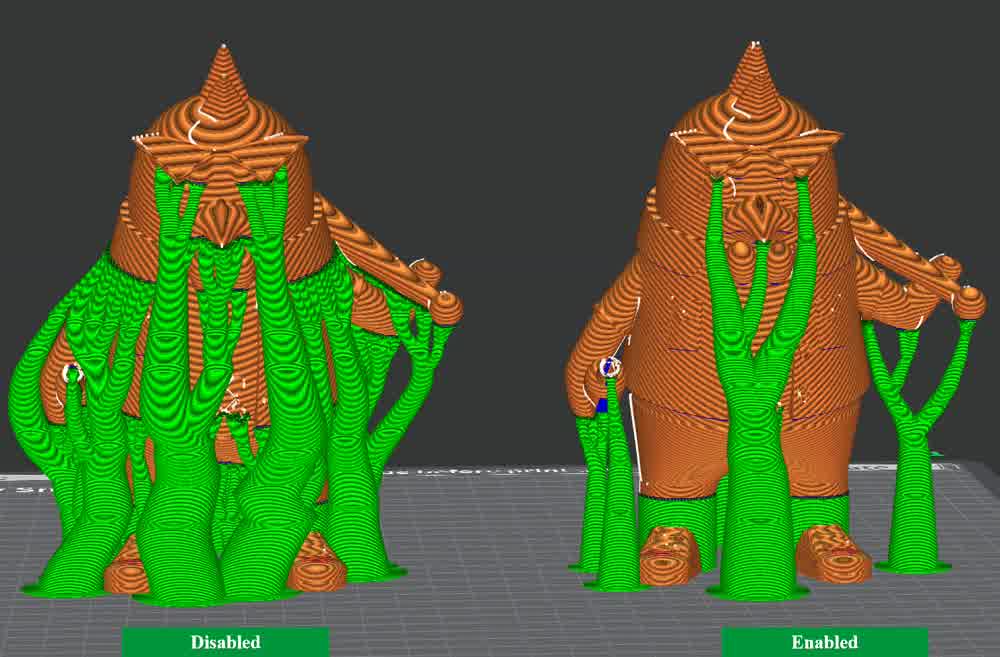
Optimize support settings (spacing, density, z distance, etc.) in the slicer before printing. Adjusting the z distance in your slicer settings can result in easier removal of supports and a cleaner surface finish.
-
Adjust the support interface/ contact point for easier detachment.
-
Use support-friendly material combos like PLA + PVA and ABS + HIPS.
-
Highlight Vreality printer features like tree supports and support distance in the slicer for fine-tuning support.
-
If the supports are difficult to remove, adjust the print settings and consider switching to a soluble alternative.
-
If removing the supports damages the print, try softening them with a heat gun or hot water or using a rotary tool for easier cutting.
-
Minimize visible marks left by supports by sanding or using a heat gun to fix imperfections.
Experimenting with different slicer settings and support-related setting adjustments can help you find the best solution for your specific print.
Choosing the right support for your 3D print can ensure beautiful results. Knowing how to remove support from the 3D printer can protect against damage and make the printing process more enjoyable. With a little trial and error, you can master support removal and significantly improve your print quality. Creality is proud to offer the highest quality 3D printer and multi-material printing options. Explore our full line of usable, smart, affordable, and enjoyable products. Creality— imagine it, make it.
Common Challenges in 3D Printing
Even with the best preparation, 3D printing can present a range of challenges, especially when it comes to support removal and achieving a smooth surface finish. Removing supports from complex prints can be tricky, but using the right tools—such as flush cutters, wire cutters, or a craft knife—can help you carefully cut away supports without damaging the print. For stubborn supports, a heat gun can soften the material, making removal easier and reducing the risk of surface imperfections.
Surface quality is another common concern, often influenced by factors like layer height, support density, and material usage. Optimizing your support settings in the slicer and using post-processing techniques such as sanding or trimming with a craft knife can help you achieve a smooth surface and professional appearance. By addressing these challenges with the right tools and techniques, you can enhance the quality of your prints and make the support removal process more manageable, even for the most complex models.