
If you’ve ever noticed your 3D print lifting or curling at the edges, you’ve encountered one of the most common problems in 3D printing — warping.
In this guide, we’ll explain what causes 3D print warping, how to fix it, and practical ways to prevent it, so you can achieve smooth, reliable prints every time.
What Is Warping in 3D Printing?
Think of it like baking a cake in a pan that’s hotter on one side: the edges might curl up as it sets. In technical terms, 3D print warping is caused by thermal contraction and residual stress in the material.
This occurs when the lower layers of your print cool and shrink before the upper layers. The uneven cooling results in internal stress, tugging at the corners or edges upwards and away from the build plate.
Common Signs of 3D Print Warping
Early detection of warping can save your print from total failure. Here are the most telling signs:
-
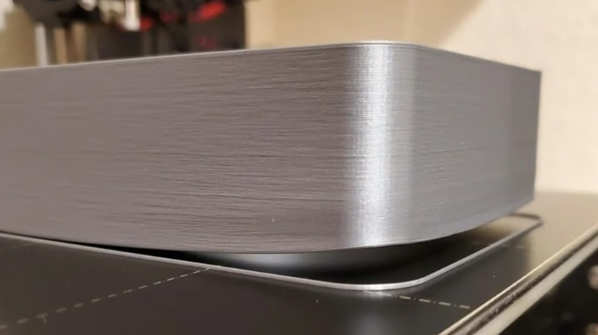
Lifted Corners or Edges: Corners or edges lift off because the bottom layers are detaching from the build plate. The print will often curl upwards, like a banana skin.
-
Uneven Base: Your model's base appears to be wavy or otherwise distorted, which makes higher layers unstable.
-
Cracks or Splits: Severe warping stress may lead to visible fractures, sometimes in very brittle materials.
-
Print Detachment: The entire model might pop off the bed mid-print, resulting in a messy failure.
-
Warping on One Side: This asymmetric issue usually indicates uneven heating or drafts on just one part of the print bed.
If you notice these during or after printing, then it's probably time to investigate. Observe the live view of your printer, or use a camera setup to capture any warping in real-time.
Most Common Causes of Warping
Warping doesn't happen randomly—it's usually triggered by a few key factors. As an expert, I've narrowed down the most common causes based on countless troubleshooting sessions:
-
Temperature Fluctuations: Rapid cooling causes the material to shrink unevenly. This is exacerbated by drafts from open windows or air conditioning.
-
Poor Bed Adhesion: If the filament is not properly stuck to the build plate, then the edges easily lift off. The culprits are usually dirty beds, incorrect bed temperature, or a lack of adhesives.
-
Material Shrinkage: ABS filaments are known to exhibit high shrinkage characteristics upon cooling, which predisposes them to warping.
-
Printing Too Fast: A high print speed can lead to a lack of proper bonding between layers and a faster cooling, which increases warping. Yes, printing too fast can cause warping by not allowing enough time for proper adhesion.
-
Uneven Bed Leveling: An unlevel print bed means inconsistent first-layer contact, leading to warping on one side.
-
Environmental Factors: High humidity or cold room temperatures can interfere with filament performance. Strong fans or open windows create uneven cooling, especially for high-temperature filaments like ABS and Nylon.
How to Fix Warping in 3D Printing
If your print is already warping, don’t panic — you can fix it by improving adhesion and managing heat flow. Try these proven steps:
-
Improve Bed Adhesion: Clean your build plate with isopropyl alcohol and apply adhesives like glue stick, hairspray, or specialized 3D print sprays. For glass beds, a thin layer of PVA glue works wonders.
-
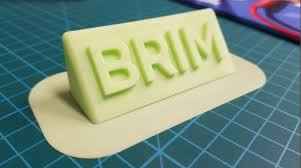
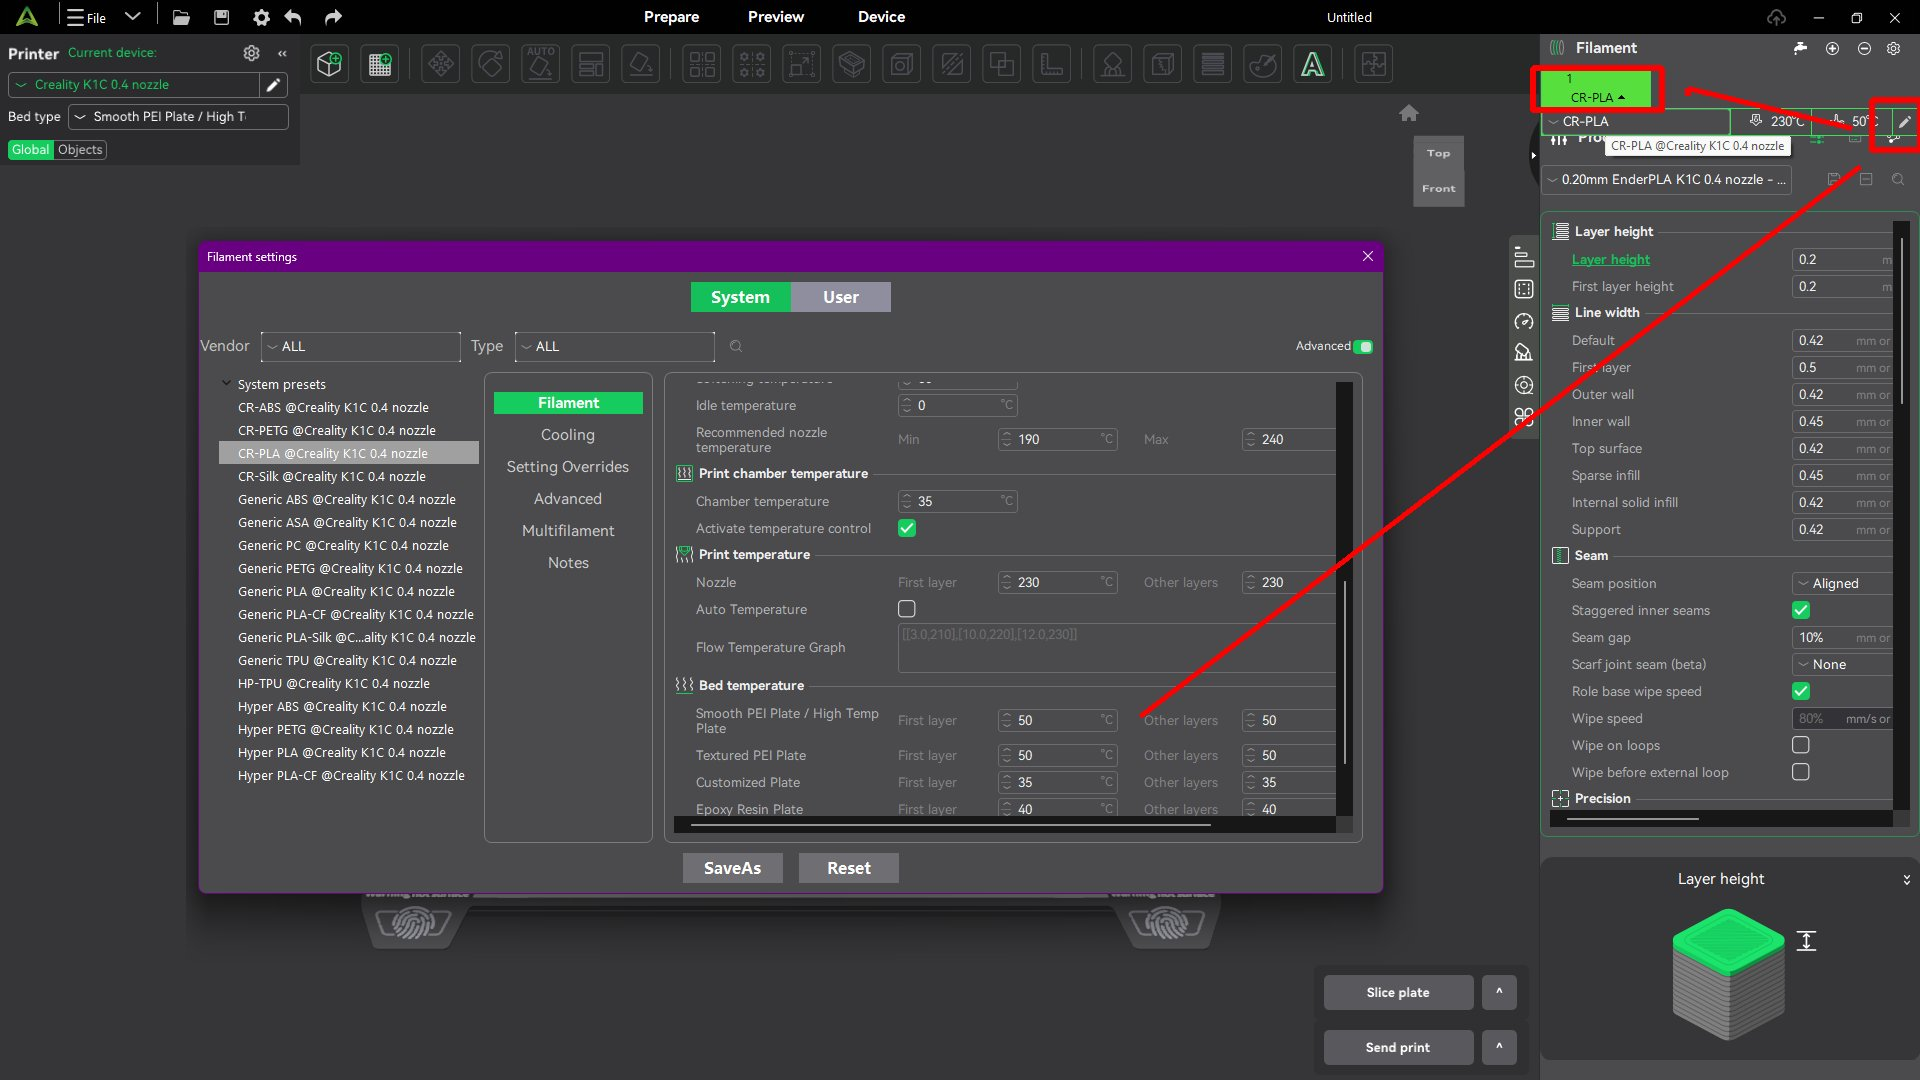
Add Brims or Rafts: In your slicer software (like Creality Print), enable a brim (a flat extension around the base) or raft (a thick base layer) to increase surface area and stability.
-
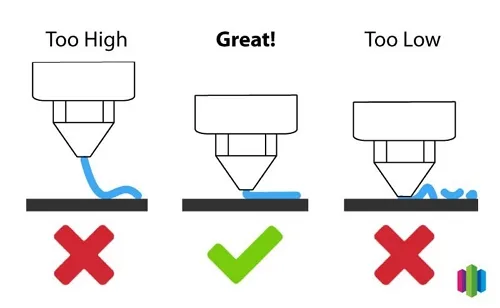
Increase the Bed Temperatures: Increase the temperature of the bed by 5-10°C to improve adhesion. In most instances, PLA requires around 50-60°C, whereas ABS needs 90-110°C.
-
Use an Enclosure: Enclose your printer to keep uniform temperatures and avoid drafts. For simple solutions, beginners can use homemade enclosures like a cardboard box lined with foam.
-
Level the Bed Properly: If available, use auto-leveling; otherwise, manual calibration should be performed using a feeler gauge for even contact.

-
Slow Down the First Layer: Reduce speed to 40-50 mm/s for the first few layers to allow better cooling control.
-
Post-Print Fixes: For slight warping, sand off the base flat or gently heat the object using a hairdryer, being very careful not to melt it.
-
Switch to a Lower-Shrinkage Filament: If warping is still a problem, try going from ABS to PLA or PETG; both filaments have a lower rate of thermal contraction.
How to Prevent Warping Before It Starts
Prevention is always better than cure in 3D printing. Put these methods into place from the beginning to reduce the chances of warping:
-
Optimize Your Environment: Print in a room that maintains stable temperatures at around 20-25°C with low humidity. Use a dehumidifier if needed.
-
Choose the Right Slicer Settings: Employ a slower initial layer speed, allow the cooling fan to turn on after the first few layers of printing, and use adaptive layer heights.
-
Bed Preparation: Always preheat your bed and ensure it's leveled. Experiment with surfaces like PEI sheets or textured glass for superior grip.
-
Enclosures and Heat Management: If you're printing with materials that tend to warp, consider either building or buying an enclosure. Provide active heating if your printer allows it.
-
Filament Storage: Keep filaments dry in sealed bags with desiccants to prevent moisture absorption, which can worsen warping.
-
Calibration Prints: Run test models like a temperature tower or adhesion test to dial in your settings before big projects.
Specific Filament Types to Avoid Warping
Not all filaments are created equal when it comes to warping. Following is a list of low-warp options that I recommend for beginners.
| Material | Warping Risk | Ideal Bed Temp | Prevention Tips |
| PLA | Low | 60°C | Great on PEI or glass, moderate fan speed |
| ABS | High | 100°C | Use enclosure, brim/raft recommended |
| PETG | Medium | 70°C | Avoid strong cooling fans |
| Nylon | Very High | 100–110°C | Enclosure + adhesive required |
FAQs
Q1: Why is my 3D print warping on one side?
A: This typically occurs when one side cools down more quickly than the other; perhaps your fan or the airflow of the room hits that side directly. Check your bed leveling, temperature distribution, and enclosure sealing.
Q2: What’s the ideal first-layer speed for good adhesion?
A: Stick to about 20–30 mm/s for the first layer. It gives the filament time to melt into the bed surface for maximum grip.
Q3: How to fix warping in 3D printing mid-print?
A: Stop the print; use adhesives on the lifting areas or tape to hold the edges down. Restart ASAP before cooling sets in.
Q: Are warping and curling the same thing?
A: Not exactly. Warping happens when parts of a print, usually the corners or edges, lift off the build plate completely due to uneven cooling and thermal contraction. Curling is a milder form where the edges bend upward slightly but the print mostly remains attached.
Wrapping Up
Warping for the beginner can be one of those unsolvable mysteries in 3D printing, but once you understand the science behind it, namely temperature balance and adhesion control, it is relatively easy to fix.
Keep your bed level, control airflow, use the right materials, and never rush the first layer. With a little patience and the right setup, you’ll enjoy smooth, perfectly flat prints every single time.