


In the past, we used photos to capture and preserve life's most wonderful moments.
The Origin of 3D Printed Photo Frames
As science and technology have advanced, 3D printing has become increasingly prevalent in our lives. By combining this innovative technology with traditional photo frames, 3D photo frames printer were born. This fusion not only preserves the essence of photo frames as a tool for holding memories but also introduces endless possibilities for customization and creativity, making each frame a unique expression of personal style and innovation.
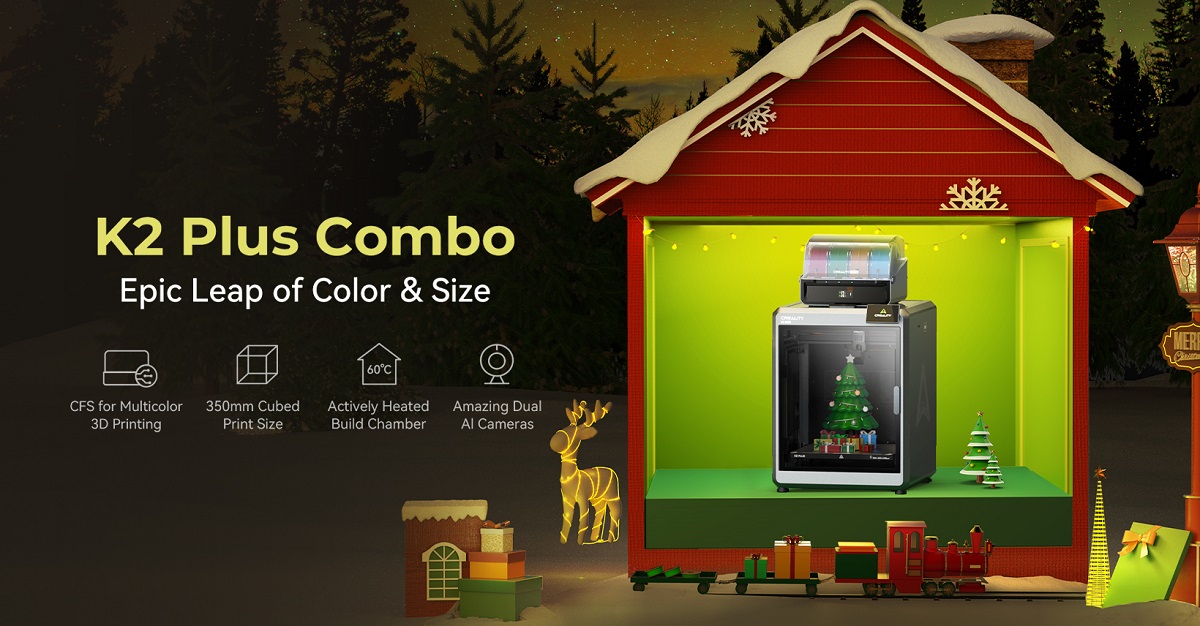
We can use the powerful functions of the creality k2 plus 3d printer to make the 3d printed photo frames we want. We can use printed photo frames to decorate our rooms, or we can use unique consumables to print unique photo frames to put our favorite photos. You can also participate in our Christmas Photos Chase Event.
From choosing the perfect design to post-processing your 3D print, get ready to unleash your creativity and bring your vision to life! Even what once seemed impossible, like achieving intricate details or using challenging materials, is now within reach thanks to advancements in 3D printing technology.
Why Choose 3D Printing for Photo Frames?
3D printing has revolutionized the way we create everyday items, offering a combination of flexibility, customization, and cost-effectiveness. Here are some key reasons why 3D printing is ideal for photo frames:
Unlimited Design Potential: You can craft intricate designs, unique shapes, and even frames tailored to specific themes or aesthetics.
Personalization: Add names, dates, or meaningful text to make your photo frame truly one-of-a-kind.
Affordable Prototyping: Create professional-looking results at a fraction of the cost of custom-made frames from traditional methods.
Eco-Friendly Options: Choose sustainable printing materials to align with environmentally conscious values.
Whether it’s a decorative frame for your desk or a heartfelt gift, 3D printing makes it possible to turn your imagination into reality.
Tools and materials needed for 3D photo frame printer
Before diving into the creative process, gather the following tools and materials:
3D Printer: In this article, we will be using the Creality K2 Plus.Ensure it’s properly calibrated and ready for detailed prints. Of course, you can also use other 3D printers, learn more about Creality 3D printers.
3D Modeling Software: Use user-friendly tools like TinkerCAD, Fusion 360, or Blender to design your frame.Choose the right 3D model software and you can use it.
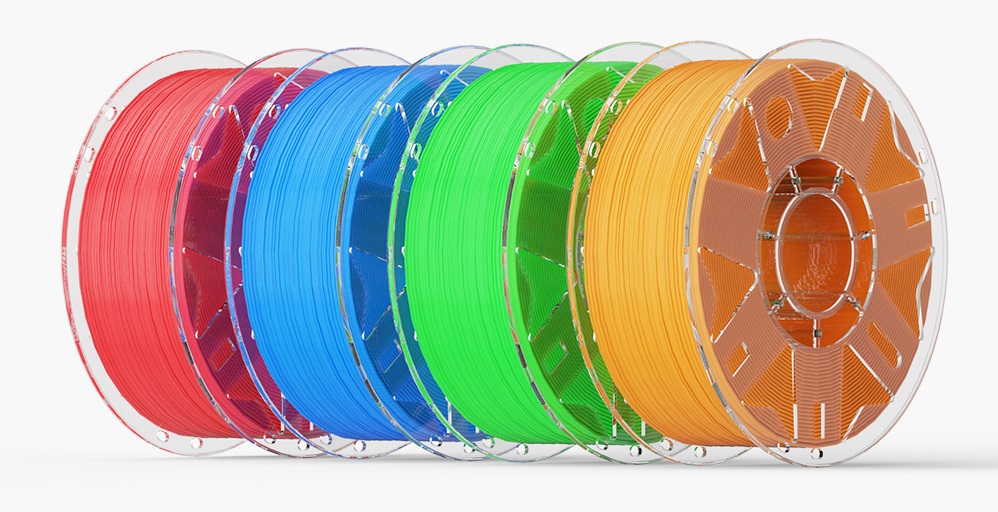
High-Quality Filament: Creality Offers PLA, PETG, TPU, ABS, PLA-CF, and more high-quality filament, each material is designed to deliver the ideal qualities for your prints.depending on your needs and preferences.
Post-Processing Tools: Sandpaper, paints, or adhesives for final touches.
Optional Accessories: Magnets, clips, or stands for frame assembly and added functionality.
Step-by-Step Guide to Making a Personalized 3D Printer Photo Frame
Step 1: Plan Your Design
Start by envisioning the look and feel of your photo frame. Consider the following:
-
Frame Dimensions: Measure the photo or artwork you want to display.
-
Design Features: Do you want a classic rectangular frame, a modern geometric style, or a whimsical themed design?
-
Personalization Elements: Add names, dates, or meaningful patterns.
For inspiration, explore online platforms like Cults3D, Thingiverse, or Printables for free or paid photo frame STL files. These can serve as a starting point or reference.
Step 2: Prepare Your K2 Plus 3D Printer
Set up your 3D printer for optimal results:
-
Choose the Right Settings: Adjust parameters like layer height, infill density, and print speed based on the complexity of your design.
-
Test Material Compatibility: Conduct a small test print to ensure your chosen filament works well with your design.
-
Check Adhesion: Apply a bed adhesive or use a heated bed to prevent warping during the print process.
Step 3: Print Your Photo Frame
Load your 3d print picture frame STL file into slicing software Creality Print(FFF Slicer) and start printing. Monitor the process to ensure quality and address any issues such as layer shifting or filament jams.

Step 4: Post-Processing
Once your frame is printed, refine its appearance:
-
Clean and sand: Remove any support structures and smooth rough edges with fine-grit sandpaper.
-
Paint or Seal: Use acrylic paints or spray coatings to add color and durability.
-
Assemble Components: Attach any additional elements, such as backboards, stands, or glass inserts.
Step 5: Final Assembly and Personalization
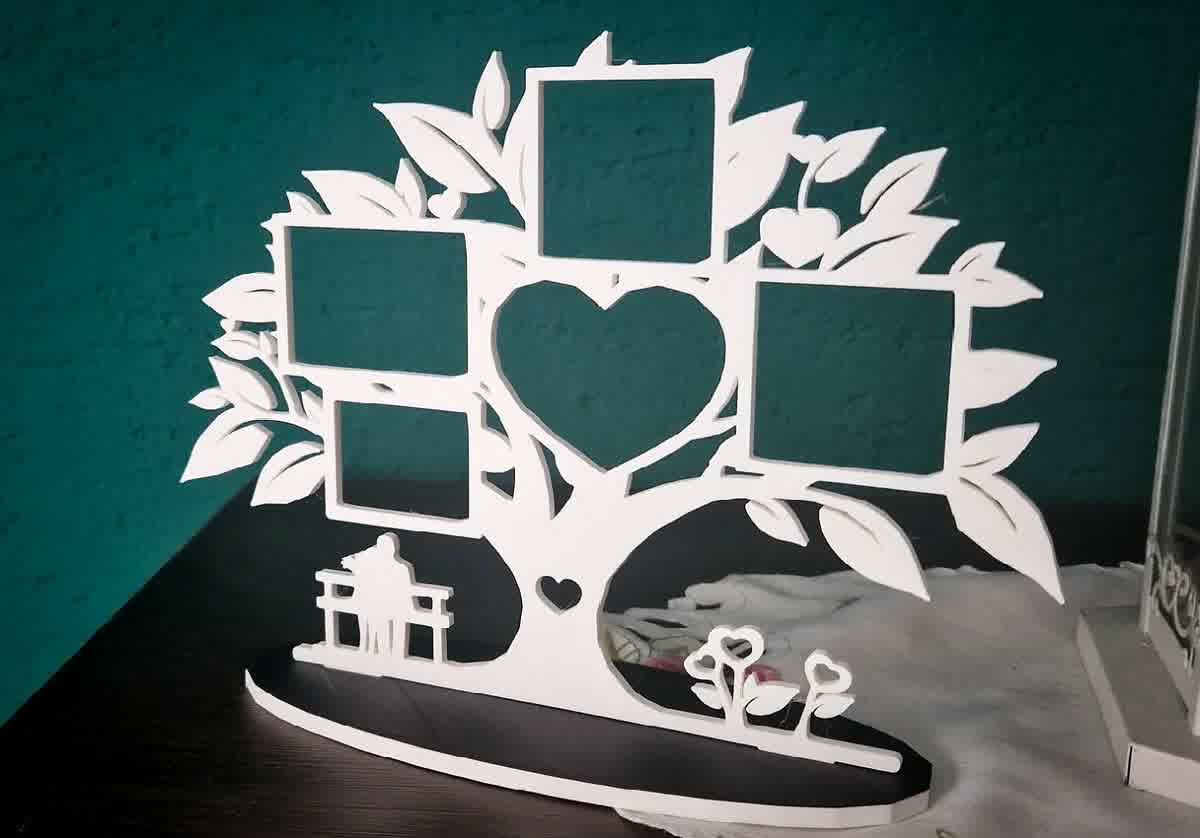
Insert your chosen photo into the frame and secure it with clips or adhesive. If desired, add decorative elements like rhinestones, stickers, or custom engravings. Explore various 3D printable models for decorative frames, ensuring good mesh quality for successful printing.
Step 6: Displaying Your Finished Photo Frame
Congratulations! You have now completed your 3D printed photo frame. Here are some ideas for displaying your finished frame:
Hang It on the Wall: Use a nail or a screw to hang your frame on the wall. Make sure to level it properly to ensure it’s straight. This is a classic way to showcase your photos and can make a striking addition to any room.
Place It on a Shelf: If you prefer not to hang your frame, you can place it on a shelf or a mantle. This is a great way to add a personal touch to your home decor and allows for easy rearrangement.
Give It as a Gift: Consider giving your 3D printed photo frame as a gift to a loved one. Fill it with a special photo or artwork to make it extra special. Personalized frames make thoughtful and memorable gifts for any occasion.
Create a Collection: If you enjoy 3D printing, consider creating a collection of photo frames in different shapes, sizes, and colors. This is a great way to showcase your creativity and personal style. You can even design themed frames for holidays, events, or specific rooms in your home.
Watch It Become a Conversation Starter: Your 3D printed photo frame is sure to become a conversation starter in your home. Enjoy the compliments and admiration from your friends and family! Each frame tells a story and reflects your unique artistic vision.
By following these steps, you can ensure that your 3D printed photo frame not only looks great but also holds a special place in your home or in the heart of someone you care about.
Tips for Perfecting Your 3D Printed Photo Frame
-
Optimize Print Settings: Use a lower layer height for finer details and a higher infill for sturdier frames.
-
Test Before Printing Large Designs: Print a smaller prototype to identify potential issues.
-
Experiment with Materials: Try wood-like PLA or metallic filaments for unique finishes.
-
Avoid Overhangs: Incorporate support structures into complex designs to prevent sagging.
Showcase: Inspiring Ideas for Personalized Photo Frames
Need some creative ideas? Here are a few examples to get inspired:
-
Themed Frames: Create frames inspired by holidays, favorite movies, or hobbies.
-
Multi-Picture Frames: Design modular frames that can hold multiple photos.
-
Interactive Frames: Add LED lights or rotating stands for a dynamic touch.
-
Functional Frames: Incorporate features like hidden storage compartments or magnetized backs.
These ideas can spark your creativity and help you craft truly standout designs.
Conclusion
Crafting a personalized 3D printed photo frame is a rewarding experience that combines creativity and functionality. Using a powerful tool like the Creality K2 Plus, the best 3D printer for large photo frames, you can bring your vision to life with precision and ease. Whether for home decor or as a thoughtful gift, the possibilities are limitless. Start designing today and let your imagination come to life with 3D printing!