


Getting into 3D printing opens endless possibilities. You can make things like detailed jewelry or early versions of your product ideas. But first, you need a 3D model file to print. Making your first 3D model might be confusing.
Creality 3d printer files guide will show you the basics. We’ll explain each step clearly and share helpful tips so your print turns out great. No matter if you are new or experienced, learning to create good 3D files is key for high-quality prints. Let’s get started and turn your ideas into real objects!
Choosing the Right 3D Modeling Software
The adventure of producing outstanding 3D prints starts well before the printer begins buzzing. It begins in the online world through 3D modeling software. Yes, the initial step in making 3D printed things is choosing the correct software.
Choosing the right equipment can greatly affect the design process and the quality of the final prints. Below is a breakdown of a few famous software alternatives designed for several expertise levels:
Beginner-Friendly Tools
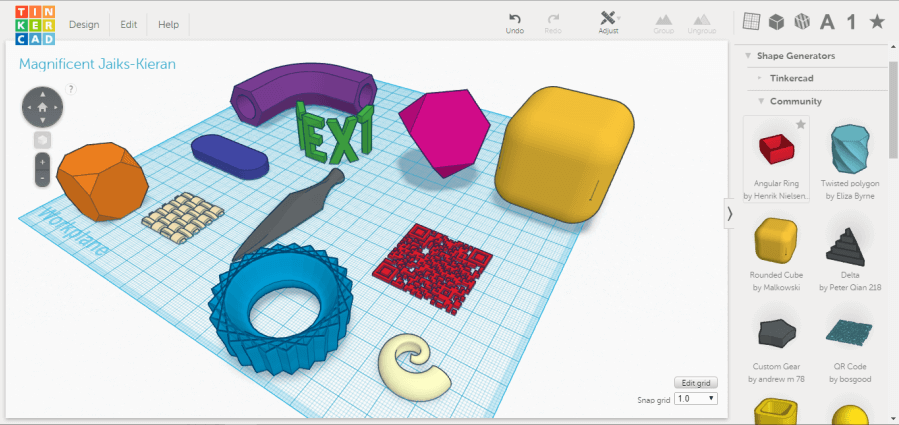
- TinkerCAD: For newbies, TinkerCAD is recommended and recognized for its user-friendliness and ease. TinkerCAD a web-based 3D modeling software is the best beginning point for those unused to 3D printing. Its intelligent interface and key features permit you to instantly learn how to make 3D print models. Also, TinkerCAD is free for all and provides a great variety of tutorials to help you get going.
- SketchUp: It is a bit more complex than TinkerCAD. However, it is still good for beginners. SketchUp offers more features for detailed modeling without being too difficult to use.
Intermediate Options
- Fusion 360: Fusion 360 closes the gap between experts and fan requirements. That said, it provides strong modeling abilities with more accuracy and authority, which is ideal for making more complicated designs.
- Blender: This tool is famous for its skillfulness and is great for two animations and things for 3D models. This makes it an excellent tool for those who wish to discover beyond stagnant prints.
Professional Software
- SolidWorks is popular in industrial and engineering fields. It offers innovative features for experts who need careful detail and complex attributes.
- AutoCAD: AutoCAD is the leader in the architecture and design sectors. People recognize it for its accuracy, and it plays a key role in making technical designs.
When picking 3D modeling software, think about a few things. First, is it easy to use? Next, does it have the features you need? Also, check if it works with your 3D printer. Finally, consider the tasks you want to accomplish.
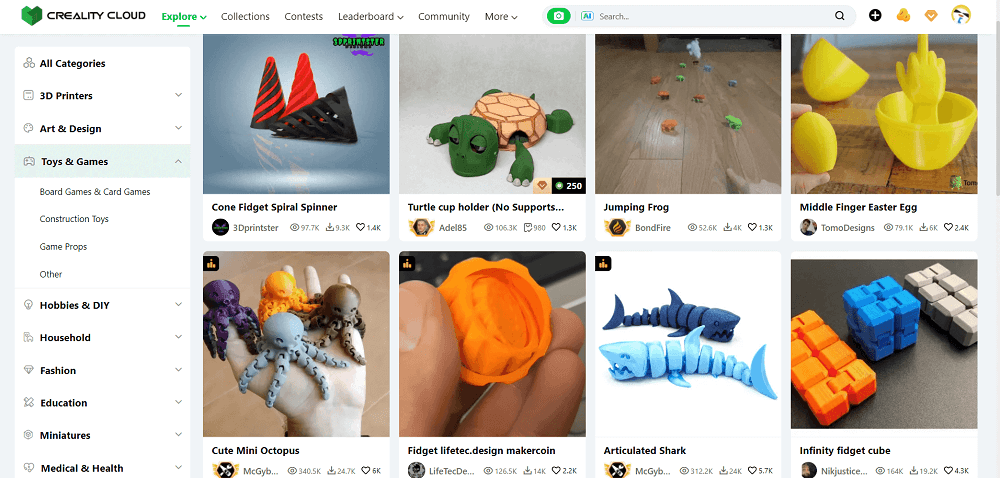
Of course, for many people, the preference is to print directly from the designed model. So Crealitycloud is a very good modeling platform, go to CrealityCloud and choose your model!
Creating a 3D Model
How to make 3D print models? Here’s a step-by-step guide to creating a basic 3D model.
Sketch Your Concept
Typically, the process of designing a 3D printable model starts with an obvious concept sketched on paper. Of course, this first step is critical because it sets the basic framework for the digital design.
Often, designers begin with easy drawings to catch the main forms and dimensions of their tasks. This helps you picture your concept and find any possible problems before you begin running the software.
While sketching your idea, make sure to review factors like proportions, size, and the precision level you want to involve.
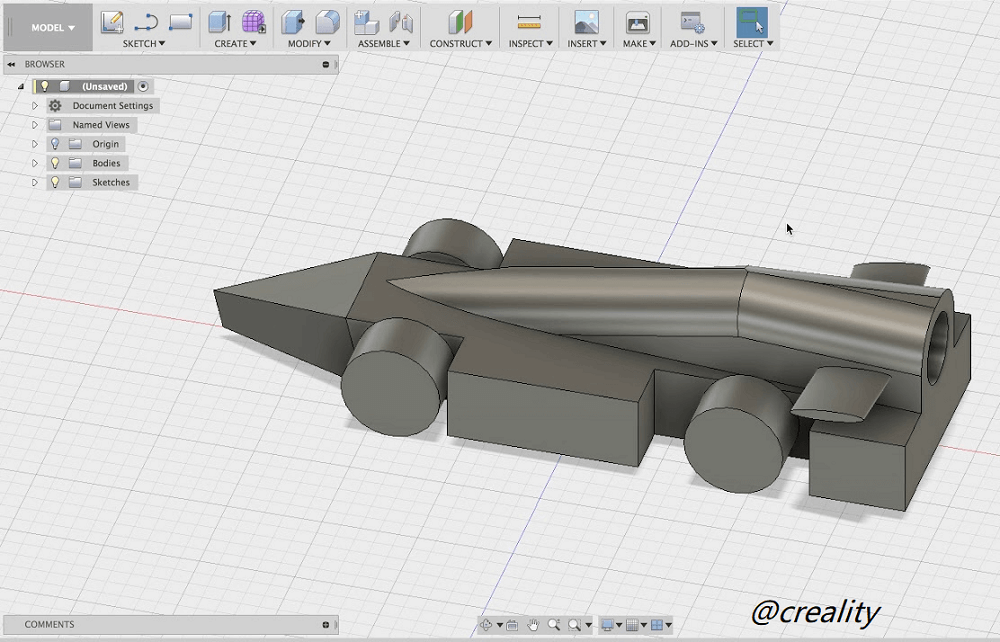
Digital Modeling
Using software such as Fusion 360, designers start carving their digital representations. The equipment in these platforms approves careful handling of design components, firmly following the first sketches.
Dimension and Scale
Precision in the dimensions of the model is crucial. You should regularly check and adjust the scale in the software. This ensures the printed prototype meets the required standards.
Pro Tip: To avoid printing problems, predict the printing process. Designs should not have floating elements. Keep a constant wall thickness to ensure durability. Also, keep in mind that practice leads to perfection, so do not hesitate to try out and make changes along the way.
Preparing the 3D Model for Printing
When the digital framework is finalized, the next move is to make it printable. This is an important stage to ensure a perfect print.
Watertight Geometry/Non-manifold
The 3d printable model should be watertight, which signifies it must not have any gaps or holes in the surface. It could cause printing mistakes. Users utilize tools such as Meshmixer to inspect the model and improve any errors that could lead to leaks.
Question yourself: in case I’ve to leave water within my model, could it outflow? If yes, then you must locate the holes and shut them. That said, people know this procedure as ‘making a manifold model.
Optimizing the Model
To refine the printing activity, remove irrelevant details. Also, lower the polygon count if possible. This development assists in quickening the printing procedure and reducing the possible slicing faults.
Fixing Non-Manifold Geometry
It’s necessary to handle non-manifold borders that aren’t part of just two faces. This is because they can generate problems while printing. So, software such as Neftabb is key for identifying and fixing these flaws.
Wall Thickness
Each surface of your 3D model must be given a wall thickness. While running the 3D modeling software, you can create a surface in the absence of a wall thickness. But 3D printers require data regarding how thick you planned your item's wall, or in case you intend to print a fully solid model. While converting a 3D model into a physical 3D copy, you need the volume or wall thickness details.
Exporting 3D Files for Printing
Once you’re happy with your design, it’s time to export it. That being said while arranging to print a 3D model, choosing the correct file format is key. This selection affects the simplicity with which a 3D printer can explain and create the design.
Here comes the question: what are the most common 3d printing file formats? Below is the detail:
Choosing the Correct File Format
STL
The most common type of 3D printer file is STL. This stands for Standard Tessellation Language or Standard Triangle Language.
People mainly use it for FDM 3D printers. It’s a favorite due to its extensive compatibility, and most software interprets an STL file format. However, it specifies the external look of the model object, not texture or color.
OBJ
OBJ format is beneficial for designs that need texture of color specifications. So, it’s appropriate for more complicated prints.
SETP/IGES
Industries that need accurate engineering information often use SETP and IGES. They are important for those who require very precise and detailed models.
Setting Export Parameters
The export settings can influence the dimensional precision, quality, and surface texture of the 3D-printed piece. Therefore, you must choose settings in the CAD software prior to turning the model into STL format.
For resolution, the greater resolution traps more detail. However, it boosts the size of the file and runtime. Also, to present scale flaws, make sure that the export units suit the ones utilized in the 3D modeling software.
Change the settings based on what the printer can do and the needs of the task. This includes support for color or textures when using OBJ files.
Slicing the 3D File
Now, you require slicing software to slice your 3D model. The slicing software changes a 3D model into layers and creates essential instructions that your printer can grasp. This helps us determine how to make a physical item in layers.
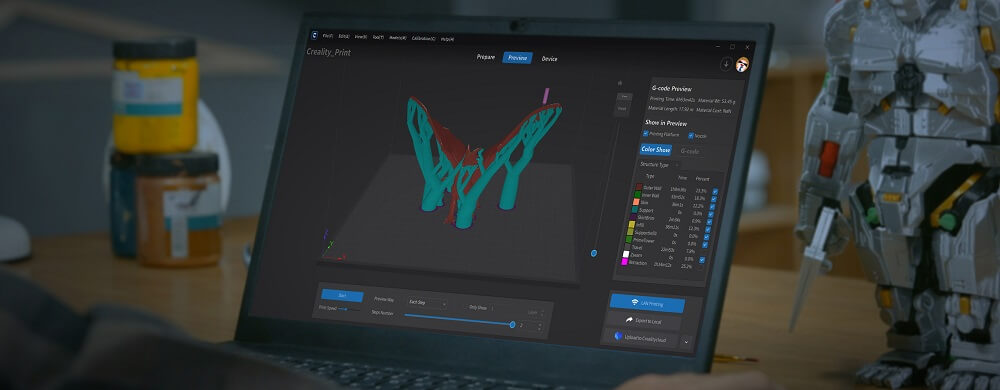
Creality offers slicing software designed to enhance the printing process for 3D printer customers. The Creality slicing software lets users manage and track their printers from afar. It makes it easy to change designs into prints. You must be aware of a few key slicing settings.
For instance, layer height impacts the resolution of the prints. Fine coats catch further detail; however, multiply the processing duration.
Infill density affects the weight and toughness of the completed print. Greater density confirms robust prints but with extra material. Also, support structures are important for printing bulges and impairs.
So, correct positioning is critical for print achievement. Moreover, print orientation influences the print’s hardiness and the size of the air required. Refining orientation can lower printing duration and material use.
Common Mistakes and How to Avoid Them
Below are a few typical errors and how to avoid them:
Errors in 3D Models
First, confirm your model's sufficient wall thickness to sidestep the print flop. Equipment inside the 3D modeling software can aid in recognizing and improving thin walls. Also, overhanging forms in a model can puzzle-slicing software. Utilize Boolean operations to mix or withdraw intersections appropriately.
Exporting Issues
Before exporting the 3D model, every time verify the scale. A common mistake is mixing up units between the printer and software. This can cause prints to be too large or too small.
Also, when converting to STL, ensure the resolution is high. This will capture all details but will increase the file size.
Slicing Problems
Every substance may require separate setups. So, regulate the print pace, temperature, and cooling based on the filament kind. Besides, check the structure of the model to figure out the crucial areas that require support. The inability to put on essential supports can cause the failure of projections.
Final Checklist Before Printing
Before beginning your print, a last examination is necessary to guarantee everything is adjusted for a perfect print. For this, use software devices to carry out one final scan for mistakes.
Treat any problems with the non-manifold borders or disconnected vertices. That said, by any chance, test print a tiny version of your task to analyze faults in the print procedure. Also, ensure the settings of your printer are specialized for the kind of material you’re utilizing.
Conclusion
Don’t worry. Relax!
Things seem more complicated than they are. Creating and printing your initial 3D design can be a thrilling and satisfying episode. By using this guide and simple tools like Creality slicing software, you will bring your ideas to life.
Take the Next Step with Creality!
Fly in the face of 3D printing with Creality. Check out our range of 3D printers. You can find helpful guides that will support you from setup to the final print. Share your thoughts and advice with Creality’s community, or get in touch with questions.