


If you’re reading this, you’re already a few steps ahead in your 3D printing journey. Most people begin by downloading designs that are ready to print. They try out some cool models. Eventually, they realize they want to create their own ideas.
If you’ve printed a few successful models and now feel ready to design your own, this guide is for you. Whether you're printing at home or running a print farm, learning how to design for 3D printing is the next crucial advancement.
Why 3D Printing Design Matters
3D printing empowers creators to turn ideas into physical objects. However, successful prints begin with smart designs.
Designing for 3D printing might seem hard at first. However, learning the process and practicing can help you make great models. These models can be both useful and easy to print.
In this easy-to-follow guide, we will show you the basics of 3D design for 3D printing. We will cover everything from the idea to files ready for slicing. This guide helps you get started, whether you use a Creality print or try new design tools.
What Is 3D Printing Design?
3D printing design refers to creating digital models specifically tailored for additive manufacturing. Unlike traditional modeling for rendering or machining, 3D printing design must account for the physical process of layering materials. This means your model needs to have true 3D dimensions—X, Y (width and depth), and Z (height).
How does 3D printing design differ from traditional CAD or industrial modeling?
3D printing is a form of additive manufacturing. It adds layers on top of each other.
In industrial modeling, manufacturing usually cuts down. So, the final product shows the desired object and cannot exist as a physical item. So, how to design 3D models for printing is a CAD process but with the print in mind, not injection molding or rendering.
Key considerations when designing for 3D printing:
Designing for 3D printing requires more than just making something look good. A good print design will require a couple of things for it to print well. You also know 3d printing best practices and various ways of optimizing print quality. Here are the most important aspects to keep in mind:
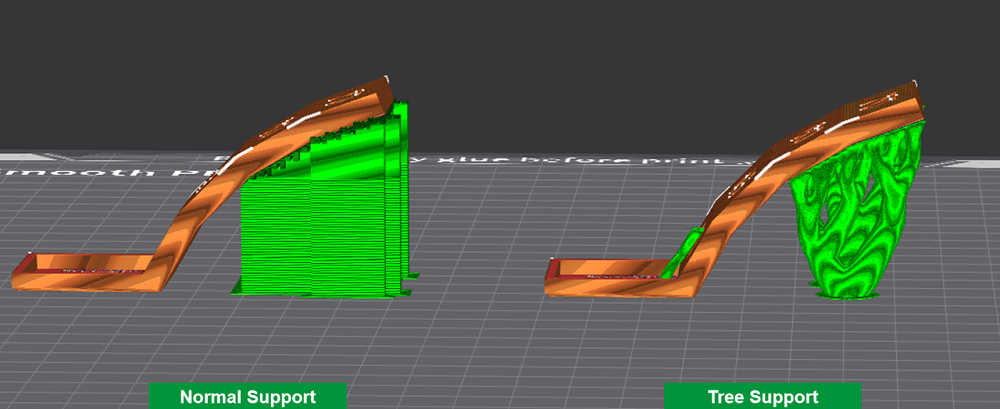
1. 3D Printing Support Structures
3D printers can't print in mid-air. Overhangs—parts of your model that extend outward without support—can lead to failed prints. To deal with overhangs:
- Break the model into smaller parts and assemble later.
- Change the print orientation to minimize unsupported areas.
- Use slicer-generated supports, which you can remove after printing.
2. Material Limitations (PLA, ABS, PETG, etc.)
Different materials behave differently during and after printing. PLA is great for beginners but struggles with heat. ABS is tougher but more sensitive to warping.
Design your model with the properties of your target material in mind. This helps avoid problems like warping, brittleness, or too much stringing.
3. Layer Orientation & Print Orientation
The direction in which you print your model affects both strength and appearance. For example, vertical prints are typically weaker along layer lines. Choose a print orientation that balances strength, detail, and printability.
4. Wall Thickness & Minimum Features
- Keep wall thickness between 1–2 mm for durability.
- Thin walls or tiny details may not print correctly depending on your nozzle size.
- Consider hollowing out large models to save material and avoid unnecessary weight.
Tolerance for moving parts
If you are making movable parts, add a clearance gap to the 3D design model. Depending on the angle of movement, you can add a gap of between 0.1mm for tight fit and 0.33mm for loose fit.
Essential Steps on How to Design for 3D Printing
Step 1: Define Your Project Idea
Start with a clear purpose:
- Is your design decorative, functional, or a prototype?
- Will it need to fit within your printer's build volume?
Sketch your concept and consider how big or small it should be. If it’s too large for your Creality Ender or K1 series printer, you may need to split it into parts or scale it down.
Step 2: Choose the Right 3D Design Software
Pick a tool that fits your skill level:
- TinkerCAD: Beginner-friendly, free, and web-based.
- Fusion 360: Great for technical users who want parametric control.
- Shapr3D: Ideal for mobile or tablet-based design work.
Step 3: Follow Design Best Practices
- To ensure the strength of the design, optimize wall thickness to a minimum of 1-2 mm.
- Avoid overhangs. All overhangs less than 45° will require support structures.
- Consider bridging limits to minimize stringing.
- Add fillets/chamfers for stress reduction.
- Ensure parts have clearance if they must move.
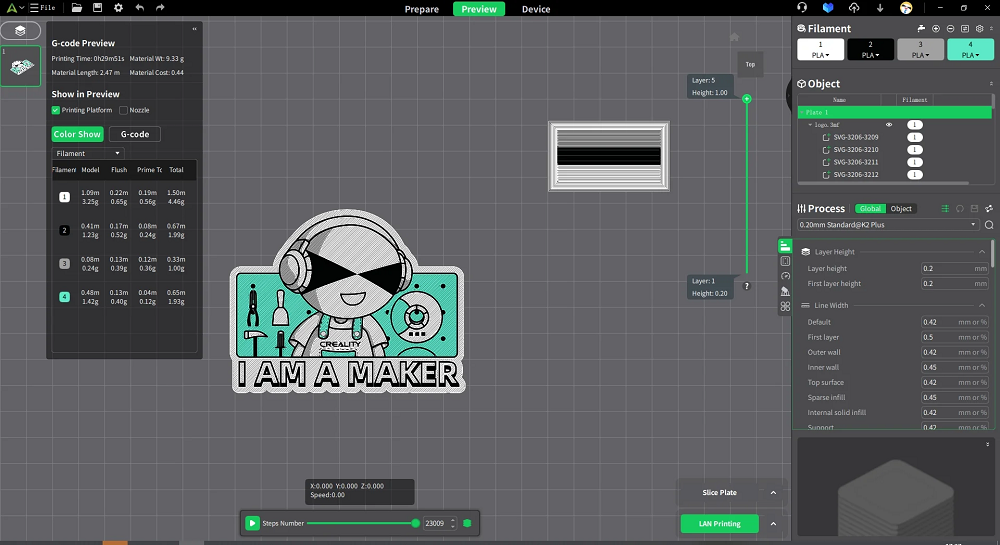
Step 4: Export and Prepare for Printing
When your design is complete, export it in a compatible format—STL or OBJ. Then import it into your slicer (like Creality Print).
Check for:
Mesh errors or non-manifold geometry.
Appropriate slicer settings for your filament type.
Previewing layer-by-layer printing paths to spot issues before printing.
Recommended Tools & Resources on How to Design for 3D Printing
Any 3D printing design process will not be complete without the following tools.
- You will need 3D design software, such as Tinkercad, Fusion 360, Shapr3D. Pick a tool and master it.
- You will need a reliable slicer for the designed object. Creality Software offers great slicing tools like Creality Print. You can always access these tools through the Creality Cloud. This makes the whole process easy and smooth.
3D printing design is an intricate process requiring creative and technical tools and decision-making. Use online libraries like Thingiverse and Printables for ideas. It is also a good idea to join a community of creators to learn and grow.
The Creality Community is perhaps the best in the industry. It has forums, tutorials, and user groups that will help improve and grow. You will learn from others how to design a model for 3d printing among other things.
Final Thoughts on 3D Printing Design
Now you know how to design a model for 3D printing. That is the theory part, start designing today to improve on practical knowledge. It is the only way to become good at it.
Mastering 3D printing design is a skill that improves with practice. Start simple, learn from each print, and keep experimenting. Creality offers not only advanced 3D printers but also powerful tools to help bring your ideas to life.