


To bring your conceptual ideas to physical objects, 3D printing is the best to achieve that. As 3D printers are getting more affordable, the 3D printing technology is no longer far-away for individuals. It is fun to make 3D printed DIY objects, or make some practical 3D printed components for your own use.
Toby Son is a YouTuber from the US. His creative “How to DIY a Bluetooth speaker from Scratch” videos have attracted nearly 300,000 subscribers to his channel King Minhvuong.
Toby's Bluetooth speakers are all designed by himself and made with wood. In his video, Toby, normally, shows how to make a stylish DIY Bluetooth speaker step by step, from preparing all the required materials to delivering the final handmade masterpiece.
Now, let's how Toby makes his awesome DIY wooden speaker even decorated with 3D printer components done on Creality CR-10 V2 3d printer.
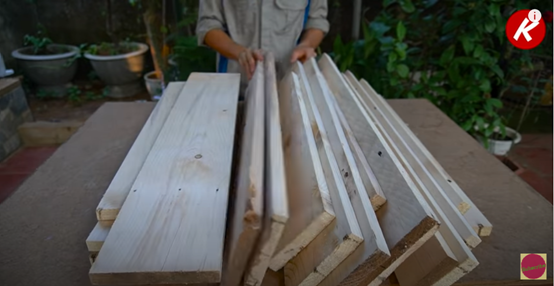
1. Preparing sufficient wood: Toby fetched these wooden plates from other wasted furniture. Before all the wood is put into use, Toby has to do a lot of cleaning up and processing work to make the wood neat enough.
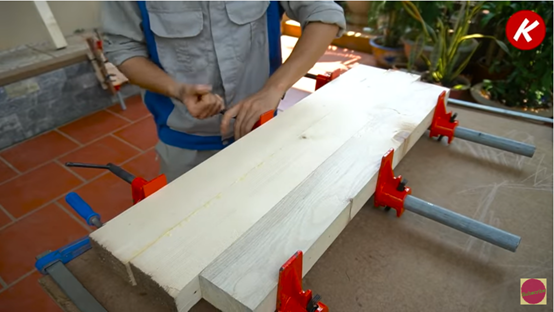
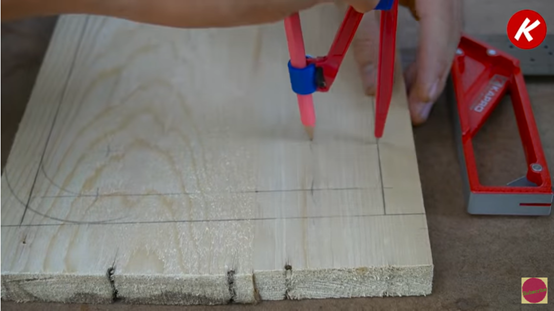
2. Splice the wooden plates and modify them into suitable sizes
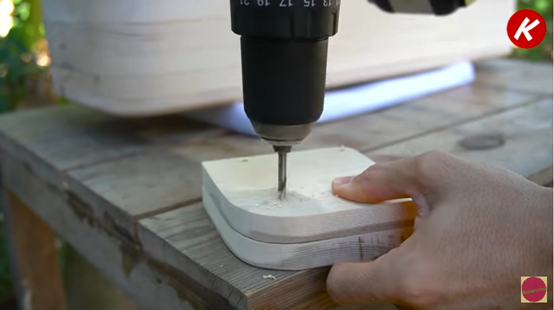
3. Make designs on the wooden plates, and then assemble them into a box shape for the exterior of the speaker.
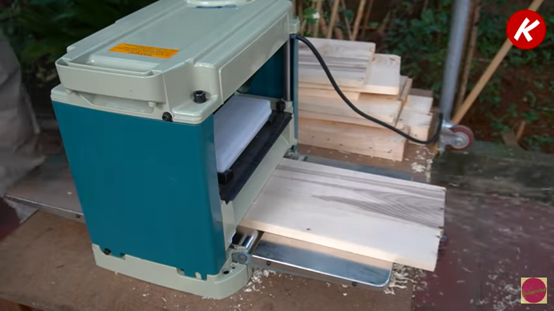
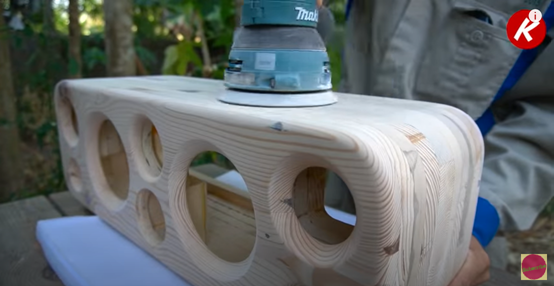
4. Polish and sand the exterior of the speaker.
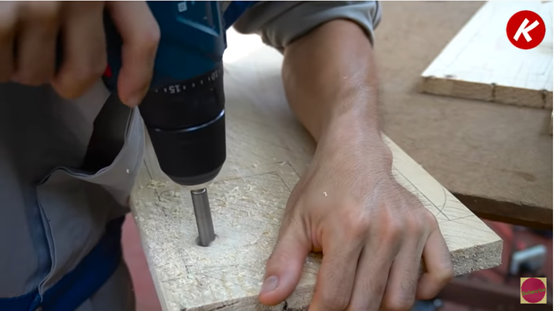
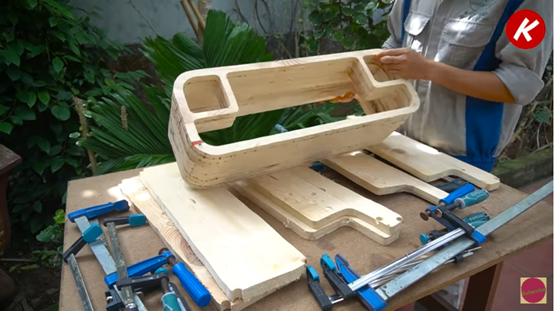
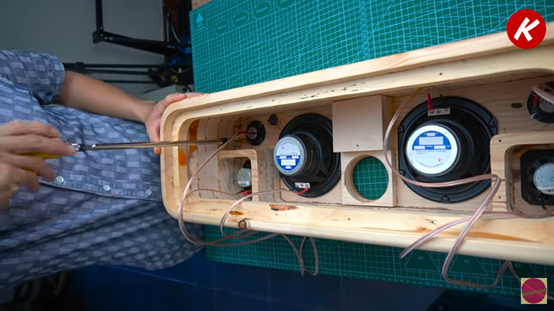
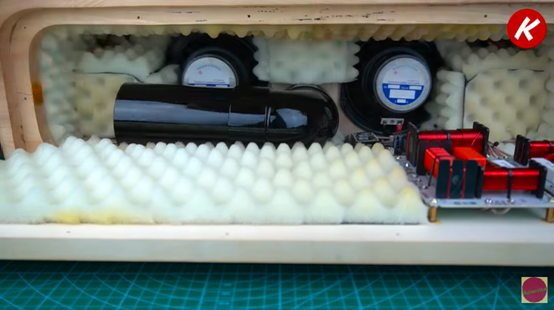
5. Make component parts for the interior of the speaker.
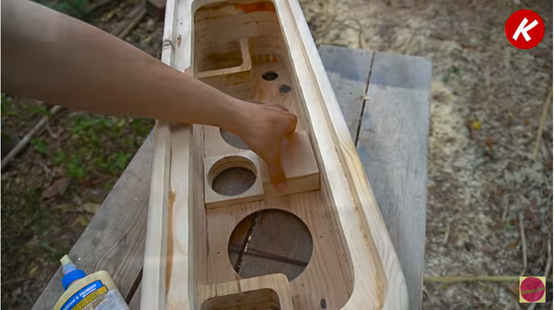
6. Time for adding core functional parts, gradually making it to be a functional speaker!
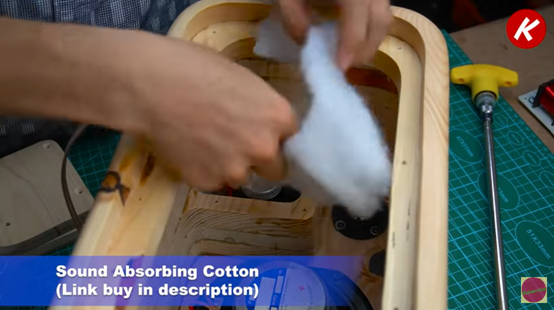
Don't forget to improve the sound effect by adding sound-absorbing cotton.
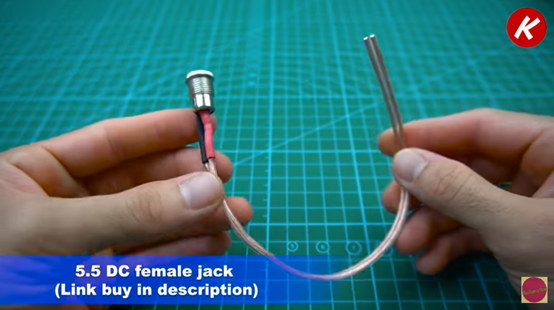
7. Add accessories for the speaker: Plasma disk, 3 Pin On/Off Switch, 5.5 DC female jack, female insulated electrical crimp terminal, Makita terminal.
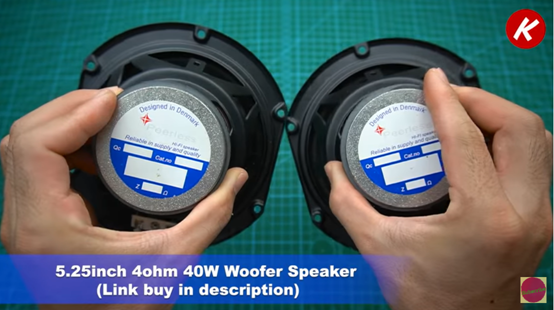
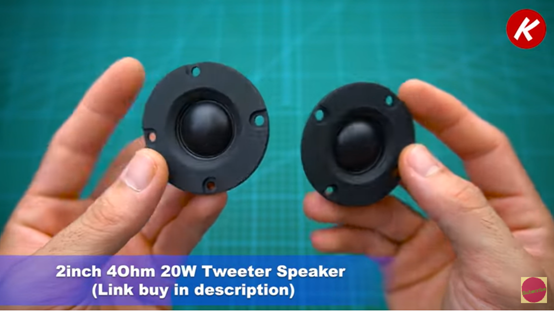
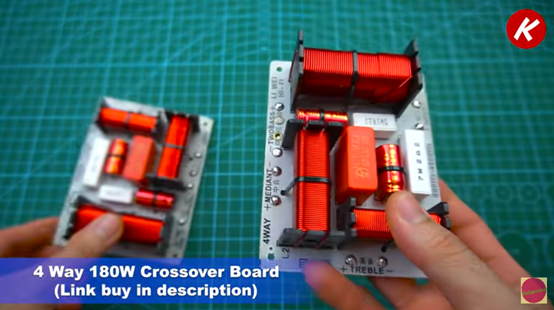
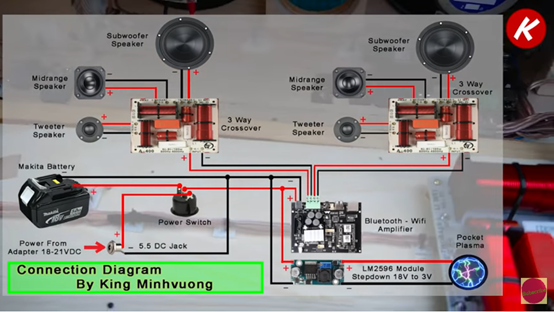
8. Add core electronic hardware parts for the speaker: 4-Way 180W crossover board, Wi-Fi Bluetooth 5.0 board up2stream AMP V2.
9. Cable management and cable wiring.
10. Build up noise reduction and cooling system
11. Cover it up and other modifications and add-ons for its exterior such as a leather handle, and footers
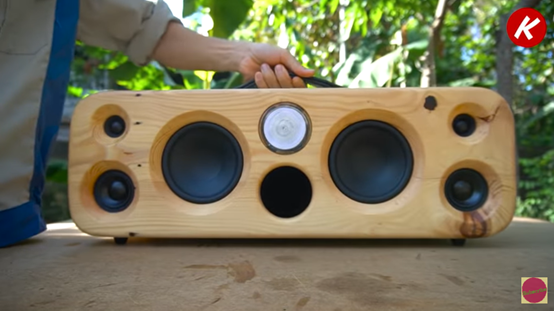
12. Power it on and time for enjoying music with the delicately designed and carefully made Bluetooth speaker.
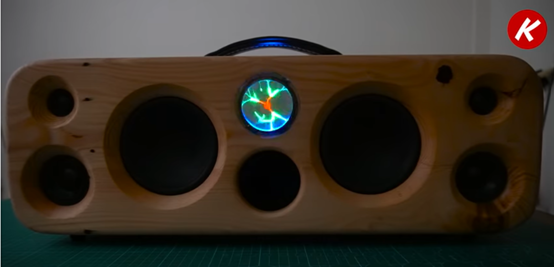
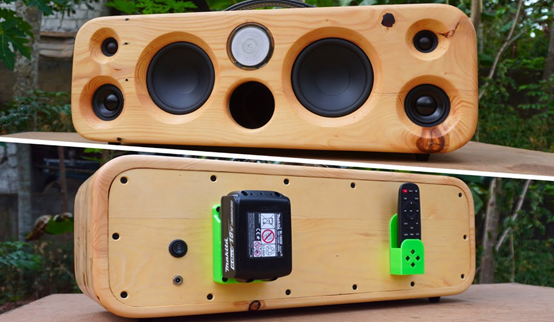
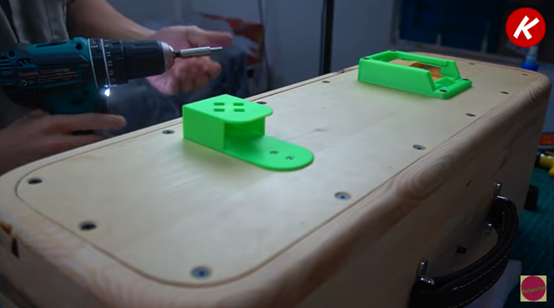
After going through the detail steps on Toby's tutorial video, can you guess which part of the speaker is 3D printed with Creality CR-10 V2?
Exactly, it should be the two green holders on the back of the speaker.
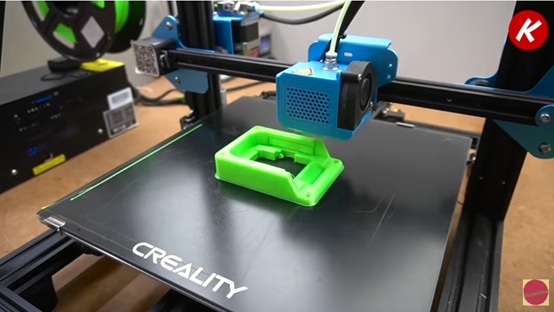
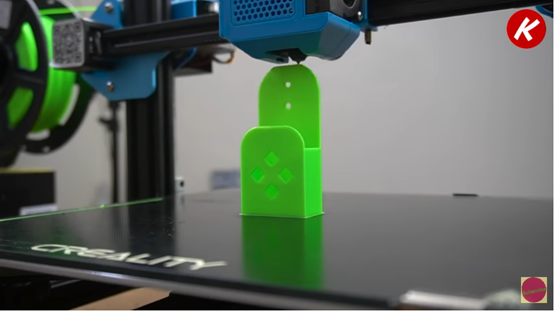
One is for fixing the matika terminal and the other is for holding the remote controller.
Toby said “CR-10 V2 is really a reliable 3D printer. It works very well and is very accurate. It's best compared to all the printers I've tried, I will definitely use it for my next projects.”
From the above, we can come to the conclusion that the best advantage of 3D printing is to make your DIY projects much more customizable. A 3D printer makes it possible to DIY component parts based on the specific requirements and needs of the maker.
As technology is getting in evolution, 3D printers can do a great job just like what makers expect. Currently, 3D printers on the market can normally achieve 0.01mm precision on the final 3D printed objects.
Taking Creality CR-10 V2 3d printer as an example, it delivers ±0.01mm precision on PLA/ABS/PETG/TPU filaments. CR-10 V2 3d printer is an upgraded version of the classic desktop 3D printer, CR-10 V2.
With both the appearance and the hardware revamped, Creality CR-10 V2 3d printer provides much more reliable 3D printing performance than ever before.
Creality CR-10 V2 3d printer is having a silent motherboard with a TMC 2208 ultra-mute drive operates the printer to a level of under 50 dB. Users will be hassle-free to work and rest in the printing room. Another small but useful feature is the new all-metal extruding unit, which is wear-resisting and allows for a stable feeding of filament. By adding a diagonal member to make the shape as a rigid triangle, the Z-axis will have less vibration and gives users a solid stable work platform.
Most FDM 3D printers are equipped with a Bowden extruder, furthermore, Creality CR-10 V2 3d printer offers a second choice: a Titan Aero direct extruding unit. In this way, soft materials such as ABS/TPU will be better printed. The lightweight and powerful Titan extruder, with its short distance to the nozzle, can push filament faster for reliable printing.
In addition, the Creality CR-10 V2 3d printer provides an optional BL-Touch auto leveling sensor. It makes 3D printing more fun and precise for enthusiastic 3D printing fans. With BL-TOUCH, users can always adjust the parameters accurately to get the best printing results.
Creality unveiled CR-10 V2 3d printer on 27, September. Compared to the old version, this upgraded version enables more reliable printing by extending material choice, and meanwhile, provides upgradable space for 3D printing hobbyists to DIY themselves.